In Season: Falling in Love with Fall

Fall is a contradictory season in the Pacific Northwest. We mourn the loss of long evenings on the patio with friends, but welcome the cooling temperatures at night—what my family calls "good sleeping weather." The breezy clothes and sandals get stashed back in the closet, but that means it's time to dig out our favorite sweaters and jeans from the storage bins under the bed.

Bean stew with chimichurri.

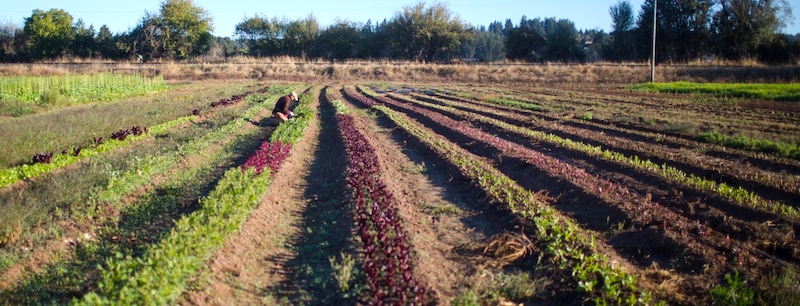
We'll miss grilling steaks and big pans of paella over the fire, but the braising pot is singing its siren song of long-simmered pot roasts and spare ribs. Pea shoots and summer squash give way to corn and seafood chowders and hearty bean stews. And I can't forget the panoply of chicories that local farms are growing, from dark red radicchio and treviso to castelfranco with its paler-than-pale yellow leaves slashed with splashes of pink.

Josh Alsberg of Rubinette Produce put it bluntly. "Anything summer is over," he said without a trace of wistfulness. That's because it's high season for fruit from his favorite Northwest growers, from grapes to figs to pears, adding "we're headlong into apples."

Josh Alsberg, Rubinette Produce.

Word of his produce passion is apparently getting around, since he has been recognized by the International Fresh Produce Association for his work with local schools, choosing six out-of-the-ordinary varieties for a blind taste test with students. He demonstrated how to score the apples based on attributes like taste, crunch, density, and other factors. Then teachers turned the activity into math and health teaching opportunities.

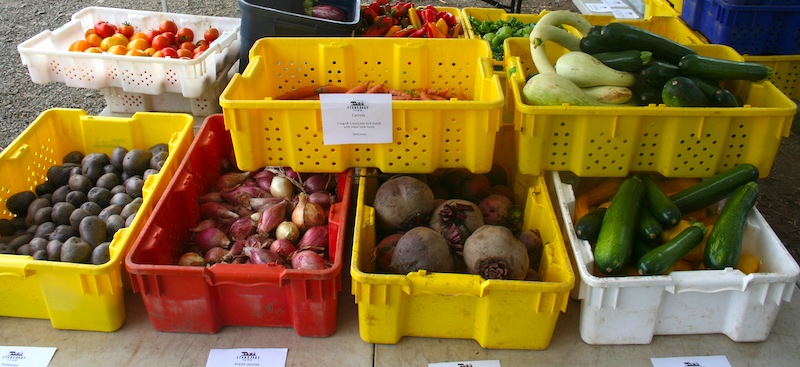
As far as what you'll be finding at our local farmers' markets in addition to the apples, pears and figs mentioned above, Alsberg said it's time for winter squash to start rolling in. If you're looking for inspiration that'll take you beyond butternut's stranglehold, check for some terrific recipes from the Culinary Breeding Network's Eat Winter Vegetables team. When buying winter squash, Alsberg cautions to be on the lookout for soft spots and try to buy squash with the stem intact, since the absence of a stem is an invitation for mold to set in around the ring.

Local cranberries? Grab 'em!

It may seem early but if you find local cranberries, buy them now rather than waiting. They freeze well and will be a their best for your holiday feasting. Why is it such a challenging year? Consolidation in the industry—hello Ocean Spray and giant Wisconsin producers—has driven prices down to the point where Oregon's once-thriving cranberry farms can't compete, and many are giving up their bogs entirely and getting out of the business.

The smell of peppers roasting will be wafting through the aisles at farmers' markets, with peppers ripening a bit later than usual this year due to our cool early summer temperatures. Alsberg is particularly excited about the new "Habanada" variety, described as the first truly heatless habanero, hence the haba-nada, get it? He added that it's a good year for the beloved Jimmy Nardello peppers, which seem to be sweeter this year.

Castelfranco chicory.

You'll find an early onset of chicories, which local farmers are adapting to debut in the fall rather than their usual appearance later in winter. Lettuces will still be available at least until the first frost, with watercress, spigarello and puntarelle on the way.

The roots are coming on strong as well, with hakurei salad turnips, radishes, rutabaga, sunchokes, carrots and zingy local celery that Alsberg refers to as "the adult version of celery." It's expected to be banner year for foraged mushrooms, with prices on the intoxicating golden chanterelles already getting into affordable territory, along with local porcini, matsutake and even truffles if we get an early freeze. Another caution: Alsberg advises buying foraged mushrooms from a reputable dealer since some porcinis have been found to be wormy—ask the vendor to cut into them if you have doubts.

Tropea onions.

It is, of course, brassica season, time for brussels sprouts, romanesco, cauliflower in a rainbow of colors, its cousin fioretto, a sprouting cauliflower, and sprouting broccoli. Alsberg says local garlic in many new varieties is being grown and is worth taste testing to find your favorite, and you can now find locally grown ginger appearing on vendors' tables, a treasure for lovers of ethnic cooking.

Alliums abound for onion-lovers, with the mild, elongated tropea onion the fresh face in town that's turning heads on restaurant menus and foodie tables alike. Potatoes and different varieties of fingerlings are de rigeur this time of the year, as are leeks, fennel and "anything bulby" according to Alsberg, who's fond of a new-ish variety of beet called Badger Flame, a gorgeous flame-red, cylindrical beauty with concentric rings (similar to Chioggia beets) whose colors deepen as the season progresses.

All in all, a good season to get thee to your local farmers' market!

Photo of tropea onions from Johnny's Seeds.

Garden Tips: Make Your Own Dirt!

Now that our fall rains have started, it's time to get out in the yard and do some cleanup and planting. While the late local garden maven Dulcy Mahar didn't recommend spreading compost until after Thanksgiving, I thought it might be good to rerun this post from 2009 (!) for planning purposes.

It was one of those invitations you just don't get very often. Like meeting the queen of England (or, more to my liking, her Corgis).

David Kobos.

So when David Kobos (left)*, whom I was interviewing about the history of coffee roasting in Portland for an upcoming MIX magazine article on local micro-roasters, mentioned that he has an annual gathering to make dirt and would I be interested, I jumped at the chance. I mean, how often do you get to find out that kind of thing? Plus the invitation included not only a tour of his organic farm but a big breakfast and some ass-kicking coffee to wash it all down with.

Last Sunday found me tooling out to the wilds of Clackamas County in, appropriately enough, Dave's old Toyota truck. I pulled up to the Kobos homestead, a gorgeous 1915 farmhouse that he and his wife, Susan, have spent the last few decades restoring. Out beyond it were his geese, a sheep and about 80 chickens, plus a huge organic garden with the most beautiful soil I've seen in a long time.

Hauling the compost to the garden.

After a couple of mugs of strong coffee (a Kenyan estate roast, Kobos pointed out) to fortify us for the dirt-making, Kobos, his son, Adam, and I headed out to the little barn, which was the original home on the property. David had set out all the supplies, so we spent the next hour or so filling buckets, sieving the peat moss and compost to remove debris (top photo) and mixing it in his ancient wheelbarrow (right). By the end we had eight or so 50-lb. bags of gorgeous seed-starting mix, which Kobos said was also good for potting plants.

And that breakfast? I barely stopped eating long enough to notice what I was putting in my mouth, but I remember a lovely egg strata, light, sweet scones made by his daughter-in-law, Betty, and some authentic (and unbelievably delicious) Polish kielbasa that her parents had brought in their luggage from Queens. And of course, more of that wonderful coffee.

If you'd like to make your own dirt, Mr. Kobos has supplied the recipe.

Seed Starting Mix

From David Kobos of Kobos Coffee Company

Use a 2-gallon bucket for measuring:

3 buckets peat moss
3 buckets steer manure
1/2 c. dolomite lime
1 bucket perlite
1 bucket vermiculite
2 c. organic fertilizer

If not using sifted peat moss and steer manure, dump buckets onto 1/2" framed screen (photo, top) and sift by hand to remove debris. Add remaining ingredients and mix thoroughly using a shovel or garden hoe. Using bucket, dump into 50 lb. seed bags. Makes 2 1/2 cubic feet.

NOTE: If you can't find Vermiculite, use double Perlite. The recipe above makes 2 1/2 cubic feet.


Organic Fertilizer Mixes

From David Kobos

These mixes are by volume, not weight.

Mix #1:
4 parts seed meal (cottonseed, soybean, linseed, etc.)
1 part dolomite lime
1 part ground phosphate rock (or 1/2 part bone meal)
1 part kelp meal

Mix #2:
1 part ground phosphate rock
1 part blood meal
1 part greensand

* David Kobos passed away in 2019. Read his obituary.

Farm Bulletin, Upstate New York Edition

In the time since Anthony and Carol Boutard sold their Ayers Creek Farm in Gaston nearly a year-and-a-half ago, I'm often asked about how they're doing at their new home in the small village of Penn Yan in the Finger Lakes region of upstate New York.

I received a note from Carol yesterday that said, "I wanted you to see the borlotto I harvested a few days ago. I'm so glad our bean days aren't behind us!" The photo on the left was attached.

Touting their estimable contribution to our tables over 24 years of farming, breeding crops and sharing their expertise with the wider food community, a recent article at Oregon Public Broadcasting about Oregon's Legume Legacy noted, "the local bean boom was…invigorated by growers like Anthony Boutard, whose Ayers Creek Farm produced the gold standard of comestibles, appreciated mainly by the Northwest’s top chefs and die-hard home cooks."

Their legions of local fans would not disagree.

Read Anthony's original series of Farm Bulletins here and here.

In Season: Eggplant is More Than Just Eggplant Parmesan

In the most recent Beaverton Farmers Market newsletter, Market Master Ginger Rapport waxed eloquent about the eggplants grown by one of the market vendors and included some recipes I definitely want to make.

Farmer Eric Hvidsten of Black Dirt Farm was not always in love with eggplant and explained how his opinion changed since he started growing them: 

Eric Hvidsten, Black Dirt Farm.

“Over the past few years, I've come to really enjoy growing eggplant," Hvidsten said. "They are absolutely gorgeous, and it's been fun exploring and experimenting with different varieties.  'Annina' is the variety that first got me hooked. Its flavor is similar to the typical Italian eggplant, but it has beautiful purple and white speckled skin that looks like marble. It looks unreal. I'm growing a long slender Japanese variety for the first time this year. It might be my favorite to cook with. Its tender skin and smaller diameter make it easy to slice into long strips or small coins. A lot of customers have recommended round Thai eggplant this year. I'm looking forward to trying these out next season.

Eggplant bites (recipe below).

"Growing up, I was not a fan of eggplant.  Eggplant Parmesan was the main eggplant dish in our house. I found it mushy and sometimes bitter. As I've experimented with new dishes I've come to really enjoy them. (See recipes linked at bottom.)

"I think its flavor really shines when paired with Greek or Middle Eastern spices like za'atar. I've also found slicing it thin and frying it briefly before adding it to the rest of the dish keeps the eggplant from getting mushy. This discovery was a game-changer for me."

"Annina" got Hvidsten hooked on growing eggplants.

As for what it's like as to grow them, Hvidsten said, "Eggplant has grown well on my farm, but it can be a challenge. They are relatively heavy feeders—home gardeners will want to amend the soil well before planting. The big challenge growing eggplant in the PNW is that they like heat. I always grow eggplant in my hoop house. For home gardeners I recommend planting eggplant in the warmest spot available.”

About how he started Black Dirt Farm, Eric said, “I started Black Dirt Farm six years ago with the goal of growing good food for my neighbors in a way that would benefit my local community, economy, and environment.  I strive to work with nature to improve the soil, control pests and diseases, and grow healthy plants.  Despite the challenges, it has been a joy to grow the farm and build relationships with my customers and other growers in the area.  Growing with the seasons, and working with nature gives me a wonderful sense of connection to the world around me.  I am so thankful for all my customers who support the farm and help me live this dream.“

Simple Eggplant Bites

4 Tbsp. vegetable oil
2 medium-sized eggplants
4 Tbsp. flour
2 cloves garlic
Dill sprigs, chopped finely, plus more for garnish
2 Tbsp. plain Greek yogurt or mayo

Cut eggplants into ½ inch slices. Pat dry and dip into flour. 

Oil has to be very hot before frying the eggplants. Fry both sides for about 2 minutes each. In the meantime, crush garlic, mix with yogurt or mayo, and add dill. Once the eggplant is golden-brown, set on a paper towel to drain excess oil, sprinkle it with sea salt, and drizzle sauce on top. This makes a perfect quick appetizer!


Check out Ginger's recommended recipes for making Roasted Eggplant Salad, Eggplant Rolls, and Baba Ganoush. And here's my recipe for an out-of-this-world Eggplant Parmesan.

The Beaverton Farmers Market is a stalwart supporter of Good Stuff NW. Photo of "Annina" eggplants from High Mowing Seeds.

Height of Summer Nectarine Galette (And a New Family Member)

There's a new member of the family I've been meaning to introduce, and now seems like the perfect time. And no, we didn't add another Cardigan to our two-dog herd, much to Kitty and Silas's relief.

A happy man.

A few months ago Dave mentioned that a gas and wood-burning pizza oven he'd been eyeing was on sale. Not cheap, but on sale. Now you have to know that he's been talking about wood ovens and reading books on them for years—at least a decade or more—from building a cob oven to constructing a brick oven to buying one of the newer portable pizza ovens made by companies like Ooni and Roccbox.

Several friends we know have invested in them, with varying degrees of satisfaction. Most are okay for pizzas, but what Dave wanted was an oven he could use for baking, in particular one that would be big enough to fit the cast iron lidded cooking pots he uses for baking his sourdough bread.

Success? I'd say so!

The idea was to make it feasible to bake bread in the summer, since running the oven at 500 degrees for several hours had a tendency to heat up the house to Mojave Desert levels. Plus I wanted to be able to use the oven's residual heat for roasting squash or braising meats once the bread was baked.

Oh, and it had to be one that wouldn't break our fairly limited budget. Good luck, right?

It turned out that Ooni had just come out with its Ooni Karu 16" Multi-Fuel oven that ticked all those boxes. And while it would cost several hundred dollars, the price was less that what we had estimated for the fire bricks to build our own. So I convinced him to put in an order, and it arrived a couple of weeks later.

The galette of my dreams.

Since then he's been baking bread, of course, but also making galettes, cinnamon rolls, biscuits and, yes, pizza, too. I've been roasting squash, making platters of roasted vegetables from our CSA, and roasting meat for stock—the Ooni's ceramic floor fits a full-sized sheet pan. It holds the heat quite well and it's easy to stoke the fire if the temperature starts dropping.

All in all, we're looking forward to more adventures with our new family member, like the nectarine galette below that Dave made last week. I've included the instructions for baking it in the oven, but using the wood-fired option in the Ooni is almost as simple.

Nectarine Galette

For the pastry:
1 1/2 c. all-purpose flour
1 1/2 tsp. sugar
1/4 tsp. salt
1 stick plus 2 tablespoons cold unsalted butter, cut into small pieces
1/3 c. ice water

For the filling:
1 1/2 lbs. nectarines (Dave used 5 medium-sized nectarines)
2 Tbsp. flour
1/4 c. sugar
Pinch of salt

Preheat the oven to 400°.

In a food processor, combine the flour with the sugar, salt and butter and process for about 5 seconds. Sprinkle the ice water over the flour mixture and process until the pastry just begins to come together, about 10 seconds; you should still be able to see small pieces of butter in it. Transfer the pastry to a work surface, gather it together and pat into a disk. Wrap the pastry in plastic or wax paper and refrigerate until chilled, about one hour. (You can also roll out the pastry and use it right away or make it ahead and refrigerate overnight.)

Cut nectarines in half and remove pits. Cut each half into thirds. Set aside.

On a lightly floured work surface, roll out the pastry to a 12-13"" square and transfer to a large parchment-lined baking sheet.

In a medium-sized bowl mix together flour, sugar and salt. Add nectarines and toss to coat. Arrange coated nectarine slices skin side down and close together onto the rolled-out crust, leaving about 1 1/2" border around the edges. Carefully fold and pinch the edges up around the nectarines.

Bake the galette for about 35-45 minutes, until the pastry is nicely browned and crisp and the nectarines are tender. Transfer to a rack and let the galette cool. Serve warm or at room temperature, with ice cream if you like.

Megadairy Update: Easterday Pulls Plug on Disastrous 30,000-Cow Dairy Project

The years-long fiasco began in 2019 when the Easterday family, potato and onion growers and owners of huge swaths of agricultural land in Eastern Washington, bought the notorious Lost Valley Farm megadairy after it closed due to criminal charges against its owner and hundreds of violations of its permits to operate. Originally permitted to milk 30,000 cows, it was considered a state-of-the-art facility, but due to the erratic actions of Lost Valley owner Greg te Velde, it never came close to housing that number of cows.

Cody Easterday and his wife, Debby, leaving his sentencing hearing.

In a 2019 post, I asked, "Who would be crazy enough to buy a facility that will require millions of dollars to clean up and more millions to install a new irrigation system…with some 47 million gallons of liquid manure still remaining onsite—which one source estimated would fill 71 Olympic swimming pools?"

In the four years since the purchase, the renamed Easterday Dairy—which was never allowed to bring cows onsite until it showed significant progress at cleaning up the massive mess left by Lost Valley—only got into more trouble, a partial list of which includes:

  • A massive fraud operation dubbed "Cattlegate" perpetrated by Cody Easterday, scion of the Easterday family enterprises, in which he claimed to be feeding 200,000 cattle owned by Tyson Fresh Meats but in fact the cattle existed only on paper and were created to cover up Easterday's losses on the commodities market.
  • The death of Cody's father, wealthy cattleman Gale Easterday, who died shortly after the fraud was revealed when he drove his car the wrong way on the freeway near the ranch and ran head-on into an 18-wheeler hauling Easterday potatoes.
  • In 2021 many of the Easterday businesses declared bankruptcy and most of the family’s massive farm and ranch empire were auctioned off. 
  • In October of 2022 Cody was sentenced to 11 years in a federal penitentiary in California for the fraud against Tyson.
  • In April of this year the Oregon Department of Agriculture handed down a notice of noncompliance to Cody's son Cole, who was put in charge of the dairy after his father's scam came to light, detailing more than 60 violations ranging from fertilizer spills to irrigation runoff to misapplications of manure on the dairy's property.
  • Oregon Public Broadcasting reported in August of this year that Cody Easterday and his wife owe the Internal Revenue Service more than $12.5 million in personal taxes, which has issued a lien against their assets.

In a recent article in the Tri-City Herald, in deciding to give up the application to re-open the dairy, lawyers for the family told a court in early 2023 that they had reached an agreement with the former landowner, Canyon Farms II and Fall Line Capital, in a $14 million lawsuit over how the land was being managed, but that in mid-August it appeared that Easterday Dairy and Canyon Farms had come to an agreement to sell the property back to the California-based company.

What happens next to the property is an open question. Food & Water Watch Oregon, which has been advocating for a moratorium on new or expanded factory farms until Oregon gets its regulatory house in order, issued a press release that said "the [Easterday Dairy] site is located in an area already plagued with widespread nitrate contamination that has contaminated private drinking water wells for nearby communities. This contamination led Food & Water Watch and allies to petition the U.S. Environmental Protection Agency to take emergency action to address the drinking water crisis in 2020, and that petition is still pending."

Regardless of what happens to the property, the contamination of the land and aquifer under the site, already designated a federal Groundwater Management Area, will need to be cleaned up before it's developed, a daunting task that would potentially cost hundreds of millions of dollars.

An additional responsibility is Oregon's just-passed SB 85 that requires a multi-step process for water quality permitting, including a water supply plan, for new factory farms and temporarily closes an exemption allowing use of drinking water for livestock without a permit or water right. It also increases agency oversight of spreading factory farm waste on land where the groundwater is already contaminated with nitrates and gives authority to, but doesn’t require, local governments to require setbacks when siting factory farms.

We'll have see if the owners, and the bureaucrats tasked with holding the developers' feet to the fire, are up to the job.

Photos: Leaking tanks, including sewage and chemicals, when Easterday Dairy purchased the Lost Valley Farm property (top); Cody and his wife by Megan Farmer for KUOW.

Herb It Up: Bulgur Tabouli Makes the Most of Summer's Fresh Herbs

This tabouli recipe, from this week's Beaverton Farmers Market newsletter, is intriguing because it calls for literally bunches of several herbs—always irresistable in my book—and also because the grain is not presoaked or cooked but simply absorbs the liquid from fresh lemon juice and oil. Try it yourself!

We are at the peak of summer which means our farms and gardens are in high gear providing us with an abundance of all the foods we love to eat. For those of us who planted herbs in the spring, this is the time of year when we need to be looking for ways to use the armfuls of fragrant leaves our plants are producing. One of our favorite ways to showcase our herbal bounty comes from none other than our own Bruce Lindner from Pony Espresso.

An accomplished cook and cookbook author, Bruce’s riff on tabouli salad is exciting because it is packed with flavor from all of the herbs he uses. Give it a try and we promise you will never make a different tabouli recipe again.

Bruce Lindner's Tabouli Recipe 

Yet another recipe that I’ve taken credit for by cobbling together several others. This one is a combination of the classic Lebanese version, an Israeli version and an Iranian version, with a few extra tweaks of my own thrown in—so now I claim it as mine! This is one of those recipes that you have to sort of eyeball the measurements, but in time it’s like riding a bike.

3 c. bulgur wheat (dry; do not presoak)
1 large bunch Italian flat-leaf parsley
1 large bunch cilantro (if you don’t like cilantro, you can leave it out and add additional parsley)
1 large bunch fresh mint
10-12 scallions
1/2 c. chopped fresh dill
1 small bunch fresh tarragon
2 tsp. cumin seeds, toasted and finely ground
10 lemons
1-2 c. olive oil
2-3 Tbsp. coarse salt
Pepper to taste
1 head Romaine lettuce

Wash and dry all the herbs and the scallions, then chop them finely with a food processor, being careful not to liquify them. Scrape into a large bowl. Take two of the lemons and zest them, then add the zest to the herb mixture. Toast the cumin seeds until fragrant, and allow to cool. Then pulverize in a spice grinder or mortar and pestle and add to the bowl of chopped herbs.

Juice 8 of the lemons and add to the bowl, being careful strain out any seeds.

Bruce Lindner of Pony Espresso.

Notice the level in the bowl where the mixture is, then slowly dribble in the olive oil until the volume has almost doubled (this may seem like a lot, but it isn’t; the dry grains will absorb most of it). Stir it all in, and then again take note of where the level of the mixture is within the bowl—you’re now going to add the dry grains of bulgur to double that.

(NOTE: Virtually every recipe for tabouli I’ve ever seen requires that you first soak the bulgur in water before using it. Don't do that! This recipe is unique because the lemon juice and olive oil soaks into the dry grains, and isn’t displaced by water in previously soaked grains. Besides, when you soak it first, it usually turns pasty after the first day—I like to live off my tabouli leftovers for a few days.)

At this point, stir the mixture together and taste for seasoning. It’s going to need a lot of salt, so stir it in now. I use around two or three tablespoons for a batch this size, but you can adjust it to your liking. Add pepper too.

Remember, as the grains absorb the liquids, they also absorb the saltiness. You might need more later. If the tabouli seems too dry, stir in the juice of another lemon or two, and add another splash of olive oil.

Put the tabouli into a covered container and refrigerate for at least two hours while the grains absorb the liquid. Once you’re ready to serve, taste again for seasoning, and adjust with more lemon juice and olive oil if necessary.

Spoon a serving into a Romaine lettuce leaf for each guest. For a little added color, sprinkle on a little paprika or sumac.

Warning: This recipe serves a small army!


NOTE: [From Kathleen] I made this recently and the flavor was stunning, though with the bulgur from the bulk aisle at the supermarket it was definitely a make-it-the-day-before type of grain salad—the bulgur was much too chewy after two hours and needed an extra few hours to absorb the olive oil and lemon juice. I ended up adding about 3/4 cup of water about an hour before serving for dinner the next day because it seemed like the grain needed some additional softening and the amounts of olive oil and lemon were already sufficient. And it really does make a lot—I'd say around two quarts, so halve it if you're not serving a crowd!

The Beaverton Farmers Market is a generous sponsor of Good Stuff NW. E-mail through the newsletter link (on the upper right of this page) if you'd like to join them in bringing more information about our food system to our community.

Following Summer's Lead: Fried Squash Blossoms a Fleeting Pleasure

My neighbors Bill and Jen, as I may have mentioned before, have an amazing garden where, on a typical Portland city lot, they grow enough herbs, vegetables and even fruit to pretty much last them through the winter. They also ferment a fair amount of the onions, beets and cukes in their raised beds, as well as canning and smoking albacore and salmon.

Stuff and twist tops to close.

Needless to say, I'm gratified when they ask me to babysit their garden in the summer when they're out of town, harvesting whatever looks good—which is, needless to say, just about everything.

This last week they were visiting friends in Alaska who are fishing for salmon this time of year, so I was told to help myself to the beans, zukes, tomatoes and anything else that was ripening. The costata romanesco, a ribbed zucchini, my favorite type, and another variety, the rampicante, also delicious, were putting out flowers with abandon, so I snipped a dozen of the male flowers—not the ones that eventually grow a squash but are simply a flower on a stem—and brought them home.

I had a few padron peppers that had come with my CSA share from Cully Neighborhood Farm, so stuffed squash blossoms with blistered peppers sounded like a perfect snack for a leisurely happy hour on the patio. No recipe was required, just zhuzhing some cream cheese for stuffing into the blossoms, rolling them in flour and egg, then frying in hot oil. You could make a schmear with smoked fish, too, or combine herbs, chopped hot peppers and a melty cheese—think jalapeño poppers—or any other combination that appeals at the moment.

Inspiration is what this time of year is all about, so my advice is to get creative and make the most of the season. Time's a-wastin'!

Stuffed Squash Blossoms

10-12 squash blossoms
2 oz. cream cheese
1 green onion, green parts only, finely chopped
1 clove garlic, pressed (or mashed and finely chopped)
1-2 Tbsp. parmesan, finely grated
Salt
1/2 c. flour
2 eggs, whisked well
1/4 c. canola oil

In a small mixing bowl, combine the cream cheese, green onion, garlic and parmesan. Salt to taste. (As noted above, you can make the stuffing with whatever soft filling suits your fancy.)

Put the flour on a plate or flat-bottomed pan (like a cake pan or wide pasta bowl). Whisk the eggs in another cake pan or wide pasta bowl.

To prepare squash blossoms, take a paring knife and make a slit from the base to the top of one side of the blossom. Open the blossom carefully in order to remove the hard yellow anther—it is edible, so this is not strictly necessary, but I'm not fond of its texture. Then, depending on the size of the blossom, use anywhere from a teaspoon to a tablespoon to fill the base of the blossom. (It will take less than you think, and a little goes a long way.)

Fill all the blossoms, twisting the flower tops to help close the blossom, then heat the oil in a large frying pan until almost smoking (300° is the target temperature). While the oil heats, take four blossoms and roll them one at a time in the flour to coat, then roll each in the egg, then roll in the flour again. Make sure the slit in the blossom is closed so the filling won't leak out—this is why you don't want to overfill with stuffing—and place the blossoms in the hot oil. Fry until golden on one side, flip over with tongs and fry the other side. Repeat with remaining blossoms.

Shower lightly with salt and serve.

Bane of Summer's Bounty: Fruit Flies!


Personals: ♀ FF, Se/E/Dp, seeks ♂ FF, / / for short term relationship.
Enjoys romance, fermentation and long walks on the peach.*


It's the annual curse of having all that gorgeous fruit and that fresh-from-the-garden (or farmers' market) produce, not to mention that all-too-tempting bucket of compost: fruit flies. It doesn't matter that a fruit fly has just as many genes as we do and that we share nearly 60% of the same genes, not to mention a susceptibility to diseases like cancer. 

Ripe targets.

I still don't want them buzzing around my kitchen.

The cure for this seasonal fruit fly infestation is a simple one. Rather than flinging my hands around trying to swat them out of the air, I simply pour a little cider vinegar, about a quarter-inch or so, into a bowl, then tightly cover the bowl with plastic wrap and punch a few holes in it with something sharp, like a pen. 

Just today, within an hour, I had more than two dozen of the %&#@!s drowning in that cider, and I couldn't be more pleased. Take that, little cousins!

* From "The Wonderful Fruit Fly."

Salad Smackdown: Barley Tabbouleh

Grain salads are my go-to in summer when the garden lettuce has bolted in the heat but cucumbers, beans and summer squash are still going strong. They pair perfectly with grilled foods and a platter of sliced tomatoes for rave-worthy backyard entertaining, and also make a quick solution for a weeknight dinner.

In the past I've experimented with salad made with farro and frikeh (or parched green wheat), but this summer I decided to try a whole grain, organic unhulled barley from Camas Country Mill—I buy mine through the PDX Whole Grain Bakers Guild—rather than pearled or hulled barley. While it has to be soaked overnight before cooking, it definitely adds texture and a slightly nuttier taste to the finished salad.

Barley Tabbouleh with Lemony Mustard Vinaigrette

For the vinaigrette:
1/2 c. olive oil
6 Tbsp. lemon juice
1 Tbsp. Dijon mustard
1 clove garlic, crushed
1/2 tsp. dried oregano
Salt and pepper to taste

For the salad:
2-3 c. cooked barley, either hulled or whole grain
1 c. coarsely chopped fresh mint leaves
1 c. coarsely chopped fresh Italian parsley
1/2 c. finely sliced spring onions, red onion, or sweet onion
1 medium cucumber, diced (or 2 Persian cukes)
Salt to taste

If using unhulled barley, soak overnight prior to cooking.

Put 8 oz. uncooked barley in the bottom of a large saucepan and cover with 2-3" of water. Bring to a boil, reduce heat to simmer and cook, adding water if it gets too dry, until the barley is cooked through but still has a nice resistance when you bite into it…don't let it get mushy. (Unhulled barley will take longer than hulled barley.) Drain and rinse in cold water to cool. Transfer 2 to 3 cups, depending on how much grain you like in your tabbouleh—I like less grain, more herbs—to large mixing bowl, add remaining ingredients and enough dressing to moisten. Combine and, if time allows, let it sit for an hour or so for flavors to meld. Serve at room temperature.

While the barley cooks, make the vinaigrette. Take any tightly lidded container—I often use a leftover (clean_ salsa container or glass jar—put all the ingredients into it, put on the lid and shake like the dickens over the sink in case, as once happened, the lid didn't seal as tight as I thought and I ended up dressing the kitchen instead of the salad. It can be made ahead and stores well for several days in the fridge.


Check out these eight salad recipes that will keep you inspired all summer long!