The ongoing crisis between Russia and NATO over the invasion of Ukraine, the struggle between protesters in Iran and the government over its extrajudicial killings, or the GOP's imminent implosion? Those have nothing on the potential fireworks involved in negotiating holiday meals with the family. The delicacy and maneuvering required as must-have side dishes are put forward for consideration, old family recipes are tossed in (and out) and dietary restrictions are figured into the mix would have even Anthony Blinken—who has released two songs on Spotify under the name "ABlinken"—scrambling for his easy listening list.
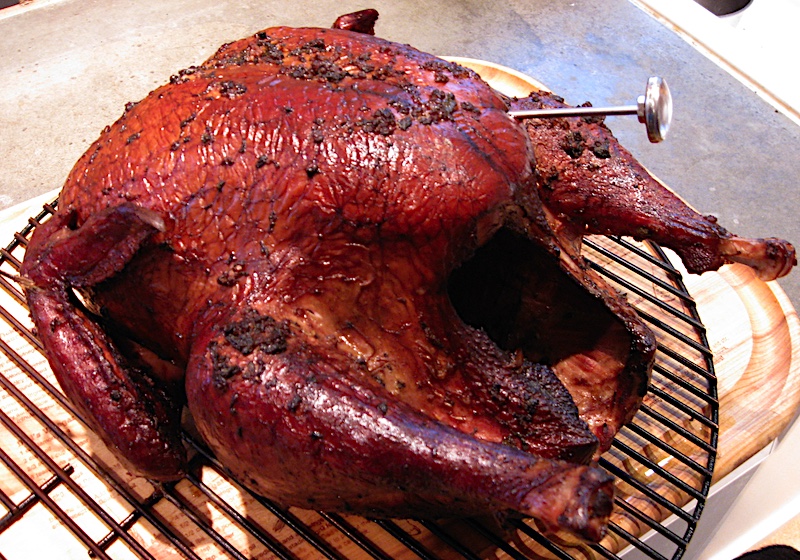
The bronzed beauty.
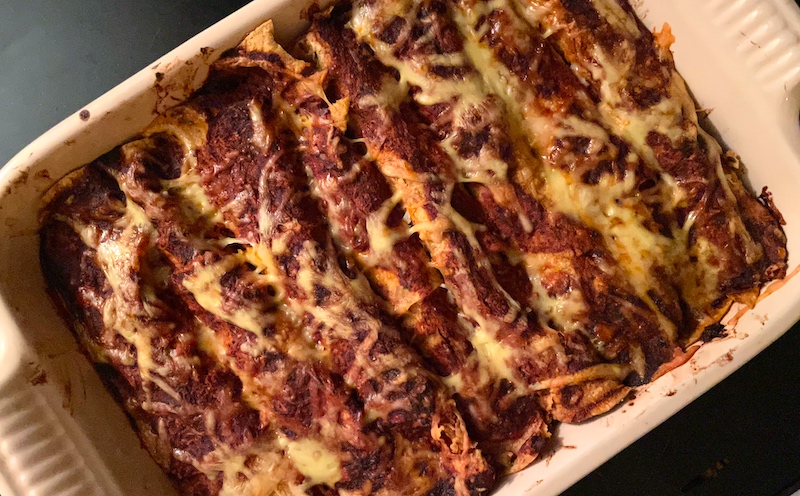
Like one year when Dave learned we were going to my brother's for Thanksgiving dinner. Normally an invitation from my brother isn't even a question due to the quality of his cooking andthe depth of his liquor cabinet. But for this occasion Dave's reaction was a look of disbelief and a cry of, "But I was planning to smoke the turkey in the smoker!"
After assuring him that I'd ordered a turkey so he could smoke it the next day, leaving plenty of leftovers for turkey sandwiches and his beloved turkey enchiladas, he immediately switched into research mode, looking up which wood charcoal to use as well as the complex calculations involved in getting the temperature and timing just right.
Suffice it to say that not only was it a wonderful holiday meal that included incredible cocktails and wines, a whole grilled turkey and some great side dishes, but the next day's smoking produced a bronzed beauty and some rocking turkey enchiladas.
Now to start planning for Christmas. Eek!
Dave's Favorite Turkey Enchiladas
For the sauce: 6 dried ancho chiles, seeded and torn into pieces 2 dried hot red chiles like cayenne, seeded and torn into pieces 3 1/2 c. boiling water 1 Tbsp. cumin seeds 2 Tbsp. (6-8) garlic cloves 4 tsp. oregano 3 Tbsp. paprika (I use 1 Tbsp. smoked Spanish pimenton and 2 Tbsp. regular paprika) 1 Tbsp. sugar 1 Tbsp. salt 2-4 c. roasted tomatoes (optional depending on how strong you like your enchilada sauce)
For the enchiladas: 4-6 c. cooked turkey, chopped 2 c. grated Monterey Jack or sharp cheddar cheese, grated 3 green onions, chopped 1 c. sour cream 1/2 c. sauce (recipe above Salt to taste 8 10-inch flour tortillas
Place the torn chiles in a heat-proof bowl and pour the boiling water over them. Soak for 30 min. until they are soft and pliable. Drain them, reserving the soaking water, and place them in the bowl of a food processor or blender. Add remaining ingredients and 1/2 c. soaking liquid and process till smooth, gradually adding the rest of the soaking water. Pour into saucepan and heat to simmer, then remove from heat.
Mix turkey, cheese, onions, sour cream and sauce in large mixing bowl. Stir to combine. Pour 1/2 c. of sauce in bottom of 9" by 12" baking dish and spread evenly over bottom of dish. Put 1/8 of enchilada mixture down center of one tortilla and roll, placing it seam-side down in baking dish. Repeat with remaining mixture and tortillas. Pour sauce over top to cover thinly (there should be sauce left over). Bake 40 min. in 350° oven. Serve leftover sauce on side or save for use in huevos rancheros, tacos, etc.
Note: This is my basic chile sauce and will make approx. 4-5 cups, which gives plenty for other uses like those mentioned above or is fantastic for a pork posole. It will keep basically forever in the freezer, making it easy to pull out as needed!
Sami Scripter's groundbreaking book, Cooking from the Heart: The Hmong Kitchen in America, written with co-author Sheng Yang, has just been released in paperback. When it was published by the University of Minnesota Press in 2009, it was the first published collection of Hmong recipes since the Hmong people adopted a written language in the 1950s, and it represented a cultural milestone for the widely dispersed Southeast Asian community. I wrote a story about Scripter and Yang for the Oregonian's FoodDay, and I'm republishing it here.
The Hmong people had no written language until the 1950s, so it makes sense that it took until now for them to get their first cookbook.
But to tell the story of the book, we need to go back to 1980. That's when Sami Scripter, the coordinator of the talented and gifted program at Rigler Elementary School in Portland, met Sheng Yang, a young Hmong (pron. "mong") immigrant, in her English as a Second Language class. Scripter's desk was in one corner of the room, and she was taken with the inquisitive and self-possessed 11-year-old.
"Sami was always very helpful," Yang says. "I'm a very nosy person. I'd go up to Sami and she would always answer my questions."
Portland had seen a large influx of Hmong from refugee camps in Thailand as part of a resettlement program in the late '70s. To welcome the newcomers to Rigler and expose the community to Hmong culture, Scripter organized a talent night that showcased Hmong songs, dance and food.
Yang (left) and Scripter (right).
Yang was scheduled to perform in the show and, since they lived just two blocks apart, Scripter would often give her a ride home from practices. Yang's mother would invite Scripter to stay for dinner, and eventually the two families formed a strong friendship. Knowing how fond Scripter and her family were of Yang, her parents asked if it would be possible for her to come live with the Scripters.
"Among Hmong families, children will often go to live with an aunt and an uncle for a year," Scripter says. "It's considered a learning experience. So it wasn't out of character for their culture, and we could help Sheng with her English and her classes."
"When I moved in with Sami and her husband, Don, he actually built bunk beds for me and (Scripter's daughter) Emily," Yang says. "Ever since then, Sami and Don and their family have been a part of our family."
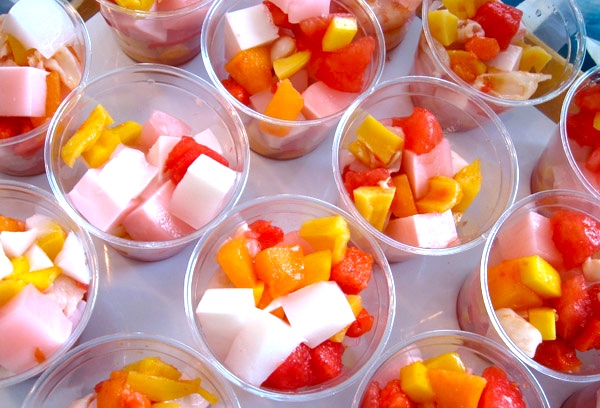
Coconut Gelatin With Tropical Fruit Cocktail
As with many cultural exchanges, it quickly became a two-way street. While Yang's English improved and she learned to appreciate tomatoes, she also began teaching Scripter and her new American family about Hmong cooking.
More than once this new road required some negotiating, as when Yang was making a variation of the traditional Hmong green papaya salad. Since green papayas were not readily available in stores at the time, Yang was making the salad with carrots.
"She needed a certain tool but didn't know the American word for it," Scripter said. "Of course, I didn't have it in my kitchen, so we ended up going back to her house. It turned out it was a mortar and pestle."
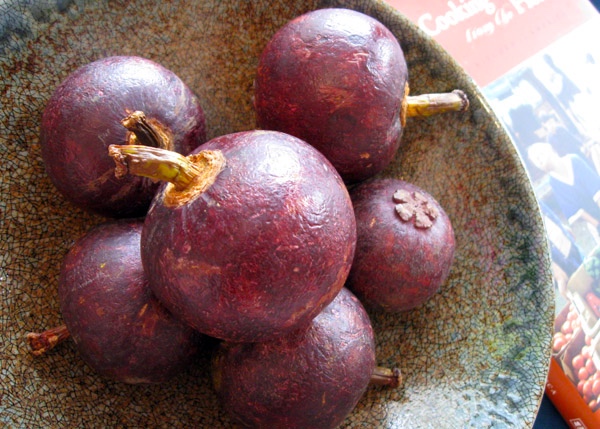
Mangosteens
Portland's Hmong population is estimated to be around 4,000, relatively small compared with the larger communities found in Minneapolis and Sacramento.* Most came here as refugees after the Vietnam War, when they were targeted by the communist government in Laos for helping the U.S. during the war.
In the mountains of Laos, they'd believed in a form of animism and used shamans and herbal remedies. Wild ingredients such as lemon grass, bamboo and rattan shoots, and banana blossoms, as well as herbs and seasonings such as cilantro, green onion, galangal, ginger, hot chiles, fish sauce and black pepper were commonly used.
Most food was cooked over an open fire, sometimes heated in a pot of broth or wrapped in banana leaves and steamed. Compared with the fiery cuisines of many of its Southeast Asian neighbors, the cooking of Laotian Hmong was fairly mild and focused on subtler herbs and broths.
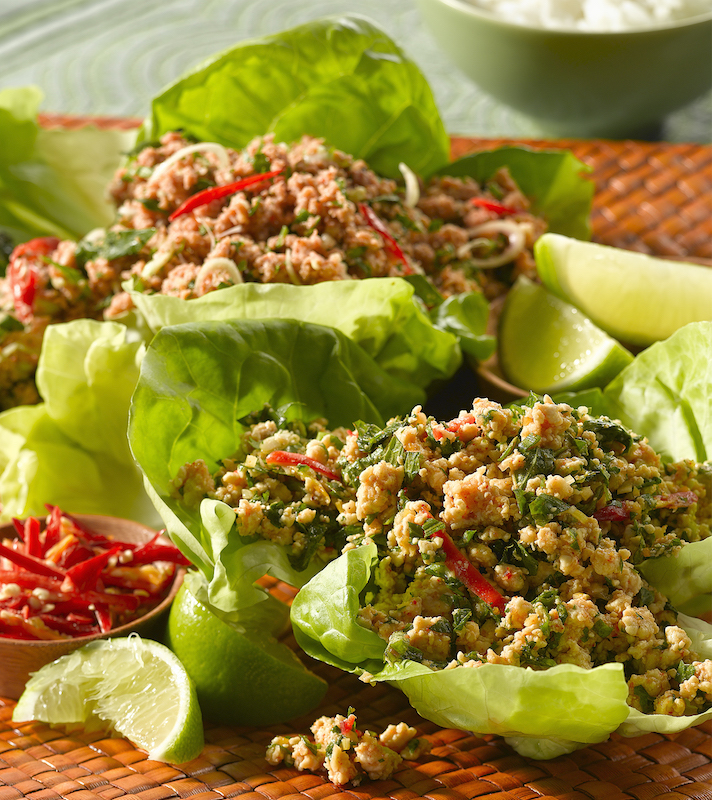
Chicken larb
As in many traditional cultures, food often played a central role in most ceremonial gatherings, whether for the new year, weddings and funerals or for shamanistic healing rituals. To this day, many Hmong foods have some spiritual or cultural significance.
But because the Hmong had no written language, until very recently they were dependent on an oral tradition to pass on their cultural heritage, and many of the recipes for these significant cultural foods had not been recorded.
Which is where Scripter and Yang's unique relationship enters the story.
Having written down Yang's recipes over the years, Scripter and Yang, now an adult, began talking about creating a book that would not only introduce Hmong foods to Western audiences but would also be a written record of the traditions that were becoming increasingly diluted by the influence of American culture.
"We wanted it to be representative of Hmong people across the United States," says Scripter, "not just what came out of Sheng's kitchen." She started traveling to different Hmong communities around the country, asking who made the best traditional foods, such as larb or cracked crab.
"So I'd go over to her house and cook cracked crab," Scripter says. "Then I'd ask what else people like that she cooks, and one thing led to another."
"I met a woman and she really wanted to tell me this story," Scripter said of her first meeting with Mai Xee (pron. "my see") Vang.
Vang's mother, Ka Kue, had immigrated without being able to read or write, so she began teaching her mother to read and write English. It soon became apparent that her mother preferred her own language, so Vang taught her mother to read and write in Hmong.
After Vang married and left home, her mother fell ill and eventually succumbed to kidney disease. "Unbeknownst to her children, when Ka Kue knew she was really ill she started writing a journal," Scripter says. "It's all about her life in Laos and is illustrated with her own drawings, with all the traditional farming and cooking implements.
"Because she knew she would die, she wanted her children to have her voice to tell them what to do to be a good Hmong man or woman," Scripter says.
After the funeral, Vang and her siblings found their mother's journal, wrapped tightly in a Hmong skirt and concealed in a basket under her bed. Under the little drawings in her journal, Kue had written, "Peb ua neej nyob yuav tsum muaj tej nuav mas txhaj paub ua peb lub neej nyob. Nuav yog qov ob huv peb lub neej." Roughly translated, her words mean, "In our lives, we must have these things in order to make a good life."
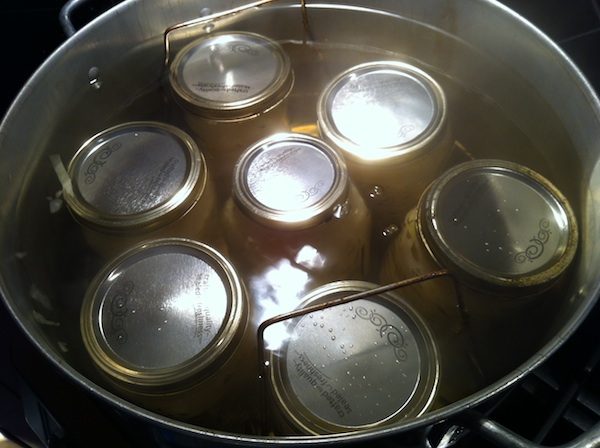
As cabbage season is upon us once again, I thought it was high time to rerun this post from December, 2011. The basic technique described below is the one I still use, though I don't do the water bath canning method that Ron prefers, since I like the crunchy, fresh (and probiotic) quality of the cabbage straight from the crock—the only drawback is you need more fridge space to store it, since it's not shelf stable. C'est la vie!
If it wasn't for a teensy misunderstanding, I might have been enjoying sauerkraut long before I did. You see, my mother had been told that my father's father had come to the United States from Germany as a young man.* So, as a young wife wanting to please her new husband, she tried serving him meals that would appeal to what she thought of as his German-American upbringing.
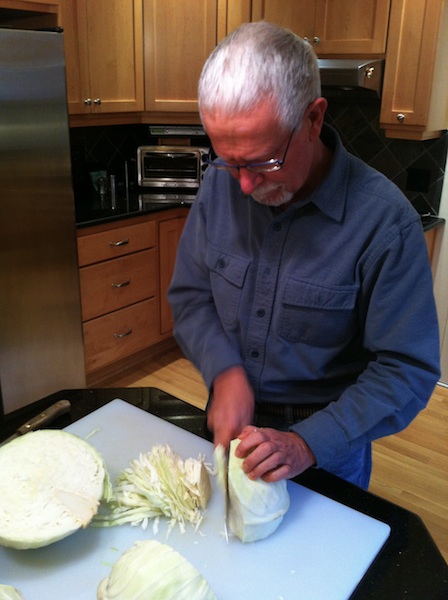
Slicing the cabbage.
Occasionally we would come to the family dinner table to find her version of a German dish was being featured, that is, sauerkraut straight from the jar heated on the stove with hot dogs—Oscar Meyer, no doubt—simmered in it. I think it took my father years to tell her he really wasn't fond of sauerkraut, but not before the tart, vinegary, tingle-your-back-teeth feeling was etched into all our minds.
That all changed for me when Dave and I went to France, traveling through the region called Alsace. Staying in an auberge with a fantastic restaurant on the first floor, we had the regional specialty called choucroute garnie, sauerkraut simmered for hours in a rich stock with sausages, pork, ham and other meats. It was truly a revelation, and forever changed the way I think about sauerkraut.
Packing the crock.
Which is why, when the subject of sauerkraut came up at a dinner we attended recently, I effused about my love for fermented cabbage. It turned out that the fellow I was speaking to was a sauerkraut aficionado, making gallons of the stuff every year from local cabbage, and he asked if I'd like to come observe the process. As you might expect, he'd barely finished asking when I answered, "Hell, yes."
I showed up one morning to find Ron Brey in his kitchen with several gigantic heads of green cabbage sitting on the counter. He buys them from Sun Gold Farm at the PSU farmers' market and looks for large cabbages—he buys 14 pounds total, or about three, per batch—that are tight and "hard as rocks." That amount is good for about seven quarts of sauerkraut, exactly the number of jars that will fit in his canner. He then slices the heads into quarters and then cuts those in slices about the thickness of a dime, slicing around the core.
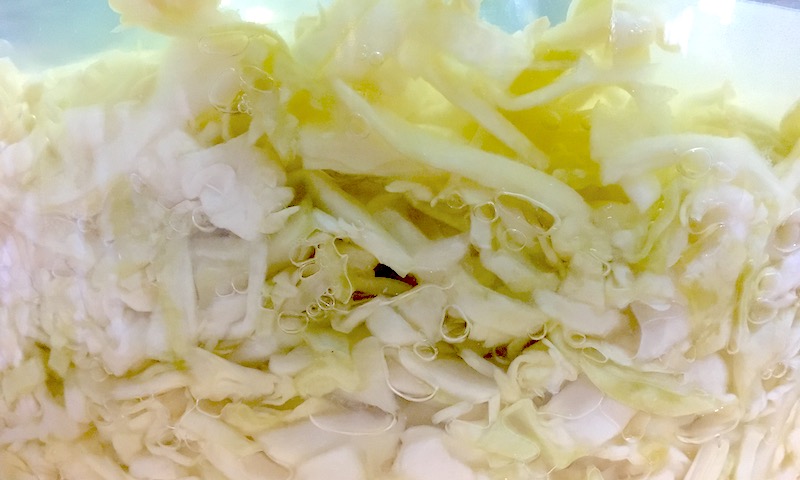
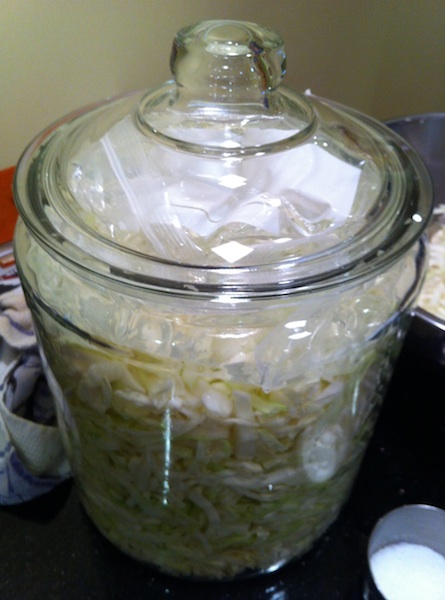
Ready to ferment!
The chiffonade from the cabbage goes into a bowl and is mixed with 11 tablespoons of salt, which almost immediately starts to "sweat" the cabbage, that is, to pull the moisture out of the leaves. Ron says he uses kosher salt because it has no additives, and mixes it in gradually as he adds more cabbage. The salt and cabbage mixture is then left to sit in the mixing bowl for six hours.
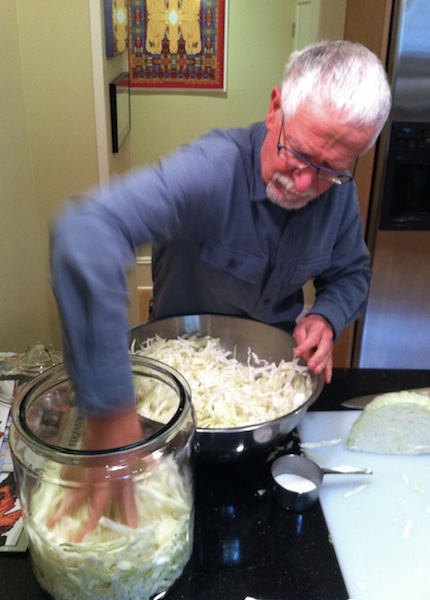
After that, Ron transfers the shreds of cabbage into the glass crocks he uses to ferment the sauerkraut. (The glass-lidded glass jars are from Fred Meyer and he says they're much cheaper than most of the ceramic crocks sold for making sauerkraut.) He firmly packs the sauerkraut in the crock by hand until it's about seven-eighths full, or up to the shoulder of the crock. [It's not necessary to completely fill the crock. I've done batches with as little as 1/3 of the crock and it turned out great.]
Packing the kraut into jars.
Brey emphasizes that it's important that the sauerkraut remains submerged in its liquid in the crock, and various mechanisms have been developed to press down the shreds, some of which work better than others. But here's the genius part: Ron came up with his own method that works like a charm and is so simple it's ridiculous. He takes a gallon zip-lock bag, fills it with water, and sets it in the crock on top of the cabbage. With a gallon of water weighing in at about eight pounds, it's plenty to keep that crazy sauerkraut under control, and it conforms to the shape of the crock. Awesome!
The hot water bath.
The cover is placed on the crock, and the sauerkraut goes down in Ron's basement to ferment for a couple of weeks. He likes to keep it at 65° for the fermentation…lower than that would be fine, but would slow down the process. He says, "There is some point—certainly by 80 degrees—where it becomes increasingly likely that the kraut will not ferment correctly. It can become soft, dark and lose the combination of tartness and sweetness." The kraut should remain fairly light-colored during fermentation; any serious darkening is an indication the ferment has gone wrong and should be tossed. Ditto, obviously, with mold.
After a couple of weeks the crock is brought up to the kitchen, the kraut is transferred to clean quart glass canning jars and is canned in the same kind of water bath canner my mom used for preserving fruit. Too bad she never knew about homemade sauerkraut and that paradigm-shifting choucroute.
Ron recommends the book "Stocking Up" by Carol Hupping as a basic guide for making sauerkraut and other preserved foods. I would also recommend "The Art of Fermentation" by Sandor Katz as an excellent guide. For Japanese pickling methods, the slim but essential "Tsukemono" is unsurpassed.
* In going through some family papers, I have since found out that my grandfather was born on Oct. 2, 1891, in the town of Sitauersdorf/Sitauerowka in the region of Galicia in what was then Austria, and is now a geographic region spanning southeastern Poland and western Ukraine.
Belonging to two CSAs, as you might imagine, has us benefitting from the fall bounty—or is it buried under a bounteous pile?—of vegetables from two local farms. While it's a short-lived situation, with the end of our summer share from one farm overlapping with the beginning of the fall subscription from another farm, it means I'm scrambling to use all the peppers, squash, cauliflower, greens and more in my veg bin before they melt into compost.
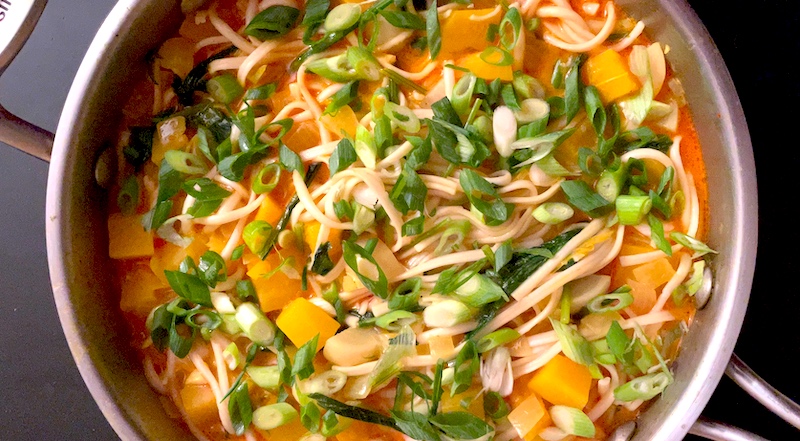
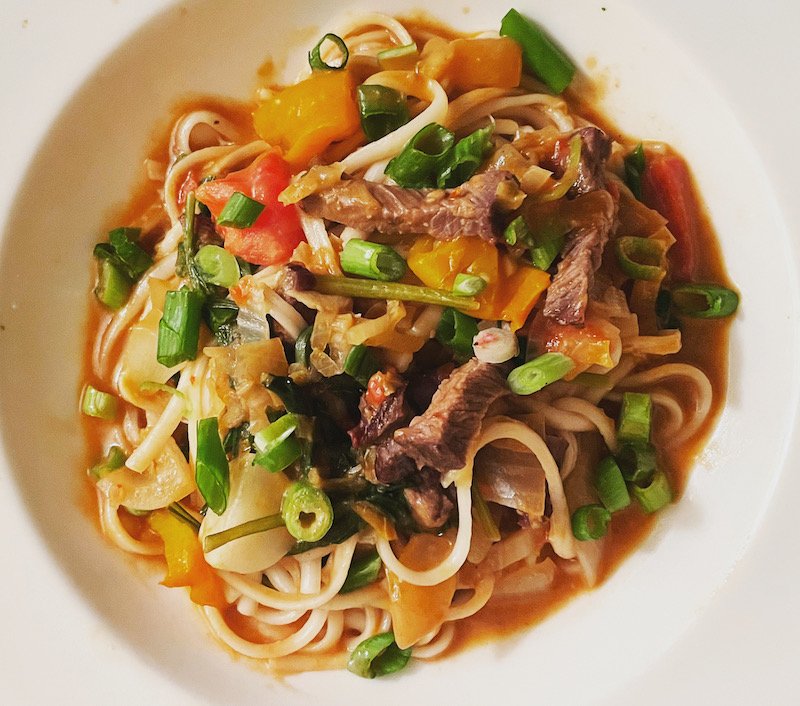
The dinner pictured above (with the meaty version on the left) is a simple one-pot curry that's been a boon on so many fronts: it's quick to prepare, it's delicious as either a vegetable or meat-friendly dish, I can throw in chicken or steak or roasted vegetables left over from other meals, and it takes up a ton of the items from those two CSAs mentioned above.
As flexible as fried rice when it comes to a healthy, hearty meal, as long as you have noodles, coconut milk and a curry paste (or powder) on hand you can have it on the table in about half an hour. I call that a darn near perfect dinner.
Coconut Curry Noodles with Seasonal Vegetables
8 oz. udon noodles (spaghetti or linguine work, too) 2 Tbsp. vegetable oil 1 yellow onion, chopped in 1/2" dice 3 cloves garlic, minced 1 tsp. fresh ginger, finely grated (optional) 3 Tbsp. red or green curry paste (I like Thai and True made here in Oregon or 2 Tbsp. curry powder or 1 1/2 Tbsp. turmeric plus 1 tsp. ground cumin) 4 c. chopped vegetables (peppers, squash, cauliflower, broccoli, kale, carrots, turnips or whatever you have in the veg bin) 1 15-oz. can coconut milk 1 c. or so chicken or vegetable stock 1 Tbsp. fish sauce Salt to taste 1/2 c. green onions, chopped (optional) 1 c. cilantro, chopped (optional)
Bring a pot of water to boil and drop in the udon noodles. Return to a boil and cook for 4 minutes. You want the noodles very al dente, since they'll finish cooking in the curry sauce. (Regular pasta will take longer to cook, but you still want it al dente.) Drain and rinse with cold water.
Heat a deep, wide frying pan over medium-high heat and add oil. When it shimmers, add the onion and sauté until translucent. Make a space in the center of the onions and add the ginger (if using) and garlic. Sauté briefly and add the curry paste (or powder) and sauté briefly. Start adding the sturdier chopped vegetables first, then adding the more tender ones as the first ones cook down a bit.
When the vegetables are all tender, add the coconut milk, stock, and fish sauce, plus any meat you may be using (cubed tofu works here, too). When it comes to a boil reduce the heat and simmer for 5 minutes, then add the drained noodles. Bring the whole pot to a simmer for another 5 minutes or so until it's all thoroughly heated. Adjust salt to taste. Serve garnished with green onions and cilantro, if desired.
The combination of dogs and a walkable neighborhood gives me the perfect excuse to go on reconnaissance missions around my neighborhood, looking—some might call it snooping—on parking strips and in front yards for fruit trees. Having older dogs that, like toddlers, are more interested in process than destination, I've taken the opportunity to note the plum, Italian prune, fig, pear, apple, cherry and persimmon trees on our various routes.
Before…
Some are gnarly old things that predate the bungalows built in the 1920s, the only surviving remnants of the orchards and farms that used to dot the countryside between the small towns like Sellwood, Albina, Multnomah, Kenton, Lents and St. Johns that were eventually annexed by Portland. Others were planted as street trees in the intervening years, though I wonder if the hapless homeowner who planted the giant walnut tree in his front yard thought about the terminal velocity of ripe walnuts when they drop 60 feet onto his car (or his head).
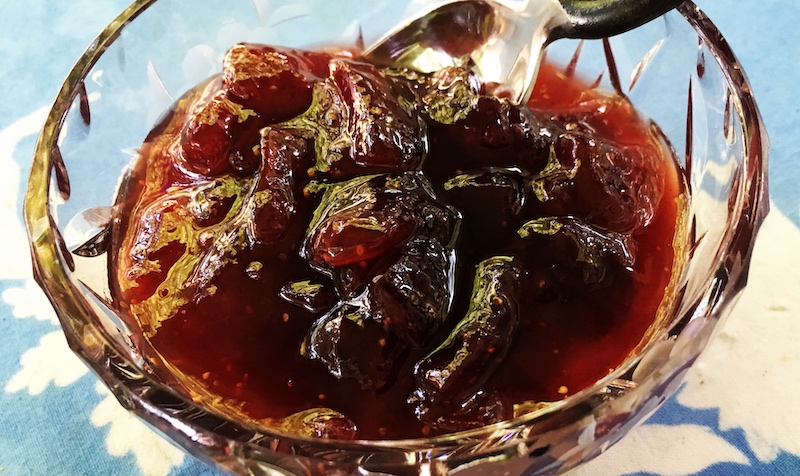
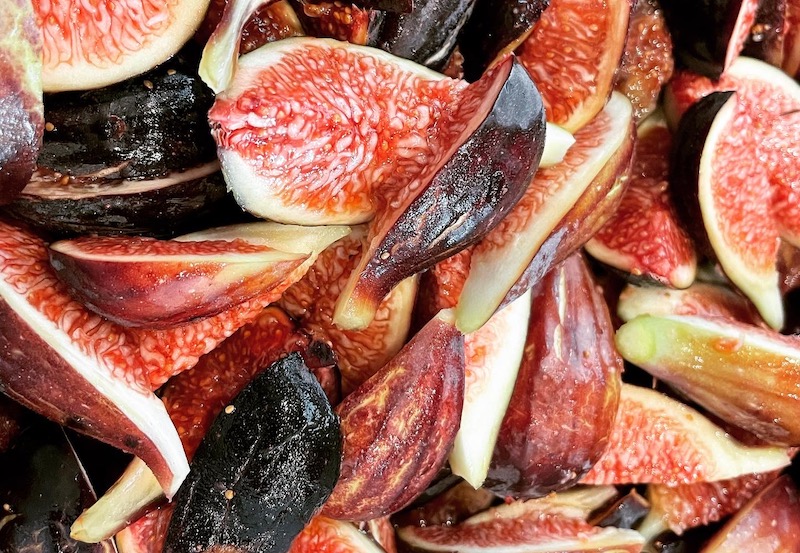
In any case, just around the corner from us is a fig tree that was planted around a dozen years ago that the homeowners had tried to espalier along a short retaining wall. The scent of the leaves was intoxicating on warm summer nights, but it never bore fruit until the house sold and the new owners neglected to trim it back. The next year there were big, dark brown figs dangling from its branches and I began stalking the house, hoping to strike up a friendly, if self-serving, conversation with the new owners.
…and after!
A few weeks ago I finally—aha!—caught the sister of the owner carrying groceries into the house and casually asked if perchance they ever used the figs or would…ahem…mind sharing some of them. She said she was hoping to dry some, but there were way more than she could use, so I could help myself.
Score one for persistence!
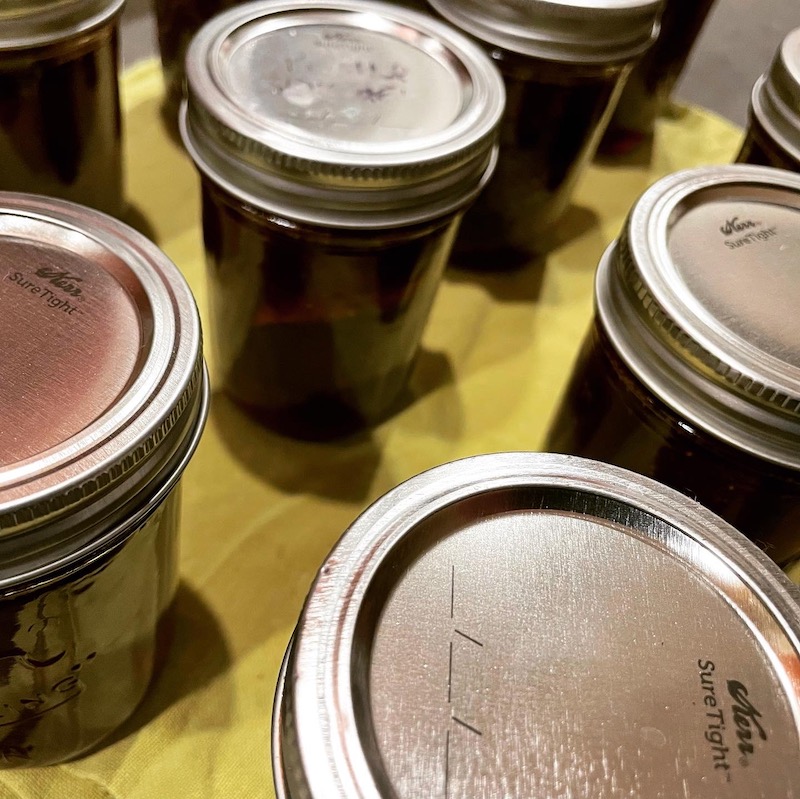
So yesterday, shopping bag in hand, I walked over and plucked five or so pounds. They were delicious for eating out of hand, and I made the rest into a stellar jam using a recipe from Martha Rose Shulman as a guide, though I doubled her recipe and used a bit less sugar than she called for.
2 1/2 lbs. ripe figs, roughly chopped 4 1/2 c. sugar 5 Tbsp. fresh-squeezed lemon juice, strained 4 tsp. balsamic vinegar (or more to taste)
In a large bowl, toss together chopped figs and half the sugar. Cover bowl with plastic wrap and refrigerate for 1 hour.
Transfer figs and sugar to a medium-sized saucepan. Bring the mixture to a boil, stirring frequently to prevent scorching. When mixture comes to a boil, scrape back into bowl and cover with plastic. Let cool and refrigerate overnight.
Scrape fig mixture back into the saucepan. Place a small plate in the freezer to use for checking the thickness of the jam as it cooks. Bring the fruit back to a boil over medium heat, stirring frequently. When the mixture comes to a boil, stir in the remaining sugar, the lemon juice and the balsamic vinegar. Boil, stirring, until mixture is thick but not too concentrated, 10 to 15 minutes. Skim off any foam that accumulates. I also skimmed off some of the seeds that cluster at the surface, though it's not necessary to skim off all of them. (Dipping the back of a soup spoon into the seeds works like magic!)
To test for doneness, remove the plate from the freezer and place a spoonful of the jam on it. Wait about 20 seconds and tilt the plate. The jam should only run slightly, and fairly slowly. Boil a little longer if it seems too runny, but take care not to cook it until too thick. It needs to be spreadable.
Transfer the jam to clean jars, wipe the rims and place canning lids on top. Place canning bands over the lids but don't tighten bands more than finger tight. Allow to cool, tighten the bands, then refrigerate or freeze.
I'm telling you, if you're like me, that is, a budget-conscious cook who loves to squeeze the most out of your food dollar at the same time as making some of the most delicious food you've ever had, look no further than the neck. Whether it's beef, pork or fish, necks—or collars in the case of fish—make for some of the best eating around.
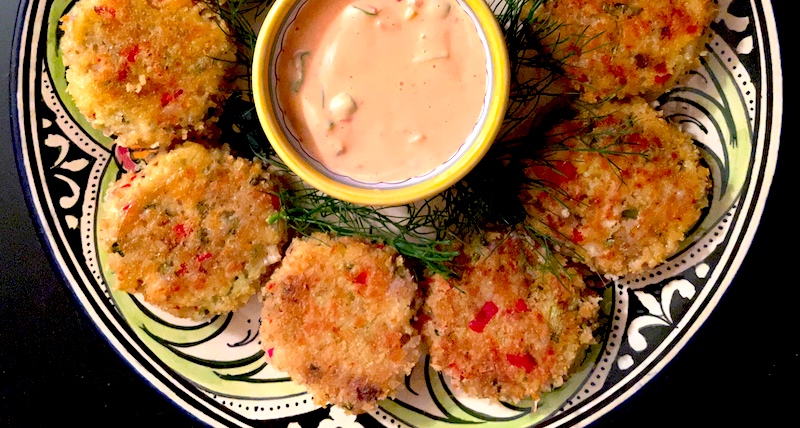
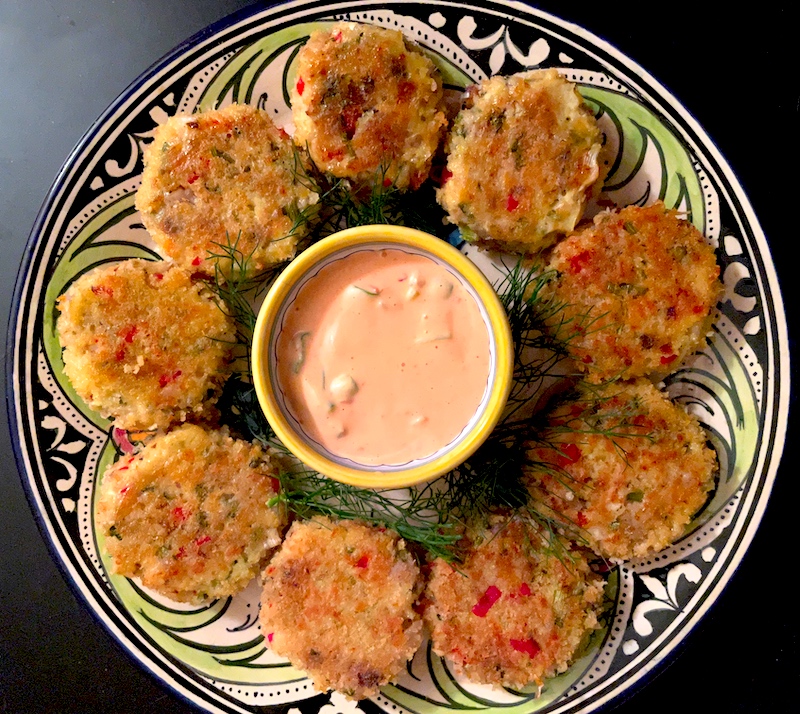
Lately I've found some mighty meaty collars, almost like a fish steak with wings, at Two X Sea (Two by Sea), the sustainable fishmonger inside Providore Fine Foods on NE Sandy. Manager Lauren Vanatter never looks askance when I oooh and aaah and point at the ones I want, so when I saw three hefty sablefish collars staring back at me (along with a couple of big ol' fish heads) I had her wrap them up pronto.
With no plans for dinner and some peppers from our CSA sitting in the veg bin, fish cakes seemed like a quick solution. I slapped the collars on a sheet pan and roasted them for 20 minutes at 375 degrees, let them cool for a few minutes, then pulled the meat off the bones, putting the pile of skin and bones in a pot and covering them with water for stock. (Two birds! One stone!)
A little chopping, a little mixing, a little forming, and they were ready to pop in the oven. Drop dead delicious, and so easy!
Thai-ish Fish Cakes
Yield: A dozen small crab cakes
For the cakes: 1 to 1 1/2 lbs. cooked fish meat 1/2 red bell pepper, minced 1/4 c. minced red or green onion 1 serrano pepper, finely minced 2-4 Tbsp. cilantro, minced 1/4 c. bread crumbs 1/4 c. grated parmesan Zest of 1 lime 1 tsp. fish sauce Juice of 1 lime (approx. 2 Tbsp.) 1 egg
For the crumb coating: 1 c. bread crumbs, preferably Panko style 1/4 c. grated parmesan
For the sriracha sauce: 1 c. mayonnaise 3-4 Tbsp. sriracha sauce (or to taste) 2 Tbsp. finely sliced green onions
Preheat oven to 350°.
Combine crumbs and parmesan and spread out on a plate.
In a medium-sized mixing bowl combine fish meat, peppers, onions, cilantro, bread crumbs, parmesan, lime juice and fish sauce. In a small mixing bowl whisk together the lime juice and egg. Add to the fish mixture and stir.
Line a baking sheet with parchment paper.
Scoop up about 1/4 cup of fish mixture and form into a plump cake about 2-inches in diameter (approx. 1” high). Compress so cake holds together. Gently sit cake in crumb mixture to coat bottom and sprinkle crumbs over top to coat—don’t flip the cake or it will fall apart. Gently compress cake between your hands to meld crumbs to the crab cake. (Keep cake plump; don’t flatten.)
Set each formed cake on lined baking sheet. When all cakes are formed, place sheet in the refrigerator for at least 15 minutes.
While the cakes chill, combine mayonnaise, sriracha and green onions in a small bowl. Serve alongside cakes.
Remove sheet pan from the refrigerator and place on middle shelf of the oven. Bake until golden brown, about 20-30 minutes.
NOTE:Adding some grated coconut and fresh mint or basil to the fish mixture is also delicious. This recipe is fabulous with crab, too!
Hot sauce is a staple in this house, whether it's sriracha—the global shortage of which has been greatly exaggerated, at least looking at the shelves of my local Asian market—or that vaunted product from New Orleans, Crystal Hot Sauce, containing just cayenne chiles, vinegar and salt. More than simply a condiment for shaking on eggs, tacos or stir fries, I use hot sauce to add depth to the cheese sauce for my macaroni and cheese, or to add zip to dips and deviled eggs.
Chopped, brined and ready to go into the basement!
So you can imagine my horror the other day when I discovered we were completely out of our usual hot sauces. Fortunately I was able to grind up some of the Ayers Creek Farm dried cayennes I had saved, so the dish wasn't completely bland, but boy howdy, it was a close one!
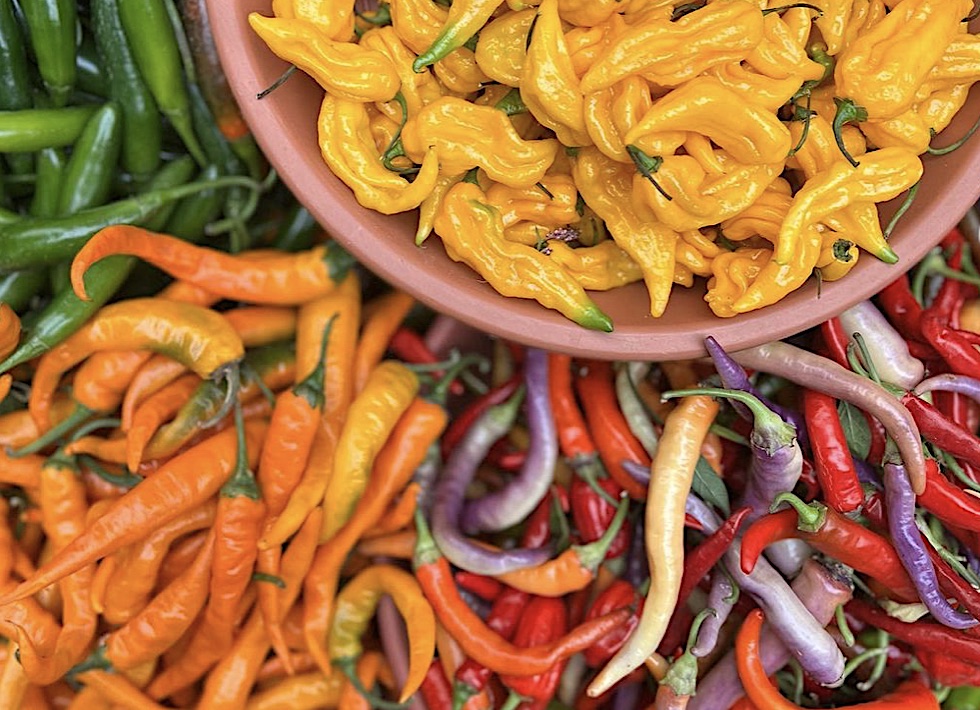
I'd collected a bag of assorted peppers—a few stray padrons, a couple of Jimmy Nardellos, anaheims and anchos from farmers' market trips and our CSA share that hadn't found their way into other concoctions—and a couple of hotter-than-all-get-out yellow-orange Bulgarian carrot peppers from my neighbor Bill, so I decided to chop those up and throw them in a quart jar with garlic and a salt brine.
I left them in the basement for a few days, and when they smelled oh-so-pickle-y, I brought them upstairs, drained them—reserving the liquid for thinning it to sauce-like perfection—and whizzed them in the blender. One sniff told me it was probably too hot for everyday use, so I threw in a couple of roasted red peppers I'd found in the fridge and tasted a tiny drop.
Hoo-eee!
Inspiration courtesy of the peppers at Eloisa Organic Farm.
It was better, but still a little too much heat, so I blended in a couple more roasted peppers and a pinch of salt, thinned it with the brine to pourable consistency and bottled it in old spice bottles I'd collected, which were the ideal size for table use.
Now, having seen farmers' market tables loaded with peppers, I'm hot (no pun intended) to make more. My friends Michael and Linda at Terra Farma in Corbett loaned me Fiery Ferments, a collection of recipes by noted fermentarians Kirsten and Christopher Shockey. With recipes and techniques for everything from hot sauces and chutneys to kimchi and other condiments, I can already tell it's going to be my bible.
But to get you started, here's the basic recipe for the hot sauce described above.
Assorted Peppers Hot Sauce
For the brine: 5 Tbsp. Kosher or sea salt 2 qts. water
For the peppers: 1 lb. assorted peppers 8 cloves garlic, peeled and smashed
Make a basic salt brine by combining the salt and water in a large bowl or gallon container. Stir until dissolved.
Remove stems from the peppers and roughly chop them (including seeds and pith). Pack tightly into clean quart jars along with any spices—I just used the smashed cloves of garlic—then pour brine over them to within 1" of the rim of the jar. Keep peppers submerged in brine with glass weight or small zip-lock bag with brine in it. Loosely cap, set in a dish in case it bubbles over, and let it sit in a cool, dark place like a basement for 4-7 days. Strain, reserving brine, and blend. Thin to desired consistency, taste for salt. If it’s too spicy, add roasted sweet peppers, or if it needs more heat add roasted hot peppers.
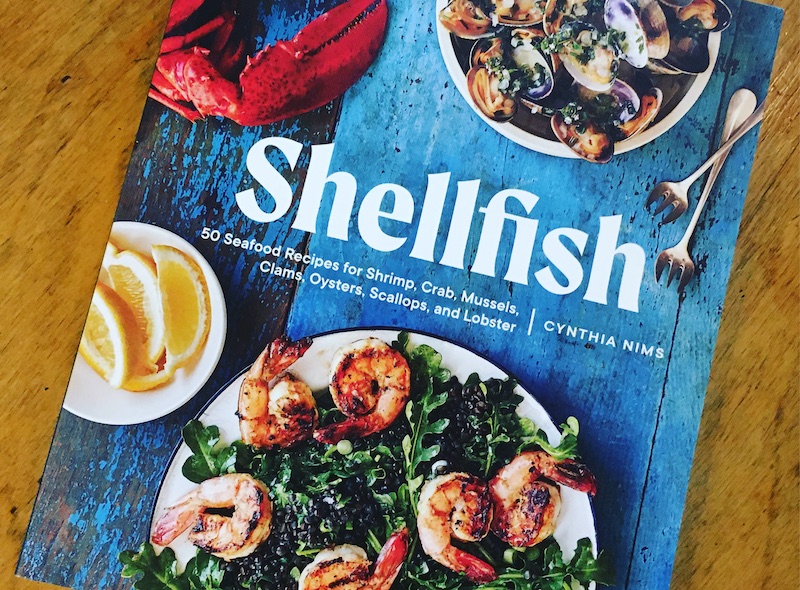
Cynthia Nims is a prolific author. The list of books she's written would take up most of the space in the cupboard I've dedicated to my whole cookbook collection—don't ask where I keep the stacks of other cookbooks that have yet to be shelved. In total, her work is a comprehensive overview of the bounty we Northwesterners enjoy, a celebration of the seasonal riches harvested from our rivers, our forests and our oceans.
There are Nims' recent single-subject seafood books, including Crab, Oysters and her latest, Shellfish. Then there are the Northwest Cookbooks e-book series (Crab, Salmon, Wild Mushrooms, Appetizers, Breakfast, Main Courses, Soups, and Salads & Sandwiches); plus the dear-to-her-heart Salty Snacks and Gourmet Game Night. Personal note: I've been angling to visit Nims in Seattle to get a tour (and maybe a taste) at her period-perfect Lava Lounge where she spins recordings—only vinyl, my dear, please—serves cocktails and runs a board game emporium for friends.
Like many of us in the food writing world, it wasn't her automatic career choice:
"Cooking has been under my skin for as long as I can remember, inspired by the sheer pleasure of cooking with my mom and big sister. I mastered the canned-pear-half-with-cottage-cheese-tail bunny salad, subscribed to Seventeen magazine for the recipes, and had my high school third-year French class over for dinner, which included a soupe à l’oignon that began with beef stock made a couple days prior."
A math degree with an eye toward becoming an engineer was scuttled after Nims attended the stagiaire program at La Varenne, which culminated in receiving the school’s Grand Diplôme d’Etudes Culinaires. She's cooked for Julia Child and the Flying Karamzov Brothers, beginning her immersion in the subject of seafood, appropriately, at Simply Seafood magazine. Nims has taught classes and co-authored, edited and contributed to dozens of publications, including the highly lauded series Modernist Cuisine.
You can meet this culinary wonder woman this weekend at two events in Portland where she's bringing her new book, Shellfish: 50 Seafood Recipes for Shrimp, Crab, Mussels, Clams, Oysters, Scallops, and Lobster, to Flying Fish on Saturday, July 23rd, from 1 to 3 p.m. Nims will be in the Chef Shack alongside Chef Trever Gilbert, who's featuring the book's Harissa Roasted Shrimp, Carrots and Radishes. Then she'll be demo-ing a couple of recipes at Vivienne Kitchen and Pantry—in their Secret Bar, no less—on Sunday, July 24th, from 3 to 5 p.m.
If you want to get a taste of just how fabulous this book is, try her simple (and seriously divine) Grilled Clam Pouches with Bay Leaf and Butter (photo above right). I made them just last night and after his first bite, Dave said, "This is going on the list for camping."
Grilled Clam Pouches with Bay Leaf and Butter
Fresh bay leaves really stand out in the preparation; dried leaves won't offer as much fragrant flavor. A rosemary or thyme sprig in each packet, or a couple of fresh sage leaves, can be used in place of fresh bay. And you can't go wrong with just buttter and clams on the grill, either. I use 12-inch wide aluminum foil; you can use larger and/or heavy duty foil if you like.
The packets make a good serving vessel perched on a plate for casual dining. You can instead transfer the clams and buttery cooking juices to shallow bowls. These lighter portions are ideal as an appetizer, followed perhaps by other items destined for the grill while it's hot.
Makes 4 servings.
2 lbs. small to medium live hard-shell clams, well-rinsed 4 Tbsp. unsalted butter, divided 8 fresh bay leaves, divided Sliced baguette or other bread, for serving
Preheat an outdoor grill for medium-high direct heat.
Cut 8 pieces aluminum foil about 12 inches long and arrange them on the counter stacked in pairs for making 4 packets.
Put 1 tablespoon of butter in the center of each foil packet. Fold or tear each bay leaf in half which helps release its aromattic character, and put 2 leaves on or alongside the butter for each packet. Divide the clams evenly among the pouches, mounding them on top of the butter and bay and leaving a few inches of foil all around.
Draw the four corners of the foil up over the clams to meet in the center and crimp together along the edges, where the sides of the foil meet, so the packet is well-sealed. The goal is to create pouches that will hold in the steam for cooking and preserve the flavorful cooking juices that result.
Set the foil packets on the grill, cover, and cook for about 10 to 12 minutes for small clams, 12 to 15 minutes for medium. Partly open a packet to see if all the clams have opened, being careful to avoid the escaping steam; if not, reseal and cook for another 2 to 3 minutes.
Set each pouch on an individual plate and fold down the foil edges, creating a rustic bowl of sorts to hold the flavorful cooking liquids. Or carefully transfer the contents to shallow bowls. Serve right away, with bread alongside, discarding any clams that did not open.
NOTE: This recipe works well in the oven, too. Preheat the oven to 475 degrees F. Use a broad, shallow vessel, such as a large cast-iron skillet or a 12-inch gratin dish or similar baking dish. Add the butter pieces and bay leaves to the dish and put in the oven until the butter has melted. Take the dish from the oven, add the clams in a relatively even layer, and return the dish to the oven. Roast until all, or mostly all, of the clams have opened, 12 to 15 minutes. Spoon the clams into individual shallow bowls, discarding any that did not open, then carefully pour the buttery cooking liquids over the top.
Looking at the weather forecast for the next few days, and knowing that the dog days of summer (i.e. August in the Pacific Northwest) are just around the corner, I thought I'd get my proverbial ducks in a row ahead of time.
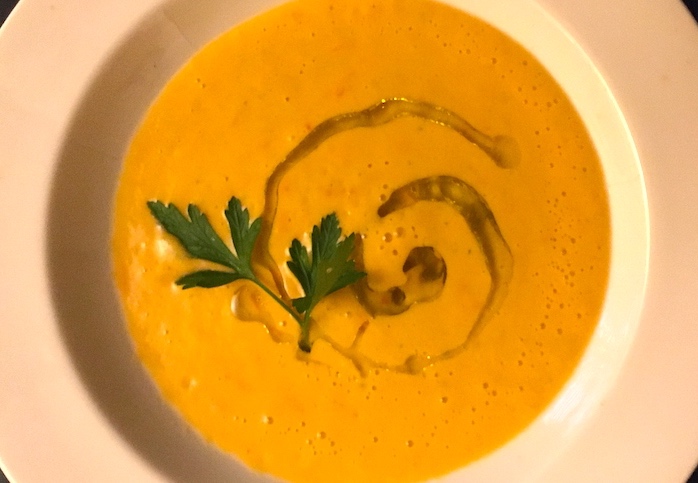
Gazpacho isn't always red…this is made with yellow tomatoes!
Like most of you, the last thing I want to do when the temperature hits 90 degrees or more is to turn on the stove, so I looked up the plethora of chilled soup recipes collected in the archives here at Good Stuff NW and found a few that are going to come in handy sooner than later.
Luckily for us Northwesterners, the summer harvest is coming on strong after our extraordinarily cold, wet spring—that sound carried on the wind is local farmers heaving a big ol' sigh of relief—so the tomatoes, fennel, fruit, peppers and other cooling things you'll need will be in good supply at our local farmers' markets.
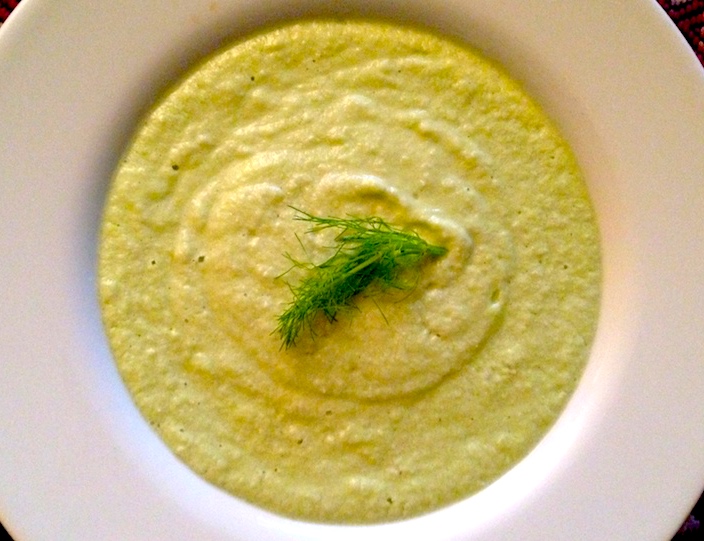
Cucumber, fennel, avocado…
Gazpacho is what most often comes to mind when chilled soups are mentioned(photo at top and above left). A fresh tomato soup made in a blender with other vegetables and a bit of bread to give it body, you can make it ahead of time or right before serving. It's handy to have a jar on hand in the fridge for a quick lunch, appetizer or light dinner with a hearty green salad.
I'm personally in love with Persian cucumbers, the smaller, less seedy version of their big, waxy cousins that we're used to. Many local farms have started growing them for customers who like their size and that they don't have to be peeled and seeded, yet still retain the cucumber's fresh, crunchy flavor and texture. A common featured ingredient in chilled soups, combining them with other seasonal vegetables is a great way to go.
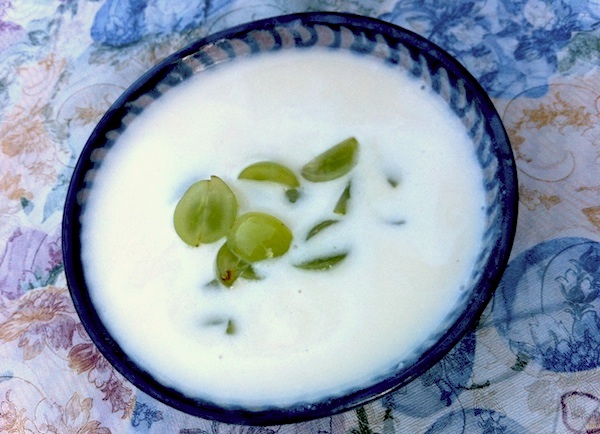
Don't let the garlic scare you…this is a gently flavorful, cooling soup.
A Spanish chilled garlic soup is cool and light with a requisite zing from the garlic and a soothing sweetness from halved grapes. It's the perfect starter to a summer evening in the back yard. It would also be terrific poured into a lidded pitcher and taken on a picnic (or a concert on the lawn) with a rotisserie chicken from the store along with a fruit salad and a bottle of chilled rosé.
So when it eventually does start to heat up and you feel that cranky demon lurking right around the corner, take inspiration from these three cool customers. With a minimum of chopping and a quick whir in the blender, they'll turn that sweaty frown upside down.
Tomato Gazpacho
Adapted from Julia Moskin's recipe in the New York Times.
Makes a full blender.
5-6 medium tomatoes 1 small Persian cucumber or a small, peeled and seeded regular cuke 1 poblano or Anaheim pepper 1/2 medium onion 2 cloves garlic 1 Tbsp. white or red wine vinegar 1/2 c. extra virgin olive oil Salt to taste
Cut all the vegetables into rough chunks. In the blender, put in the tomatoes first (they'll liquefy quickly and pull in the other stuff) then add cucumber, poblano pepper, onion, and garlic. When that has been puréed, add vinegar and blend until very smooth. With the motor is running, add extra virgin olive oil. Taste and add salt if needed. Chill or serve with ice, and add a little water if it's too thick to drink easily.
Chilled Cucumber, Avocado and Fennel Soup
2 medium cucumbers, peeled and seeded, or 3-4 Persian cukes (no peeling or seeding needed.) 1 avocado, peeled and seed removed 1 fennel bulb, quartered and cored 1/4-1/2 onion, roughly chopped 1 clove garlic, roughly chopped Juice of 1/2 lemon 1 c. water 1/2 c. sour cream 1, 1" slice day-old artisan bread, crusts removed and cut in 1/2” cubes Salt to taste
Place half of the cucumbers, avocado, fennel bulb, onion, garlic, lemon, water and sour cream in a blender. Blend until mixture is thoroughly puréed. Add half of bread cubes and continue to blend until it is a smooth mixture. Add salt to taste. Pour into large mixing bowl. (At this point you can taste and adjust amount of onion, etc., for the other half of the soup.) Repeat with second half of ingredients. Stir to combine. Can be refrigerated (or not) before serving.
Sopa de Ajo Blanco
My friend Judy Holloway learned to make this soup when she and her family lived for a time in Spain.
1/2 c. blanched almonds 3-4 slices of large-sized baguette, more if using smaller loaf 3 cloves garlic 1 tsp. salt 4 c. water 5 Tbsp. olive oil 3-4 Tbsp. sherry vinegar 16-20 seedless green grapes
Put slices of bread in water to soak. Peel garlic. While bread soaks, put garlic and almonds in processor or blender and pulse until smooth. Squeeze water from bread, tear into pieces and add bread and salt to blender. While blending slowly, add oil, vinegar and finally water to blender. Taste, adjusting salt, vinegar and oil to taste. Chill at least 2-3 hours or overnight. Serve grapes on side, or put several in soup bowl and pour soup over grapes. Serves 4.
My first taste of kimchi was a revelation…salty, acidic, crunchy, and searingly spicy with the heat from Korean red chiles. I still salivate at the memory of it.
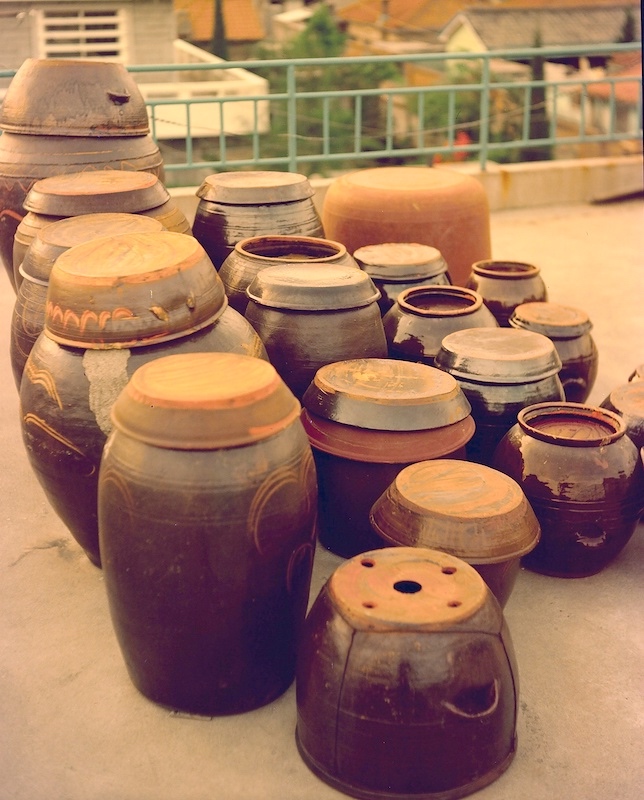
The fermentation pots, or onggi, on the roof of my host family's home.
It was made by the mother of my host family in Daejon, South Korea, having fermentedin loosely covered clay pots, called onggi, on the flat, exposed roof of their home alongside other mysterious concoctions that drew my curiosity with their richly funky, exotic smells, aromas that were as foreign to my middle-class American palate as tuna noodle casserole and Swiss steak would be to my host family.
I seem to recall the family eyeing me suspiciously as I lifted the chopsticks containing that first bite to my lips, not sure how the big American girl they'd taken into their home might respond. Would she scream? Gag? Run out of the room?
They were probably relieved, if maybe a bit disappointed, that none of those happened, though I remember my lips burning by the end of the meal of fish, wok-seared greens and kimchi. It helped that there was plenty of rice and traditional scorched-rice tea (sungnyung) to help mitigate the fire of the chiles, but I was intrigued.
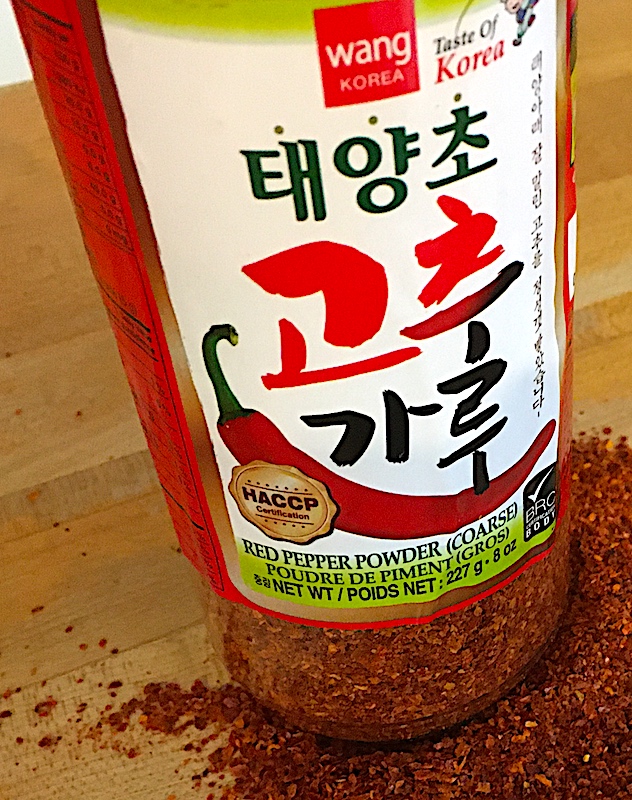
Gochugaru, coarse ground red pepper, is a critical ingredient.
Since that college trip I've been wanting to recreate the taste that was almost literally seared into my memory 40 years ago, and my experiences with fermentation made me pretty confident I could do it without killing or sickening my friends or family.
So when I found out that my friend Denise was willing to help me make it from the recipe her sister had transcribed from her mother Betty Ann's recipe—one that Betty Ann had learned from her mother, Annie—I was all in. (Read the story ofAnnie Mah's odyssey and get her recipe for gochujang.)
It began with Denise and I making a trip to one of the city's many large Asian supermarkets to get the coursely ground Korean red peppers, or gochugaru, that is the critical ingredient in kimchi, one that cannot be substituted if your goal is to make the real deal. I'd already picked up the Napa cabbage, daikon and carrots, my preferred mix of vegetables—though the recipe just calls for five pounds of whatever suits your tastes.
Remarkably simple, Denise's family recipe is fairly mild as kimchi goes, confirmed when her relatives sampled my second attempt in which I'd upped the cayenne quotient, making it more like the version I'd had in Korea. Mind you, they liked it, but as her Aunt Else said afterwards, clapping me on the shoulder, "You make it like a Korean would!"
High praise, indeed!
Kimchi (Kim Chee)
Adapted from Betty Ann della Santina's recipe by her daughter, Cynthia Forsberg.
For the brined vegetables, any of the following, about five pounds total: Daikon, shredded or chunked Napa or green cabbage, chunked
After brining the vegetables above overnight, add as many of these as you want: Green onions, sliced in half or quarters lengthwise, cut crosswise in 2 to 3-inch lengths Yellow onions, chunked Carrots, shredded
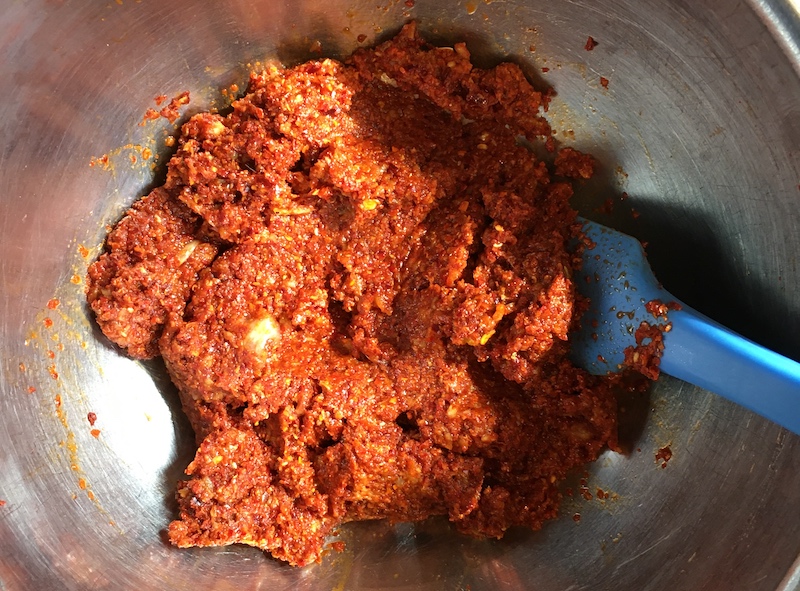
For the paste: 1/2 c. fine to medium crushed Korean red pepper flakes (gochugaru) 3-inch piece ginger peeled and grated (with juice) 5-7 large juicy garlic cloves, crushed 2-3 Tbsp. shrimp powder, shrimp paste, or fish sauce, or a combination 1-3 tsp. ground cayenne pepper or red pepper flakes (optional, depending on your heat tolerance) 2 tsp. sugar 1/2 c. water (only enough to make into paste)
Soak cabbage and daikon in brine of 1 c. salt mixed in one gallon water for 14-24 hours, making sure they stay submerged in the brine. Do this by placing a plate on top of them or half-filling a gallon zip-lock bag with water and placing that on top of the vegetables. The next day, rinse thoroughly in cold water. Drain vegetables and press out most of the remaining water.
Red pepper paste.
Mix together red pepper (gochugaru), grated ginger, crushed garlic, shrimp powder (or fish sauce), cayenne (if using) and sugar in a large bowl with just enough water to make a thick paste.
Add brined and cut vegetables to the paste and mix thoroughly. Press into clean wide-mouth quart (or pint) jars. Press down firmly, allowing 1" space at top, and close the lid tightly, allow to ferment at least 24 to 36 hours on the counter.
[Fermentation time can vary depending on temperature and other factors. I allowed mine to sit in the basement for 5 to 7 days, and started to taste it after the third day until it had developed the "funky" taste I wanted. - KB]

 But to tell the story of the book, we need to go back to 1980. That's when Sami Scripter, the coordinator of the talented and gifted program at Rigler Elementary School in Portland, met Sheng Yang, a young Hmong (pron. "mong") immigrant, in her English as a Second Language class. Scripter's desk was in one corner of the room, and she was taken with the inquisitive and self-possessed 11-year-old.

 Lately I've found some mighty meaty collars, almost like a fish steak with wings, at
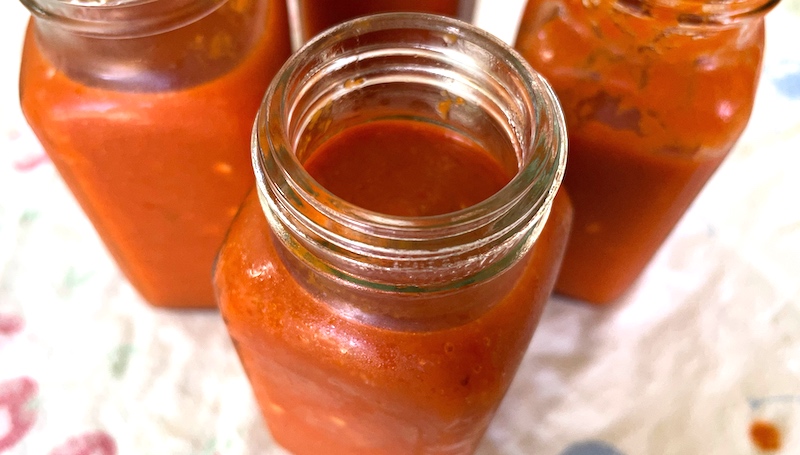


 There are Nims' recent single-subject seafood books, including
 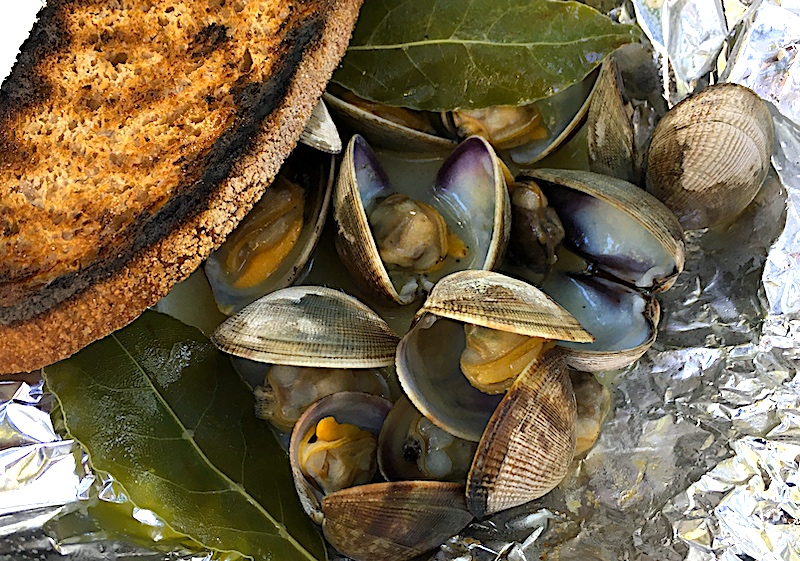 You can meet this culinary wonder woman this weekend at two events in Portland where she's bringing her new book,