Celebrating at Home: Simple Salmon Dinner

It's a birthday. It's an anniversary. It's a special occasion and right now, because of a nationwide pandemic, all the restaurants in town are closed. There is the option of supporting a local restaurant and ordering takeout, but the idea of going out and having to do even more Lady Macbeth-level handwashing before, during and after is dread on a whole new level.

So now's the time to go to the freezer and haul out one of those sides of salmon you packaged up when the stores were offering to butcher whole fish at a fraction of the price per pound they normally charge. (If you didn't do this, put it on your list for next season.) Simply thaw it, slice it into pieces, mix up the marinade below and put in the fridge for an hour or more, then broil it briefly—you'll have a fancy restaurant-level dinner that'll make anyone feel celebrated, pandemic or not.

I'd suggest a bright, lemon-inflected risotto and a creamy miso-dressed salad with, maybe, a deceptively simple apple galette for dessert, but I'll leave those decisions up to you. The point being, of course, to feed people well and make them feel loved, as it is any time, but especially now.

Roasted Miso-glazed Salmon

1 whole salmon filet
1/4 c. white miso (I'm in love with Jorinji miso)
1/4 c. canola oil
1 Tbsp. sesame oil
1 Tbsp. regular honey
1 Tbsp. rice vinegar
1 Tbsp. soy sauce
1 Tbsp. grated ginger

Preheat oven to 425°.

Place all ingredients in medium-sized mixing bowl, whisking as you add each one.

If you are starting with a whole filet of salmon, slice it crosswise into 2-inch pieces. (The marinade would also be great with a salmon roast, larger filets or steaks, though cooking times listed below may be different.) Place the pieces into a gallon zip-lock bag and add the marinade. Gently massage the bag to distribute the marinade evenly and place the bag in a bowl in the refrigerator for at least one hour (I allowed 3 hours for mine).

Place parchment paper in the bottom of a large sheet pan or roasting pan. Remove the salmon filets from the bag and place them skin-side down on the parchment, leaving some space between them. Put the pan on the middle rack of the oven and roast for 3-4 minutes per inch of thickness of the filets (3 minutes will be more rare, 4 minutes will be more well done). When the filets are cooked, remove the pan from the oven and set aside. Set the oven on broil and allow a couple of minutes for the broiler to heat. Place the pan of filets back in the oven. When the filets are slightly caramelized, remove from the oven and serve.

Thanks to Michele Lee Bernstein for the Lady Macbeth turn of phrase above. So apt, as my poor, cracked hands can attest!

No Waste: Making Vinegar from Apple Peels!

Here in Portland, especially in our increasingly warm summers, we know that yeasty, vinegary smell whenever we go out to dump our compost in the bin the city provides. (Portland has had curbside composting since 2005 when the city developed the Portland Composts program that required city garbage companies to offer it.) Well, those intense olfactory experiences had me pondering how to make my own vinegar, especially since I've been learning about fermentation lately, and discovering how incredibly simple it is.

Looking up a few vinegar how-to websites made it even more of a slap-myself moment. Being the cautious sort, I decided to start small and see how it went, but since I'd just bought a few apples for pie, the supplies for a small batch—apple peels and cores—were readily at hand.

As with most fermentation projects, it takes patience. As in waiting a month until you know if your vinegar experiment has yielded a desirable result, which is the hardest part of the process (at least for me). Fortunately this one, when I strained out the solids, gave about a cup of pink-tinged, delicately apple-perfumed vinegar (top photo) that will be lovely sprinkled on soft lettuce salads or to give a light acidic touch to other dishes.

It gives me the courage to try again with a larger batch, maybe with another fruit or vegetable, so stay tuned!

Apple Vinegar

Quart wide-mouth jar
Peels and cores from four or five organic apples
2 1/2 Tbsp. sugar
2 1/2 c. boiling water

Bring the water to a boil and stir in the sugar until dissolved.

Pack the jar 3/4 full of apple peels and cores and pour the sugar water over the top to fill the jar to the shoulders. Use a chopstick to poke the submerged apple peels and dislodge air bubbles. Refill the jar with more sugar water if necessary. The apple bits should stay submerged, so place a canning weight or smaller jar inside if necessary to hold them down.

Place a square of coffee filter or several layers of cheesecloth over the jar and secure with a rubber band or canning ring. Place in cool, dark place for one month, checking to make sure no mold is forming.

The contents may get cloudy or a SCOBY (vinegar mother) may form, but that's normal. Taste the vinegar after 4 weeks and, if it's to your liking, strain out solids, place a lid on it and store in refrigerator.

Winter Warmer: Lentils with Ground Pork and Radicchio

"I’m duty-bound to eat lentils on San Silvestro (New Year’s Eve). Why? Because each tiny legume represents another coin added to my treasure chest in the year ahead and if I don’t consume lentils, well, poverty inevitably will loom."

Writer and author Nancy Harmon Jenkins, who lives part-time in her hometown of Camden on Maine's charming coast and a portion of every year among her beloved olive trees in a tiny Tuscan village, lives my dream life. She is completely at home in both places, speaking both Downeast-ese and Italian, and is fluent in the cuisines of both, as well.

Her recent ode to the tradition of eating legumes at the turn of the year to assure prosperity in the year ahead captured me, so much so that when I saw lentils in the bulk bin at the store, I had to buy a pound to try them out.

For me, lentils always meant the brown lentils ubiquitous in every natural foods cookbook and on every hippie café menu during my young adulthood. Hearty, for sure, and marvelous when paired with a beefy stock and roasted tomatoes, I loved the flavor but wished they had a sturdier texture since, when cooked, they tended to moosh up into a dal-like consistency (not that there's anything wrong with that, as the saying goes…).

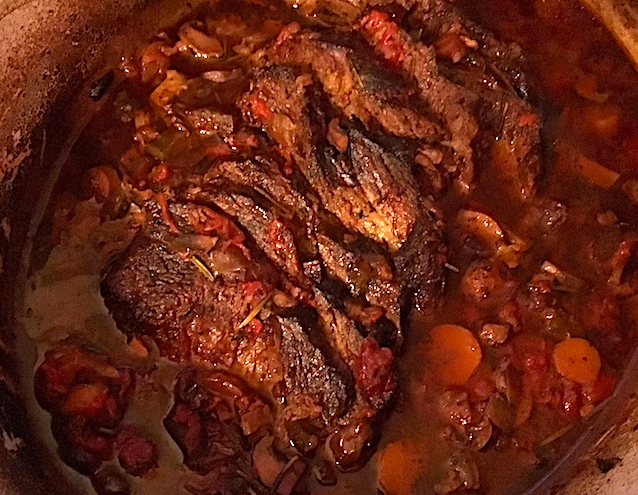
So when Nancy wrote that these lentils "are incomparably sweet and hold up well, not disintegrating when they’re simmered for 30 to 40 minutes," I was all in. I had a vision of a meaty, slightly brothy stew with tomatoes (see above), but also featuring some hefty, simmered greens for color and texture. Having just processed a half pig, I used a pork stock to simmer the lentils and ground pork for the meat, but having no kale or chard in the fridge (!) I decided to use a small head of treviso in a nod to Nancy's Tuscan side.

The resulting hearty winter stew was a rich counterpoint to the blustery cold winter weather outside, and I'd recommend it for your table any time you have a need to feel prosperous, indeed.

Lentilles de Puy with Ground Pork and Radicchio

1 lb. Lentilles de Puy
1 qt. stock (chicken, pork, vegetable, whey or simply water)
2 bay leaves
2 Tbsp. olive oil
1 lb. ground pork
1 onion, chopped in 1/2" dice
1 tsp. fennel pollen
1 Tbsp. dried oregano
4 cloves garlic, roughly chopped
2 c. (16 oz.) whole roasted tomatoes
1 head treviso radicchio, sliced crosswise into 1"strips
2 Tbsp. fermented cayenne peppers or other chopped, roasted red peppers
1/8 tsp. ground cayenne (optional)
1 Tbsp. red wine vinegar
2 tsp. salt or to taste

Bring the stock to a boil and add the lentils and bay leaves. When the stock returns to a boil, reduce heat and simmer until lentils are tender, about 30-40 min. When lentils are done, strain and cool, reserving stock in a separate bowl.

While lentils cook, heat olive oil in Dutch oven over medium-high heat. When the oil shimmers, add ground pork and brown. Add onion to the pork and sauté until tender, then add garlic, fennel pollen and oregano and heat briefly. Add tomatoes, radicchio, peppers and vinegar and sauté briefly. Simmer over low heat, adding enough of the reserved stock to keep the stew from drying out  too much (I used it all), at least a half hour and preferably an hour in order for the flavors to meld. Also terrific reheated the next day. Serve with a loaf of artisan bread and good red wine—preferably Italian, right, Nancy?

A Festival to Celebrate Winter (Plus Celeriac Soup)!

Just about exactly a month ago I posted about an event called the Fill Your Pantry and Winter Vegetable Sagra, a gathering of farmers, ranchers, plant breeders and folks who care about where their food comes from and how it’s grown. It offers the community a chance to order in bulk from local producers and pick up those orders at the event, but since most of the producers bring some extra meat, produce and bulk items along, it becomes a giant community farmers' market.

Mona Johnson of Tournant.

Portland chefs known for their support of local producers—Chef Timothy Wastell  Katherine Deumling of Cook With What You Have; Jaret Foster and Mona Johnson of Tournant; Jim Dixon of Real Good Food; and Lola Milholland of Umi Organic Noodles, among others—cook up samples of dishes like radicchio Caesar salad, yakisoba with vegetables, bean and cabbage stew and creamy celeriac soup (recipe below).

So much goodness!

This year the event was literally packed cheek by jowl with people shopping, eating, talking and, in some cases, even singing the praises of our local bounty. I can't tell you how uplifting and inspiring it is to see your community come together to enjoy and celebrate the goodness that is produced here. The atmosphere was absolutely electric!

Thanks to Friends of Family Farmers, the Culinary Breeding Network and Oregon State University Small Farms Program for sponsoring this outstanding gathering.

All in the [Apiaceae] Family Celeriac Soup

By Mona Johnson and Jaret Foster of Tournant

This creamy, comforting celeriac soup is served with a supporting cast of characters from the same Apiaceae family to which it belongs. Celery, parsley, fennel and caraway all play a role in complementing celeriac's mild, earthy flavor. If time is short, feel free to top with only the ghee or gremolata, or skip both and just swirl in a dollop of creme fraiche or a drizzle of brown butter.

For the celeriac soup:
3 Tbsp. butter
2 medium leeks (white and light green parts only), halved lengthwise, sliced into thin half moons, rinsed and drained
2 medium fennel bulbs, halved lengthwise, thinly sliced
2 medium celery roots (about 1 1/2 lbs.), trimmed, peeled and chopped in 1/2" dice
1 c. dry white wine
1 Tbsp. kosher salt, plus more to taste
2 bay leaves
2 sprigs fresh thyme
6 c. water
1/2 c. heavy cream

For the smoky caraway ghee:
4 Tbsp. ghee
1 tsp. caraway seeds
1 tsp. smoked paprika

For the celery gremolata:
1/4 c. finely chopped Italian parsley
2 cloves minced garlic
2 Tbsp. finely diced celery
Grated zest of 1 lemon

To make the soup, melt butter in a large heavy-bottomed pot over medium heat. Add leeks and cook until beginning to soften, about 2-3 minutes. Add fennel and cook until softened, stirring occasionally, about 8-10 minutes. Add the celery root to the pot along with salt, bay leaves and thyme, stirring to combine. Add wine and simmer until mostly evaporated. Add water and bring to a simmer. Reduce heat to low and continue simmering until all vegetables are soft enough to purée, about 10-12 minutes.

Purée soup with an immersion blender (or in batches in a blender) until very smooth. Heat purée over medium low heat, then stir in heavy cream. Taste for seasoning and consistency, adding more salt, cream or water if needed for desired taste and texture.

To make the ghee, melt ghee in a small saucepan over low heat. Add caraway seeds and smoked paprika and cook, stirring occasionally, about 4 minutes, being careful not to scorch spices. Remove from heat, let cool, then strain through a fine mesh strainer, discarding solids.

For the gremolata, add all ingredients to a small bowl, mixing to combine.

To serve, ladle soup into shallow bowls, swirl with infused ghee and sprinkle with gremolata.

Celebrate Local Cranberries with This Cranberry Tart

Oregon cranberries are one of those somewhat under-the-radar crops though, in fact, cranberries are native to the Northwest. The berries have been harvested by indigenous people for millenia and were (and still are) used fresh and dried in many traditional foods. They were traded widely among First Nation people on traditional trade routes, along with salmon and other products.

Cranberry bog.

Cranberries were first grown commercially in Oregon by Charles McFarlin, who settled in Coos County after failing, like so many others, to make a fortune during the Gold Rush of the late 1800s. He planted vines he brought from Massachusetts, later developing a variety known as McFarlin that is still grown today.

Most of the state's cranberries are grown in Coos and Curry counties on the South Coast and, at nearly 3,000 acres and accounting for 95 percent of the state's production, it's just five percent of the nation's commercial harvest. Most cranberry growers are heavily reliant on pesticides and herbicides to control insects and weeds that can devastate crops, but there's a growing number of farmers who are transitioning to organic methods.

Cranberry harvest.

While small in number, organic cranberry farmers are joining forces and sharing successes and challenges, according to an article from Oregon Tilth, one of the region's largest organic certifying agencies. It says that state agricultural agencies, which normally provide support to farmers, are almost exclusively geared to conventional growers and aren't up to speed on the specific needs and challenges of organic farmers, so this homegrown network of organic growers has become critical to the success and availability of locally grown, organic cranberries.

Cranberries are a family affair.

“It’s been a steep learning curve,” according to cranberry farmer Richard Schmidt, who is quoted in the article and, with his wife, Pam Schmidt, owns Schmidt Berries in Bandon. “We’ve really relied on our neighbor, Ty Vincent, and his dad, Bill Vincent [of Vincent Family Cranberries]. They were the ones that put the farm into transition [to organic] after 30-plus years of traditional practice. It’s their expertise and practical experience that have made our new inexperienced farmer reality much easier. They are the essence of succession in a community. We’d never really been farmers before, and had never lived or farmed on the Oregon coast…we mainly rely on our neighbors. We’ll help them harvest, and they help us harvest. They’re organic too, so we can share equipment, which is kind of nice.”

You can find local, organic cranberries at some stores and area farmers' markets, and I can't say enough about the flavor of these ruby-colored jewels in jams, chutneys, sauces and, of course, pastries. This recipe for a cranberry tart is one of those can't-miss, smash hits that has been the raved-about culmination of two dinners so far this season!

Cranberry Tart

For the pastry:
1 1/2 c. all-purpose flour
1 1/2 tsp. sugar
1/4 tsp. salt
1 stick plus 2 tablespoons cold unsalted butter, cut into small pieces
1/3 c. ice water

For the filling:
1 lb. cranberries, preferably locally grown
1 scant c. sugar
2 Tbsp. orange liqueur (triple sec, Cointreau, Grand Marnier, etc.)
2 Tbsp. cornstarch
Zest of 1/2 large orange
Egg white (optional)

Preheat the oven to 375°.

In a food processor, combine the flour with the sugar, salt and butter and process for about 5 seconds. With the processor running, drizzle in the ice water over the flour mixture until the pastry just begins to come together, about 10 seconds. Transfer the pastry to a work surface, gather it together and pat into a disk. Wrap the pastry in plastic or wax paper and refrigerate until chilled, about one hour.

Just before the dough finishes chilling, place cranberries in a large bowl and add sugar, liqueur, cornstarch and orange zest. Remove dough from refrigerator and place on well-floured surface. Roll out into large round approximately 14-15" in diameter. Transfer to large, parchment-covered baking sheet (I usually fold the dough in half very carefully, transfer it to the sheet and unfold it). Brush the bottom of the dough with a very thin coating of egg white to within 4" of the edge. Place cranberry filling in the middle, keeping it within 3-4" of the edge of the dough. Lift the edges of the dough and fold over on top of filling, pleating it slightly to keep the tart's rounded shape. An option here is to brush the dough with egg white and sprinkle it with sugar to give it a shiny appearance.

Place in oven and bake at 375° for one hour or so until filling is bubbling and crust is golden.

Photo of cranberry bog from USDA. Photos of harvest from Vincent Family Cranberries.

Eggplant Parmesan My Mother Would Love

Nothing's better on a crisp, blustery fall day than something cheesy, melty and creamy. Grilled cheese sandwiches with a steaming bowl of cream of tomato soup. A multi-layered lasagne infused with sauce, mushrooms and meat, its edges crusted with caramelized cheese. An eggplant parmesan, the meltingly tender purple-rimmed slices stacked in their casserole as carefully as a fieldstone wall, held together by roasted tomatoes and parmesan.

The definition of comfort.

My go-to recipe for eggplant parmesan was one from "The Cooking of Italy," part of the Time-Life "Foods of the World" series that my mother had subscribed to when I was a child. It calls for salting the sliced eggplant to draw out moisture, then frying the slices in olive oil. It says to somehow limit the amount of oil, a task I've found impossible since the slices soak up oil like a shaggy dog in the rain. Plus it takes way too long to do, at least for this impatient cook.

That was when I started searching online and found a recipe by Food52's Nancy Jo that called for roasting the slices in the oven, which made much more sense since I could cook all of them at once. (Thanks, Nancy!)

Roasting, not frying? Brilliant!

The Time-Life recipe is extremely simple—other than its time-consuming eggplant prep—only calling for five ingredients: the eggplant, salt, flour, tomato sauce and cheese. I dispensed with the tomato sauce recipe it uses, since at the time it was published, cooks like my mother would have used little cans of not-very-flavorful industrial tomatoes that required some "doctoring" (another common phrase back in the day). I had my roasted Astiana tomatoes that require no zhooshing other than a few slices of garlic.

I had picked up some aged provolone to accompany the Parmegiano Reggiano and Pecorino Romano we always have on hand, so those were mixed and layered with the roasted slices and sauce. The result was a bubbling, rich, gooey, hearty casserole that I think my mom would have approved of.

Eggplant Parmesan

3 lbs. eggplant
6 oz. Parmigiano Reggiano, Pecorino Romano and/or aged Provolone, grated*
1 qt. roasted tomatoes
3 garlic cloves
Flour
Salt

Preheat oven to 450°.

Slice eggplants lengthwise into 1/4" slices. Salt both sides and place in single layer on paper towels to drain, at least 30 min. Pat dry and dredge in flour, knocking off extra flour that may be clinging to the slices. Line baking sheet(s) with parchment and lay the eggplant slices on the sheet in a single layer, lightly drizzling them with olive oil. Bake eggplant slices for 15 min., then flip slices over and bake another 15 min. Remove from oven and reduce oven heat to 400°.

While eggplant bakes, slice garlic cloves thinly. Heat olive oil in small skillet over medium heat. When the oil shimmers, add garlic slices and heat briefly, then add roasted tomatoes. When sauce just begins to boil, reduce heat and simmer.

Oil casserole or baking dish. Add a thin layer of tomato sauce in the bottom of the dish. Place a single layer of eggplant slices on it, then a thin scattering of grated cheese, then another layer of sauce. Repeat until all the eggplant is used, then top with a final layer of sauce and cheese.

Bake for 30 min. at 400° until bubbling.

* Can be a mix of any of these cheeses, though I used roughly half provolone, half Romano/Parmesan. Also (note to self) a smoked, aged provolone might be, as they say in Italian, perfetto!

Company's Coming: Gluten-Free Fruit Crisp, Anyone?

We've all been there. A good friend or beloved relative is coming to dinner, someone who has a dietary restriction, whether chosen—vegan, wheat-free, vegetarian, religious—or unchosen, like an allergy to nuts, wheat, garlic, sugar, etc., or an intolerance to certain foods. And I don't know about you, but my initail reaction is to freeze up when it comes to planning the menu.

Gluten-free crumble topping? Done!

This happened recently when a couple we've known for years were coming over, one of whom has ascertained over the years that her system doesn't respond well to gluten. It's not celiac disease, just as my husband's intolerance to lactose isn't life-threatening; it's just something that makes for a "rumbly tumbly," as Winnie-the-Pooh would say.

The main dish was easy—they're meat-eaters, and I'd just bought a grass-fed sirloin tip roast from Carman Ranch that I was planning to slice open, slather with a sorrel-shallot-rosemary-fennel pollen mixture, then roll up and rotisserie. An Astiana tomato risotto using tomato stock from the 120 pounds I'd roasted this summer, and a castelfranco chicory salad with Caesar dressing were easy decisions.

Ready to pop in the oven.

But then…dessert.

Virtually every dessert we normally make has some flour in it. Tarts, pies, crisps, cakes, all flour-dependent. Sorbet was an option, made with the scads of berries I had squirreled away in the freezer, but we were short on time for it to freeze properly. A trip to the store to buy a commercial sorbet was my back-pocket solution, but could I come up with a gluten-free dessert that wouldn't require (another) trip to the store? (The short on time element, remember?)

A crisp for the ages.

A search for "gluten free crumble" led to a recipe on the Kitchn website for a gluten-free topping that merely required grinding up oats in the food processor until they were the consistency of flour. Score!

But their crumble recipe (in my humble opinion) resulted in a clumpy product that didn't appeal to me, so I ground the oats in the processor as they suggested, but then used the "flour" as a substitute for the flour called for in my family's crisp recipe, along with the usual suspects: brown sugar, oats, cinnamon and butter or margarine.

The result was a virtual identical twin of my family's recipe, especially glorious because I used a combination of frozen marionberries from our neighbor's garden and equally incredible Chester blackberries from Ayers Creek Farm—of course the splash of Cointreau in the berries didn't hurt, either. And for the full-gluten experience, you can feel free to substitute one cup of all-purpose flour for the oat flour below.

Gluten-Free Berry Crisp

For the topping:
1 c. oat flour (see instructions, below)
3/4 c. uncooked rolled oats
1 c. brown sugar
1 Tbsp. cinnamon
1/2 c. melted butter or margarine

For the filling:
4-6 c. berries
1 c. sugar
2 Tbsp. cornstarch
1/4 c. Cointreau, triple sec or eau de vie

Make the oat flour by processing 1 1/4 cups of uncooked rolled oats in the food processor until it has a flour-like consistency. Mix the oat flour together with the other dry ingredients in a medium-sized bowl. Pour in melted butter or margarine and stir with fork to combine. Set aside.

Place berries in large mixing bowl. Add sugar, liqueur and cornstarch and mix thoroughly. Put in 9” by 12” baking pan. Scatter topping mixture over the top and bake in 350 degree oven for 50 min. to 1 hr. until bubbling.

Fermentation Fascination: DIY Hot Sauce

I had this whole plan, see? I'd been searching without success for the thick-skinned, thick-walled, fleshy espelette peppers like the ones I found four years ago from Viridian Farms—which is unfortunately no longer in existence—and used to such great effect to make some kick-ass, fruity, smoky harissa. In the intervening years I'd tried espelette peppers from various area farms, but the fruit, while it had the requisite thick skin, was uniformly thin-fleshed. When roasted, the flesh stuck to the skins like glue, making peeling arduous and not worth it in terms of resulting volume.

Harissa.

This year I was determined to try again to find those perfect peppers and purchased peppers from two more farms. Again, sad trombones.

With the first couple of pounds I managed to make a very small batch of harissa, but the next two pounds were just not going to be worth the work. Not wanting to waste their fruity, biting heat, I was casting about for good uses. Most suggestions were to dry and grind them to a powder, but then I ran across farmer and author Josh Volk's Instagram photo of chopped peppers that he'd fermented in a 3.5 percent salt mixture.

Bubbling away.

Aha!

A little back-and-forth with Josh led me to chop the two pounds of peppers in the food processor, add the salt, pack them in a Mason jar, set the jar in a dish in the basement, then put a zip-lock bag of water inside the jar like a pickling weight, which allows it to breathe (and overflow if necessary). Putting a lid on isn't necessary, but if you do, make sure it isn't screwed on tight—it needs to breathe!

Hank Shaw's sour corn.

After four days I saw bubbles and a little puddle underneath the jar, which indicated that fermentation was, indeed, occurring, so I left it for a few more days. Recipes say you can allow it to ferment for as long as a month, but being the impatient person I am, I gave it a week before bringing it upstairs to whiz in the blender, adding water to thin it to a sauce-like consistency.

The result? Well, we used it as a hot sauce on pork tacos along with some of Hank Shaw's sour corn that I'd made earlier and we thought it was great. But the real test came when I gave some to my neighbor Ivy Manning,  a hot sauce aficionado as well as author of countless authoritative cookbooks, for her expert opinion. Her reaction? "Can you just pour some out on the counter so I can roll in it?"

'Nuff said.

Miso Happy: Creamy Miso Vinaigrette

Oil and vinegar. Oil and lemon. Oil and balsamic. Mustard vinaigrette on lively greens tossed for the briefest amount of time possible and showered with crunchy salt.

These dressings make a regular appearance at our table, but every now and then I crave the kind of tangy, smooth and creamy dressings I grew up with. My mother's recipe was based on my grandmother's go-to standard, which started with mayonnaise and a squirt of ketchup—an ingredient almost as ubiquitous as cream of mushroom soup in my mom's repertoire—plus a sprinkle of thyme and basil with a pinch of garlic powder, thinned with a splash of milk.

So when I've got some sturdy heads of romaine, escarole or chicories that can stand up to heftier dressings, my thoughts turn to Caesar dressings loaded with anchovy or, lately, miso mixed with mayonnaise (hey Mom!), studded with garlic and a dollop of mustard.

A small Portland-based miso company, Jorinji, makes authentic red and white unpasteurized miso from non-GMO soybeans fermented from six months to three years. Jorinji products are widely available at area supermarkets and last basically forever in the fridge. A little goes a long way, so get some and add a subtle hint of fabulous umami to your marinades, stir-fries, soups and braises.

This vinaigrette can also double as a dip for vegetables and fried foods, or as a drizzle over meats, fish and roasted veggies, and it's a splashy twist on a traditional coleslaw dressing.

Creamy Miso Vinaigrette

3 Tbsp. mayonnaise
1 Tbsp. Dijon mustard
2 Tbsp. rice vinegar
1 clove garlic, pressed in a garlic press
1 Tbsp. white miso
Herbs, finely chopped (I like tarragon or thyme as well as some chopped chives)
1 tsp. honey (optional)

Combine ingredients and stir until smooth.

Summer Quencher: Classic Gin & Tonic

Whenever my mother would visit, the first thing we did was to sit her down and hand her a gin and tonic. You might say it was the family's signature cocktail, since even before I had been introduced to the joys of a good gin, my father had instructed me in the art of making a decent gin and tonic.

To wit: a glass two-thirds full of ice, two fingers of clear-as-an-icy-mountain stream gin poured over said ice, then fill with tonic—whether plain or artisanal, it made no difference. A final touch was a wedge of lime squeezed over the top and dropped into the glass. A brief stir with a cocktail spoon (or even a finger—the alcohol would vanquish any germ that dared intrude) and it was done. No recipe, no finicky measuring of ingredients. Just gin, tonic and lime over ice was all that was required.

Some of the aunties preferred a little less gin, a little more tonic—that was fine. Some uncles may have tipped a splash more gin in the mix; no shame there, either. Ratios of two parts gin to five parts tonic may be touted by rules-bound aficonados, but in our family a perfect gin and tonic was always a personal matter, a ratio determined when the complex variables of mood, external and internal temperature, maybe even altitude (who knows?) came into play.

The one rule that always applied? Sip and enjoy.

Classic Gin and Tonic

Gin
Tonic
Lime wedge

Fill glass 3/4 full of ice. Pour in two fingers of gin. Fill with tonic. Squeeze lime wedge over top and drop it in the glass. Briefly stir to combine.


Elderflower Gin and Tonic

Gin
Tonic
1 to 1 1/2 cocktail spoons elderflower syrup (equivalent to 1 to 1 1/2 tsp.)
Lime wedge

Fill glass 3/4 full of ice. Pour in two fingers of gin and add elderflower syrup. Fill with tonic. Squeeze lime wedge over top and drop it in the glass. Briefly stir to combine