In the Pacific Northwest, early summer and late spring can feel like fraternal twins. So much alike and yet, at the same time, so different. Just as you're ready to toss your hoodies and jeans into the bottom drawer of the dresser until you reluctantly dig them out again in the fall, a cool maritime front blows in from the coast causing the mercury to plummet 20 degrees.
In cases like that—and I'm not speaking hyperbolically, since today's 94 degrees is predicted to be a cool 75 tomorrow—it's wise to have a good soup recipe sequestered in your back pocket when the chillier of our early summer twins is in residence. Luckily for me, I found an extra jar of my favorite local kimchi hanging out in the back of the fridge (we're out of my homemade kimchi, a situation soon to be remedied in about a month when Napa cabbage is available at the farmers' market) along with a tub of local Ota tofu and just enough leftover roasted chicken to shred into it.
Oddly, in searching through recipes online, I came across one from Joanne Molinaro, aka The Korean Vegan, that called for black beans to be added to this most Korean of stews. Coincidentally I had just cooked up a big pot of those legumes and, since Joanne said it was okey-doke to add them, I did, though not only for the added fiber alone. Just two cups of beans added a pop of color and a bit of that bean-y texture that complemented the crunch of the fermented cabbage quite nicely. It might just be a combo I'll try in other dishes.
Kimchi Jjigae
1 Tbsp. sesame oil 2 Tbsp. gochugaru 1/2 c. diced onion 4 green onions, sliced crosswise into 1" pieces 3 cloves garlic, minced 1 medium-sized potato, chopped into 1/2" dice 2-3 c. Napa kimchi (cut into bite-sized pieces) 3 Tbsp. gochujang 2 Tbsp. soy sauce 1/2 c. water 4 c. stock (chicken or vegetable) 1 16-oz. block medium firm tofu, diced 2 c. cooked, drained black beans or 1 15-oz. can of black beans, drained 1-1 1/2 c. shredded chicken (optional)
Heat a Dutch oven or your favorite soup pot over medium heat, then add sesame oil until it shimmers. Add gochugaru and cook for about one minute, then add onion and sauté until onions begin to become translucent. Add green onions and garlic, stirring often to keep the gochugaru from sticking to the bottom of the pot.
Add potatoes, kimchi, and gochujang, stirring to combine. Add water and soy sauce, stir, then add stock. Bring to a boil, reduce heat to low and simmer for 20 minutes. Add sliced tofu, black beans and shredded chicken, if using, return stew to a boil, reduce heat and simmer for 15 minutes. Serve with jasmine rice. Garnish with toasted sesame seeds, roasted unsalted peanuts or more finely sliced green onions if desired.
Early summer whets my appetite for what's to come in the Pacific Northwest: First to trickle in from our fields both cultivated and wild are the earliest greens—nettles, fiddleheads and fava tops among them—then comes asparagus, green garlic, early strawberries and the softest young lettuces, soon followed by the briefest appearance of our native, and much anticipated, Hood strawberries, along with fava beans, spinach, mustard greens and more exotic friends like agretti and komatsuna.
While local farmers are starting to worry about what's looking like a hot, dry summer requiring the trouble (and expense) of near-constant irrigating, the relatively mild spring was beneficial for getting a jump on planting, weeding and the growth of the tender seedlings that will be harvested later in the summer and fall. In his weekly newsletter to subscribers, my CSA farmer Aaron Nichols of Stoneboat Farm wrote:
"It's a mixed bag for the spring crops, some are coming on quick and very well (hello fava beans!) and others seem a bit behind (broccoli and cabbage) or are being very temperamental (we're looking at you radishes!). A lot of things we plan to have for a few weeks are wrapping up in one or two this spring but, so far, it's been fine as other things are ahead of schedule. I'm pretty worried for a hot summer but no point in borrowing that trouble now!"
Revel in the freshness of summer produce, but don't forget to preserve it for later!
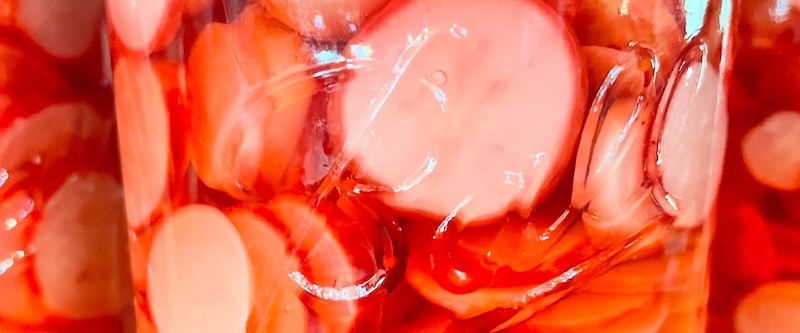
This season always gets my juices flowing for preserving the freshness of summer. After gorging myself on fresh strawberries and shortcakes, I turned around and made three batches of strawberry jam to replenish our dwindled supply from last summer, and I'm already anxiously anticipating the raspberries, blackberries and plums that are on the way. (Check out my hack for perfect fruit jam.) The radishes that Aaron mentioned above went into four jars of simple pickled radishes for our taco Tuesdays, and soon cucumbers will be sliced into rounds and given the hot brine treatment as well!
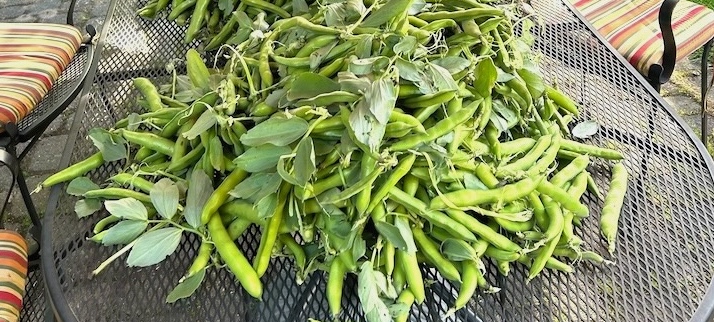
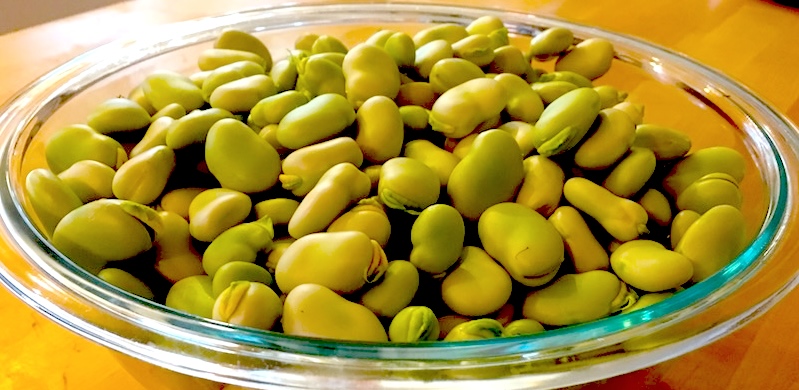
I love fava bean season so much that, at the first sign of the bundles of young green shoots on farmers' market tables in the spring, I get a little giddy thinking of them stir-fried with garlic and tossed with pasta and preserved lemon, or slathered with oil and roasted, served alongside a beautiful grilled, pasture-raised chicken thigh. Then there's the knowledge that in just a couple of weeks, it'll be time for the pods to start appearing, their strange, off-green, blobby exteriors revealing pale green kidney-shaped beans pillowed in a porous white cushion.
My neighbor Bill loves his favas and grows more than enough to share. Lucky me!
That's about when I remember that to prepare these little beany delights, I have to strip them out of their pods, boil them in a salty pot of water, then spend what seems like hours in the tedious task of popping them out of their skins to get a paltry—albeit decidedly delicious—pile of the bright green, shiny jewels.
In a post on her blog, she excoriates Americans who insist on peeling the skins from their beans:
"What a waste of time! What a waste of flavor!
"Where does this weird practice come from? I suspect from the French professional kitchen where chefs are constantly challenged to come up with new tricks and trucs to keep their enormous brigades de cuisine in operation. In Italy, where restaurant kitchens are run much more economically, no one has to dream up tasks—there are enough to go around and more.
"But why do Americans insist on this? Every food writer except one (me) says you have to peel beans. Then they go through elaborate rigmaroles to show you how to do it. No wonder fava beans are not exactly popular despite their magnificent, slightly earthy flavor, so very different from string beans or limas. Every spring or summer I feel like climbing up in the pulpit and shouting: YOU DON’T HAVE TO DO THAT—IN FACT, IT IS COUNTER-PRODUCTIVE!!!"
Toss the cooked beans with Oregon albacore and pasta…so simple, so delicious!
Which, as you might imagine, got my attention. And came in mighty handy when my neighbor called offering a grocery bag full of freshly harvested favas from his garden. Let me tell you, I never relished preparing beans more—just shuck, boil in a pot of salted water for ten minutes and they're ready!
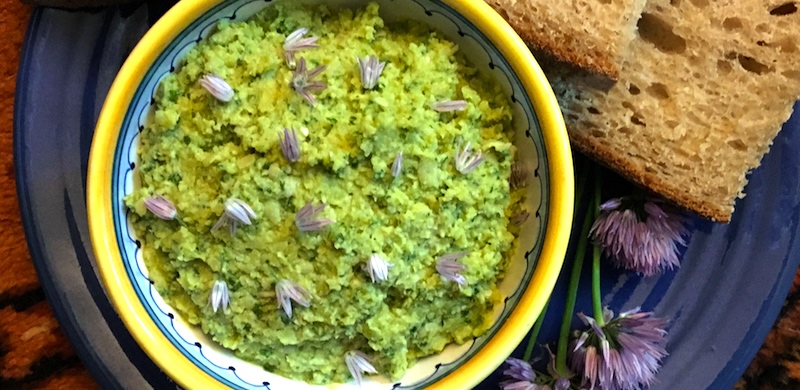
While there's a vast universe of serving suggestions, and more cultural trivia about these delicate denizens of early summer, for me, I used some of my neighbor Bill's beans tossed with preserved lemon and albacore, tossed with pasta, sprinkled with chive blossoms and chopped chives, then used the rest to make the following dip for guests. Though when everyone oohed and aahed over the amount of work it took to peel all those beans, I was torn about revealing my secret. (Psst…I did.)
Fava Bean Spread
3 c. shucked beans 2 cloves garlic 1/2 fennel bulb, cut in half, cored and roughly chopped 1/4 c. parsley, coarsely chopped 1/4 c. mint, coarsely chopped 1/3 c. fresh lemon juice 3-4 Tbsp. olive oil Salt, to taste
Bring a large pot of well-salted water to a boil. Drop in fava beans and cook for ten minutes. Drain and run under very cold water (or ice bath) until cool.
Put beans, garlic, fennel, parsley, mint and lemon juice into the bowl of a food processor. Turn on and while its running drizzle in olive oil until puréed. Adjust lemon juice and olive oil and add salt to taste. Serve with slices of rustic bread or crackers, or on toasted slices of baguette (à la bruschetta).
This article was written by Portland author Peggy Acott to celebrate the 30th anniversary of Growing Gardens.
Beginning in 1996 with a staff so small you could count them on one hand and still have fingers left over, Growing Gardens is today a robust group of nearly fifty, with program volunteers numbering more than a hundred. They are passionate and persistent in their goal to create a sustainable and equitable food system.
Here in Oregon, as in many regions of the country, hunger and food insecurity are on the rise in this time of perilous economic and political uncertainty, a condition that disproportionately impacts BIPOC and LGBTQIA-plus communities.
The Home Garden Program has created over 3,000 backyard gardens.
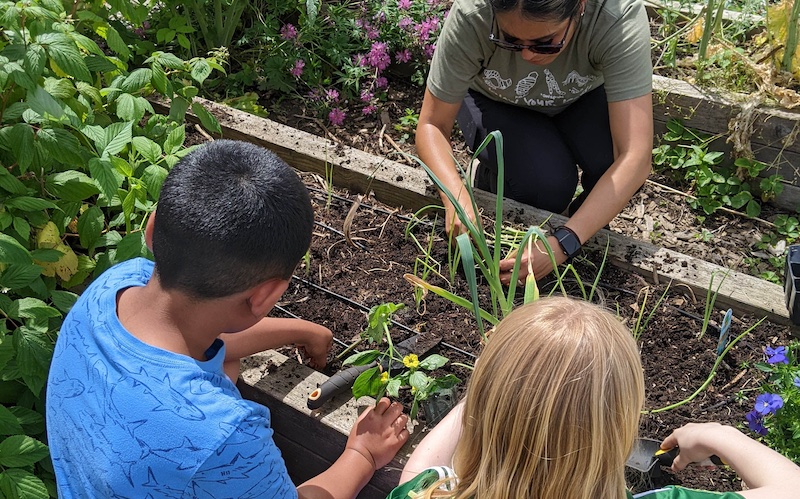
Growing Gardens confronts this imbalance in the food system head on, in very direct ways: The Home Garden Program, which has to date created over 3,000 backyard gardens; a school garden program for students from elementary through high school; and the Lettuce Grow Program, where over 1,500 incarcerated adults and juveniles have access to gardening and garden-based education, with the added benefit of learning job skills that can assist in the successful re-entry back into society.
One of the team members sums it up this way: “What we’re really building is so much more than gardens. We’re growing futures rooted in health, self-sufficiency, and deep community connection.”
Portland Youth Builders offers a program of high school completion, vocational training, counseling, and long term support.
When COVID erupted in 2020, the disruption and challenges of lockdowns and interrupted supply chains were immediate and far-reaching. In order to survive, the staff and volunteers employed a combination of online programming and strict distancing practices, and made at-home garden and plant-related projects for students while schools remained closed. It was a demanding and difficult period, but they were committed to keep their mission alive.
“Any nonprofit that survived and made it through was a huge success,” says Executive Director Jason Skipton. “We had to completely transform our programs, but we weren’t going to give up, because ‘No’ was not an answer we could give the community.”
Skipton explained that there had been energy and determination in both the local and national government to allocate funds and resources to help service organizations during the pandemic. But then, just when Skipton and his staff thought the struggle was behind them and were eagerly planning toward the future, the freezing of federal funds in early 2025 dealt them a devastating and demoralizing blow.
“The rug has been ripped out from under us. Now what we’re facing is a political pandemic,” says Skipton, “and we are fighting every day to maintain, be relevant, and keep the doors open.”
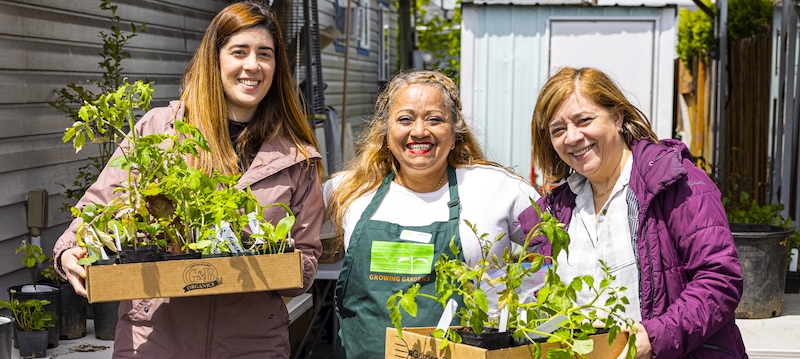
Growing Gardens partners with local businesses to help supply their program needs.
It has also created a domino effect among foundations and local government agencies that have become reluctant to provide money when they feel their own resources are in flux. But not all the news has been bad: In the spring of 2025, Hampton Lumber and Parr Lumber collaborated to deliver 20,000 linear board feet of lumber, enough to supply the organization with 100 percent of the lumber needed for the year.
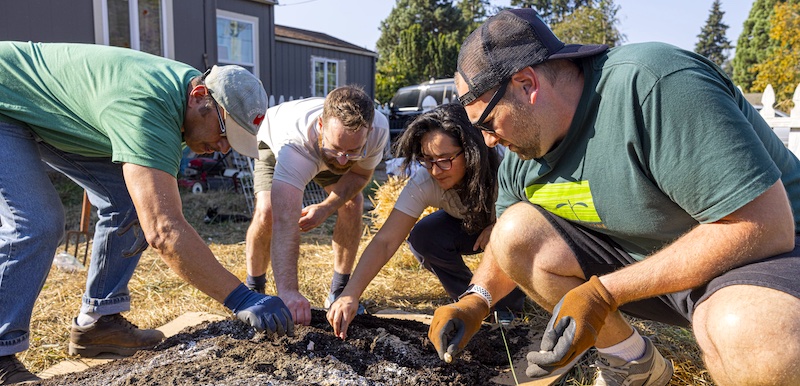
In 2023 an ambitious and far-reaching project—Community Empowerment Through Urban Food System Reliance—received a USDA grant to implement a greenhouse program that would support the development of a locally based food network for low-income and culturally specific communities, increasing their food security and sovereignty. To achieve that, Growing Gardens partnered with Feed’em Freedom Foundation (FFF)—a Black-led food system farming and food access hub—to build a 16’ by 90’ greenhouse at Multnomah County’s CROPS educational farm in Portland’s east county, where the FFF farm leases land. Five smaller greenhouses were also constructed and placed on the properties of selected Growing Gardens community organizers and volunteers. In the large greenhouse, vegetables and flowers will be started from seed. The Foundation will use sixty percent of the greenhouse space to raise plants for their farm and education programs, and Growing Gardens will use forty percent for the plants that will eventually be moved to the five neighborhood greenhouses and distributed to the participants in their programs.
The planning and construction phase has been completed, assisted in large part by the youth of the nonprofit Portland Youth Builders. “They were amazing,” says Program Director Jordana Mendonça Valdés. “We couldn’t have accomplished what we did without them.”
More than 1,500 incarcerated adults and juveniles access gardening and garden-based education through the Lettuce Grow program.
The next phase is teaching the participants about topics like crop planning and greenhouse management practices. It is a challenge to figure out how to best combine the various resources and people involved in order to satisfy everyone’s needs. But Valdés is optimistic. “In the end, it’s the same vision…communities having a say over what they want to eat, nourishing themselves, their families and their neighbors.”
It is the power of this vision, and all the people they work with and get to know, that keeps Skipton and his team going in spite of the setbacks: It’s the delighted look on children’s faces when they discover something delicious that they grew themselves; it’s the news that a man released from his time in prison has the skills to enable him to get a job at a plant nursery; it is the pride of home gardeners who are able to grow and provide fresh food for their families, many of whom then in turn become volunteer mentors to other new gardeners in the Home Garden Program.
Antonio was a first-time participant in the Home Garden program in 2013. Over the next twelve years, his role evolved from volunteer and neighborhood garden advisor to paid staff member, and today he is the Home Garden Community Manager. “Everything I do is to support the community,” he told me. “I wish we could meet all their needs.”
This spring the organization is facing their biggest challenge to date. For reasons that span the upheavals and continuing political and economic climate, funding on every level—federal, state, city, foundations, corporations and individuals—is waning significantly and, in too many cases, cancelled entirely. Often this is occurring with little notice, from funding sources that were thought to be already securely in place. This is a devastating turn of events, one that has the team at Growing Gardens scrambling for solid ground.
“There is a financial shredding at every level of support,” says Skipton. Growing Gardens has weathered an incredible number of challenges in these last few years, where many non-profit organizations have been forced out of existence. Skipton and his staff are working hard to find ways to keep the organization not only alive but thriving into the future.
There is the famous saying: “Give a man a fish and he will eat for a day. Teach him to fish, and he will eat for a lifetime.” But, the ongoing work of Growing Gardens insists we consider the next step in this equation: If he then teaches his neighbors to fish, the entire community will eat for a lifetime.
To commemorate their 30th anniversary, Growing Gardens will serve up their celebratory dinner and fundraiser, Chef in Your Garden, on Saturday, Aug. 29th. This year’s event will showcase some of the indigenous food and culture of Oregon. Tickets will be available for purchase on their website, beginning in June. Sign up for their newsletter to be notified.
There are certain vegetables that I am embarrassed to admit I have had almost no experience with. I could blame my upbringing in small town Oregon in the middle of the last century where iceberg lettuce was the only fresh green in Piggly Wiggly's produce aisle. Or my father and brothers who considered any vegetable outside of frozen peas and creamed corn to be potentially poisonous, so much so that my mother rarely dared to venture further afield.
But there was that magical day when she somehow—call it a mistake, a lapse in judgement, or maybe a frozen food-aisle epiphany—came home from the store with a box of frozen broccoli with cheese sauce. Packaged in a vacuum-sealed plastic bag, the only cooking required was to submerge it in boiling water for ten minutes to heat the broccoli and melt the cheese sauce.
I thought I'd died and gone to heaven, and have been a fan (and evangelist) for vegetables ever since (though not so much frozen or cooked in plastic).
I am, though, a latecomer to the leek. While I love alliums of all sorts, leeks intimidated me with their baseball bat size and warnings about the need to clean them thoroughly, since their upright growth habit provides a perfect receptacle for splashes of spring mud.
Then came my epiphany in the form of my friend Carol Boutard's Potage Bonne Femme, a potato leek soup that seduced me with its rich, creamy luxuriousness. Like so many soups, it's simple and so quick you can make at the (nearly) last minute, the leeks infusing it with a sweet, light, slightly onion-y flavor and the potatoes giving it a smooth, hefty body, particularly if you choose to blend it either in a blender, food processor or with a stick blender. We love this soup on a cool or wet spring evening.
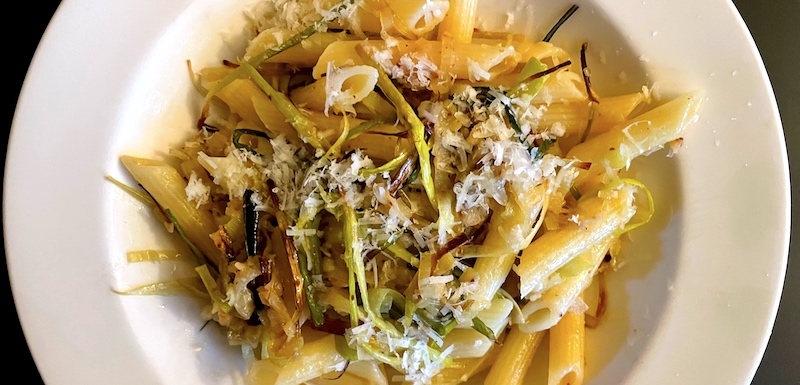
The other evening I was casting about for what to have for dinner that we hadn't had a million times before and was curious about combining the leeks I had in the vegetable bin with pasta. A quick internet search turned up a recipe for leeks in a cream sauce over pasta, but it seemed a bit heavy for a warm-ish spring evening, so I pivoted to a savory sauté that included most of a tin of leftover anchovies. The guys deemed it immensely "tasty"—their highest accolade—so I share it here; it would also be incredibly delicious spread on crostini as an appetizer.
Leek Sauté with Anchovies over Pasta
For the leek greens: 2 Tbsp. olive oil for drizzling Leek greens Salt
For the sauté: 1 lb. dried pasta 2 Tbsp. olive oil 1 Tbsp. butter 2 medium-sized leeks 1 tin anchovies with oil 4 cloves garlic, minced Juice of 1/2 lemon Salt and pepper, to taste Parmesan cheese for sprinkling
Preheat oven to 375°.
While the oven is heating, separate the dark green tops from the light green/white bottoms by slicing crosswise, then making sure they are free of dirt or grit, slice the dark green tops crosswise into approximately 3-4" lengths. Press those flat and slice lengthwise into thin slivers, then spread out on a sheet pan lined with parchment paper.
Drizzle olive oil over the slivers and sprinkle with salt. Place in oven for 25 minutes or until lightly charred.
Put a large pot of water on to boil for pasta.
While it comes to a boil, slice off any root ends remaining on the leeks, then slice the leeks in half lengthwise, rinsing off any dirt or grit. Slice the whites crosswise into thin slices.
Place a large frying pan on medium heat and add olive oil. When it shimmers, add leek whites to the pan and sauté for 10-12 minutes until they are wilted. Make a well in the middle of the pan and add anchovies, pressing them down with a spatula until they dissolve. Add garlic and sauté briefly until warmed, then reduce heat. Add the roasted greens to the pan and stir. Keep it on a low burner while you cook the pasta.
Put the pasta into the boiling water and cook until al dente. When the pasta is done, drain in a colander and transfer to a large serving bowl. Pour the leek mixture over the top and toss briefly. Drizzle with additional olive oil and serve with grated parmesan at the table.
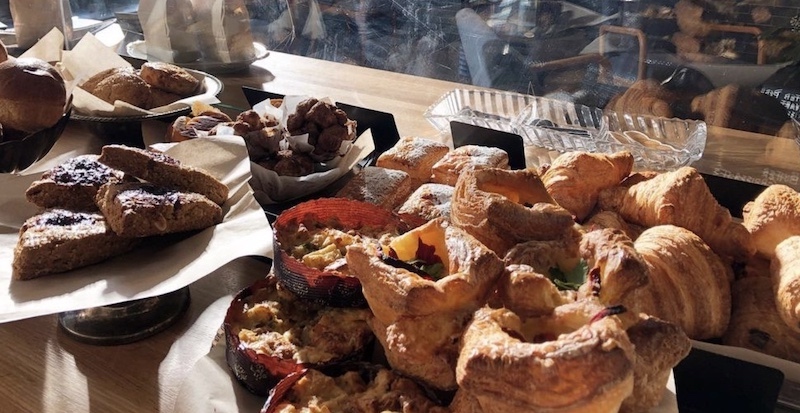
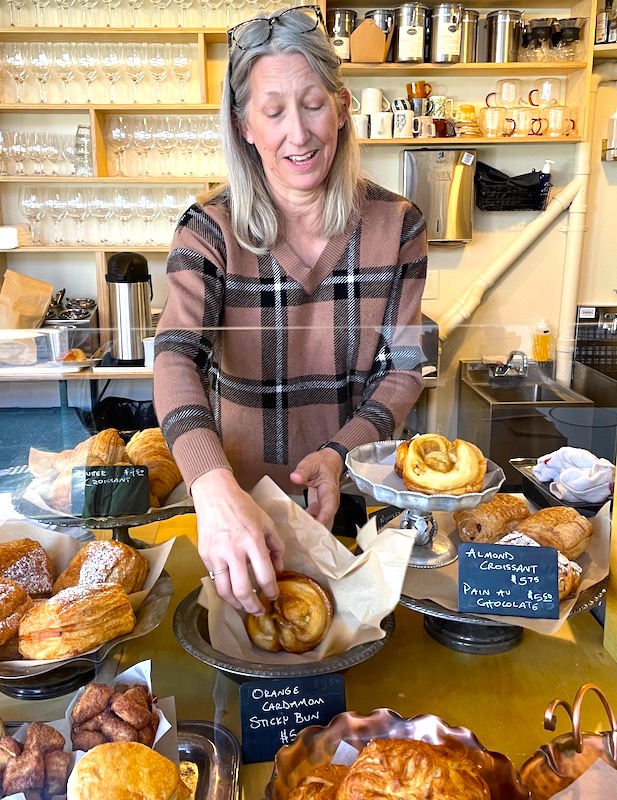
Like Paris, Portland is a city of neighborhoods, each having its signature cafés, restaurants, bars and bakeries, where residents gather to nod a hello, remark on how big children have grown and share the latest gossip. Lisa Belt's Flour Market was that kind of place from the moment it openedon Northeast 30th and Killingsworth, and quickly achieved "let's meet there" status among lovers of good drip coffee and outstanding baked goods and breads.
So regulars were overcome with shock and dismay at the news that Lisa was closing the beloved bakery at the end of 2025 due to financial considerations at the Killingsworth space, shifting her focus to the production bakery in Southeast Portland. There was a ray of hope in the closure announcement, however, in that she was open to a "brilliant location thought or secret idea."
Flour Market owner Lisa Belt.
Enter Brant Ozanich and Gabby Terracciano of Dogwood Wine and Flowers on Northeast 30th and Alberta, loyal wholesale customers of Flour Market, who were remodeling their space to accomodate a food service partner in the mornings when they weren't open. Even better, with its location just a few blocks from the original spot on Killingsworth, Flour Market regulars could still drop in on their morning dog walks, with seating for 15 customers inside plus a covered and heated outdoor patio for patrons (and their pets) that seats 30.
Look for Lisa's signature bread loaves, including the singular Danish rye called Rugbrød, and seasonal specials like challah. There's even (potentially) a Swedish limpa coming as soon as Lisa can match the memory she has of her mother's loaf with its hint of orange and fennel. (And a note to farther-flung fans: Look for Flour Market at the Beaverton Farmers Market starting this month!)
The best news of all, at least to this fan? Flour Market's new location is still just a half hour walk from my front door!
The base of the famous landmark Thompson Elk Fountain was damaged by Portland protestors during a wave of nationwide protests over the murder of George Floyd by Minneapolis police in May of 2020. While the nine-foot-tall elk statue itself was undamaged, the 3,000-pound bronze elk was discovered to be held in place by a single bolt and the base was deemed unstable. (Read more about the history of the Thompson Elk Fountain here.)
The elk statue was cleaned and then placed in storage while the base and its fountain were reconstructed to meet national standards of historic preservation, which required sourcing the granite from the same quarry in Barre, Vermont, that supplied the original fountain base.
For more than a century the public squares near the statue have been a locus for protests.
The restoration project was overseen by the Regional Arts and Culture Council (RACC) and managed by my dear friend Keith Lachowicz, the Public Art Collections Manager for RACC, who worked with conservator Robert Krueger, as well as countless agencies and contractors over nearly six years to bring the statue and fountain back to its historic downtown home. It was a fitting final project for Lachowicz before he retires after more than 19 years stewarding the city's public art collection.
A public rededication ceremony for the fountain was held on Sunday, April 12, with the elk adorned by a wreath around its neck and hundreds of onlookers cheering its homecoming, some—in very Portland fashion—wearing commemorative antlers for the occasion.
A sure sign of spring in the Northwest is the unpredictability of the weather from one minute to the next. Regardless of the prediction of the weather app on my phone, I now head out on every walk wearing a raincoat and hat over my hooded sweatshirt, the better to strip down or layer up when needs must. Plus, butting up against the stereotype of Northwesterners, I've also taken to carrying an umbrella for those drenching spring downpours that seem to sneak up when I least expect it.
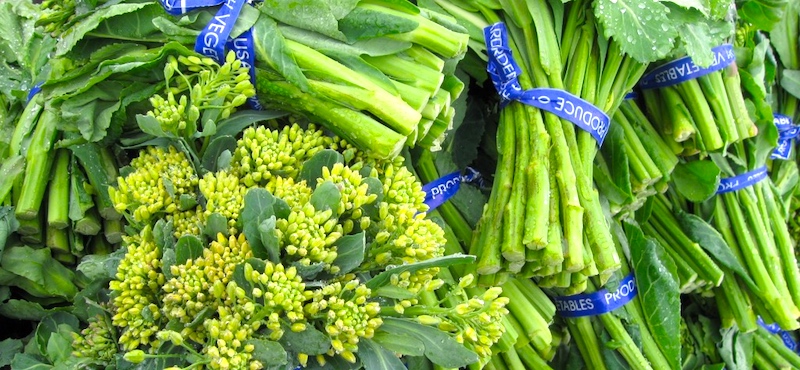
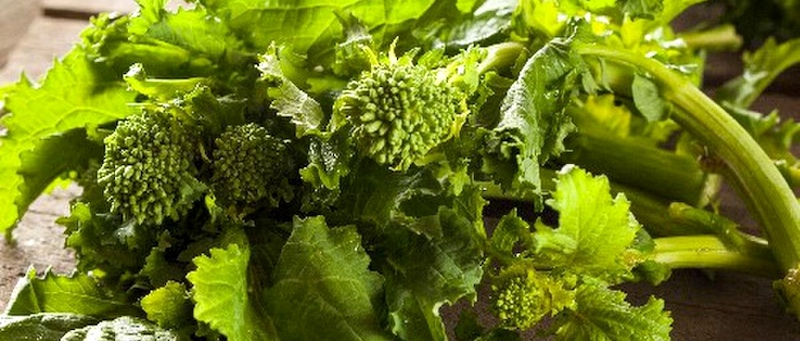
Another sure sign of spring is the appearance of a plethora of raabs, rabes, rapinis and their friends like broccolini and purple sprouting broccoli (be a cool kids and call it PSB). Though I can't help hearing my friend, farmer Anthony Boutard of the legendary Ayers Creek Farm, snort that the only true raab comes from turnips, the rest being merely the inflorescence of plants, defined as a group or cluster of flowers arranged on a stem that is composed of a main branch. Morphologically, it is the modified part of the shoot of seed plants where flowers are formed.
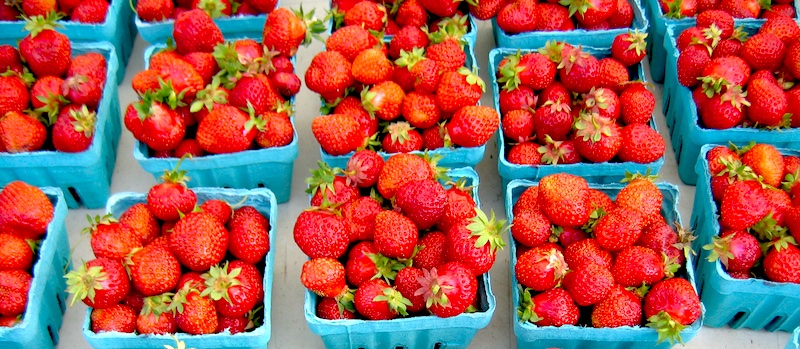
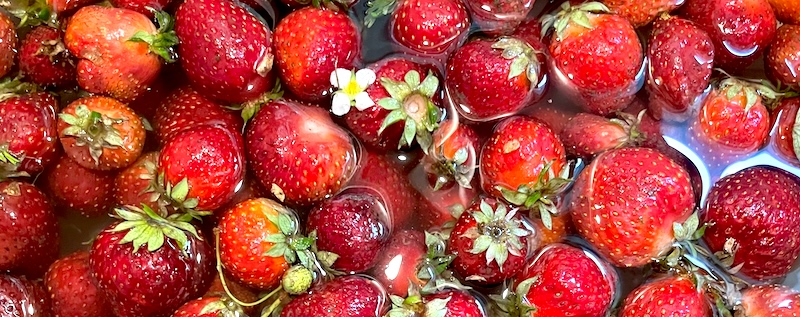
Strawberries are at the top of every farmers' market list in spring.
As they do every season, farmers' market customers are clamoring for local strawberries, and there are some of the hardier varieties starting to appear in very limited quantities, so it'd be best to get to your local market right as the market bell rings or you'll find yourself standing in line at the supermarket with the bloated, flavorless varieties from industrial growers. (The wait for those prized local delicacies, Hood strawberries, will be a few weeks out yet.)
The first wild greens including nettles and fiddleheads are appearing as well, as are the first of the spring onions and garlics. Not-so-wild bundles of another springtime favorite, asparagus, are standing tall on market tables, and piles of pea shoots, sorrel, spinach and fava greens are waiting to star in sautés and salads, along with fresh herbs from chives to chervil and parsley to cilantro.
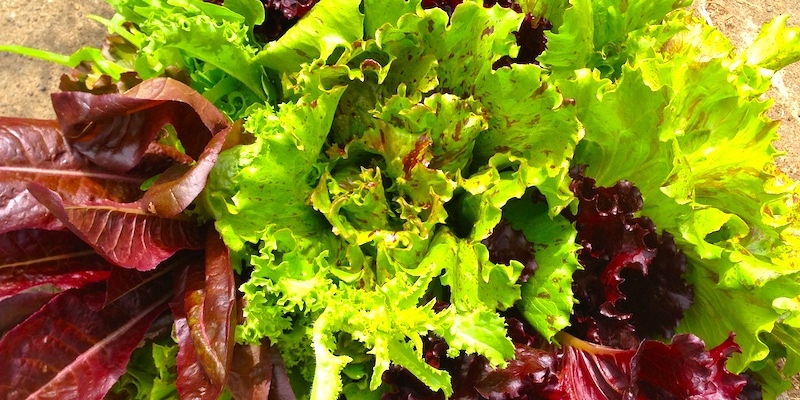
Sprightly spring greens bring a satisfying crispness to salad bowls.
Another salad sweetheart are the small, white hakurei turnips and the first spring radishes that'll add color and crunch to your salad bowl, and don't forget to include some zing from mizuna and mustard greens to complement the sweetness of spring salad greens. (My recipes for a sweet red wine vinaigrette and a creamy miso vinaigrette will complement then perfectly!)
While you're at the market, don't forget to pick up a big bunch of tulips, dogwood blossoms or lilacs for your table—nothing makes spring feel like it's officially here than a colorful bouquet of local flowers!
I adore quiche, especially the version known as Quiche Lorraine with bacon and cheese, the one that Julia Child trilled about on her cooking show, "The French Chef." I watched it in reruns on our first color TV in the 1960s, along with "The Galloping Gourmet"—aka Graham Kerr—as he swozzled his way through recipes swirling bottomless glasses of red wine.
The rage for French cuisine that Ms. Child ushered in caused quiche to become ubiquitous on brunch and "luncheon" menus in the 70s, though most were pale versions of Julia's, reheated in new-at-the-time microwave ovens or kept too long in warming ovens—they'd been made hours before, which deflated and dried out the delicate egg custard.
Nothing shouts spring more than green sprouts like this broccoli raab.
The difficulty for me when it comes to making them for anything but special occasions is the necessity for a blind-baked pie crust. Not that a crust is difficult, mind you, but it does require planning ahead—not my strong suit when it comes to weeknight dinners—to leave enough time for the dough to chill, then to prebake the crust before filling it and finishing the baking.
Crustless quiche to the rescue!
Perfect for a quick dinner using spring greens like raab or kale, I made the version below for dinner a couple of nights ago—the only time-consuming aspect was prepping the vegetables and bacon. Tossing them into a buttered dish with the grated cheese then pouring in the egg mixture was a cinch, and the resulting moist, eggy custard would have made Julia proud.
Crustless Quiche with Greens and Bacon
1 Tbsp. butter for greasing the baking dish 1 1/2 Tbsp. panko or fine bread crumbs 3-4 oz. greens like kale, raab, etc. 8 oz. bacon sliced in 1/4" cubes 3 cloves garlic, finely chopped 1 c. grated cheese like Comté, Gruyère or Cheddar 1 c. half-and-half 1 c. whole milk 5 eggs 1 tsp. salt 1/2 tsp. freshly ground black pepper 1/2 tsp. freshly grated nutmeg 1 oz. freshly grated Parmesan 3 green onions, finely sliced
Preheat oven to 325°.
Butter a deep 9" pie dish or 8" square baking dish. Sprinkle the panko evenly over the bottom of the dish.
Bring a medium-sized pot of water to boil over high heat. Toss in greens and cook until tender, 2 to 3 minutes. Strain through a sieve or colander and run under cold water to stop them from cooking. Squeeze out moisture and slice into chiffonade. Place on paper towel to drain any remaining water.
In a small frying pan, sauté bacon over medium heat until slightly crisp. Add garlic, stir and remove from heat.
Break eggs into a medium-sized bowl and whisk until no whites are discernible. Whisk milk and half-and-half into eggs along with salt, pepper, and nutmeg.
Scatter greens evenly over bread crumbs in the buttered dish. Scatter bacon and garlic mixture (and any bacon fat) over the greens. Top bacon and greens with the grated cheese, covering it evenly. Slowly pour the egg mixture over the bacon, cheese and greens, letting it seep into the nooks and crannies. Sprinkle Parmesan and green onions over the top.
Place quiche on a sheet pan in the oven (just in case it bubbles over while baking) and bake 45-50 min. The middle can be slightly wobbly when you take it out of the oven. Allow to cool for ten minutes before serving.
Do you feel overwhelmed when you go to the farmers' market? Does the abundance of produce on market tables and the brightly colored flowers, not to mention the noise of shoppers crowing about their finds, make your head spin? In the latest Beaverton Farmers' Market newsletter, Market Master Ginger Rapport has some sage advice for planning your next trip.
As we are approaching the final stretch of March here in Oregon, the market feels like it’s on the verge of stepping into a new chapter right on the cliffhanger of the seasons. The winter crops are still holding strong, but here and there we are starting to spot the hints of spring, from bright and sunny daffodils to tender, flavorful greens and herbs, the first guests of season 2026. For our marketgoers, juggling busy schedules and work-life balance, this is actually the best time to think about their routine Saturday outing in terms of meal planning. The ingredients are flavorful, simple, and easy to mix and match across the meals.
Make a weekly plan based on what's in season.
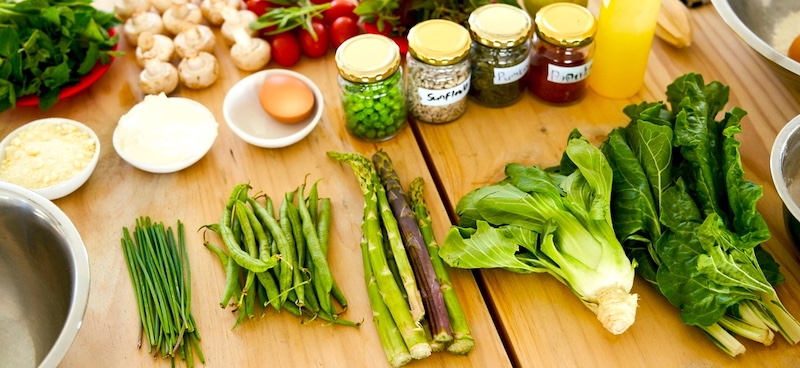
The concept of a “base basket” makes it easier to plan what to shop for and how to stretch your budget a little further. Instead of a single recipe, think strategically. Start with hardy veggies like potatoes, carrots, squash, and onions.
Add fresh seasonal produce like asparagus, kale, or spring greens. Build simple, flexible meals around what’s freshest and most flavorful at the market. Enjoy vibrant, nourishing dishes that make the most of the season.
Next stop—eggs, bread, and cheese to round things out. With these humble and simple staples, you can create a variety of dishes for the week without ever getting bored. Creamy soups, quiches, bowls, and sandwiches—the possibilities are endless!
Prep ingredients rather than whole meals.
Strategize to prep ingredients rather than whole meals. A little bit of time after the market spent with your haul is going to yield a great payoff. Sauté your mushrooms, roast a pan of veggies, wash and chop the greens, and cook some grains like quinoa or brown rice - these are your building blocks for the week. Instead of cooking from scratch, you can assemble your meals in minutes from the ingredients that just need to be warmed up.
Approaching mid-week is when the farmers market produce really gets to shine! One-pan or one-pot meals make it easy to throw together a pasta dish or a stir-fry. A quick hummus, roasted veggie, and pickled radish wrap may be the best lunch you’ve ever made! Top with seasonal microgreens from Le Petit Jardin or herbs like scallions or parsley to brighten up the dish. All the ingredients are fresh and nutritious! Here is a delightful, customizable wrap recipe from The Garden Grazer that is perfect for lunch and will make all of your coworkers jealous.
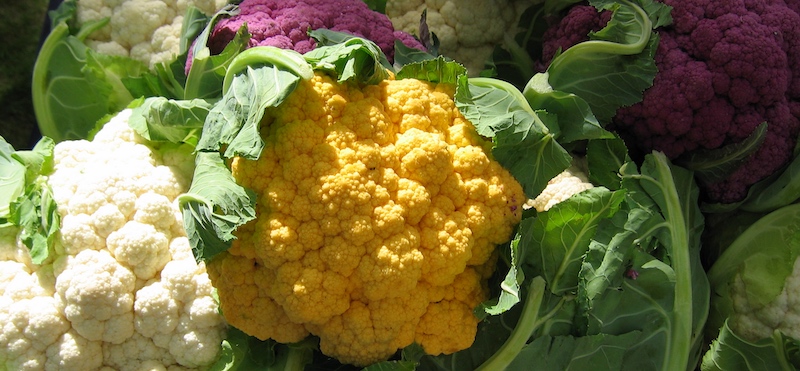
Roasted cauliflower is simple and versatile…just toss florets with olive oil and salt!
Toward the end of the week, “low energy” recipes will carry you over. Roasted veggies tossed on top of spring greens and topped with a fried egg from Santos Family Farm fancies up what may seem like a humble dinner. Try the delightful, exotic-flavored bread from our new vendor, The Spiced Oven, paired with goat cheese from Fraga Farmstead Creamery, and topped with vanilla-infused honey from Salmon Creek Farm, for a simple, no-effort platter with a relaxing glass of wine.
When life gets too busy, and there’s not even a minute to throw it all together for a family meal, Foglia Pasta has you covered! Pick up their trays of baked ziti, classic mac 'n' cheese, lasagna, meatballs, or fresh pasta for an easy dinner!
Finally, let the market guide you rather than the other way around. Late March in Oregon is all about transition, and your meals can reflect that—cozy but lighter, simple but vibrant. By shopping with flexibility and by prepping just enough to stay ahead, you can turn one farmers market visit into a full week of nourishing, stress-free meals that fit seamlessly into a busy life.


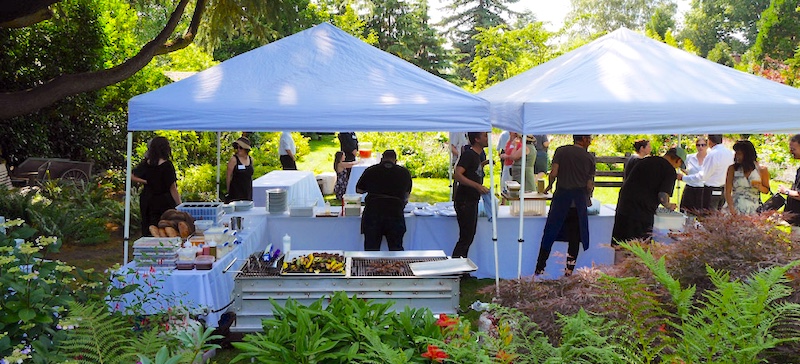 To commemorate their 30th anniversary, Growing Gardens will serve up their celebratory dinner and fundraiser, Chef in Your Garden, on Saturday, Aug. 29th. This year’s event will showcase some of the indigenous food and culture of Oregon. Tickets will be available for purchase on their website, beginning in June.
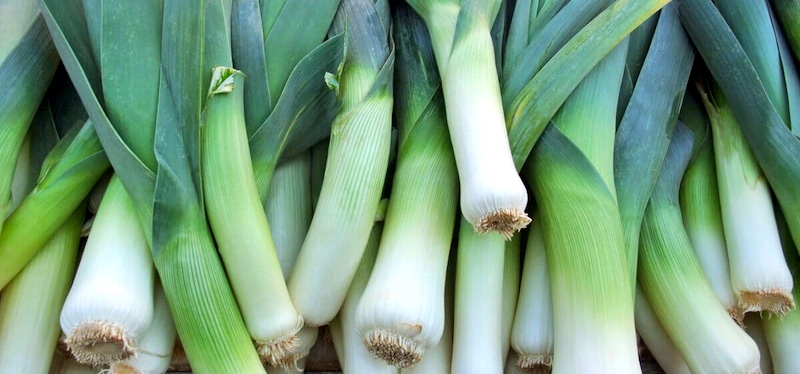
 I am, though, a latecomer to the leek. While I love alliums of all sorts, leeks intimidated me with their baseball bat size and warnings about the need to clean them thoroughly, since their upright growth habit provides a perfect receptacle for splashes of spring mud.