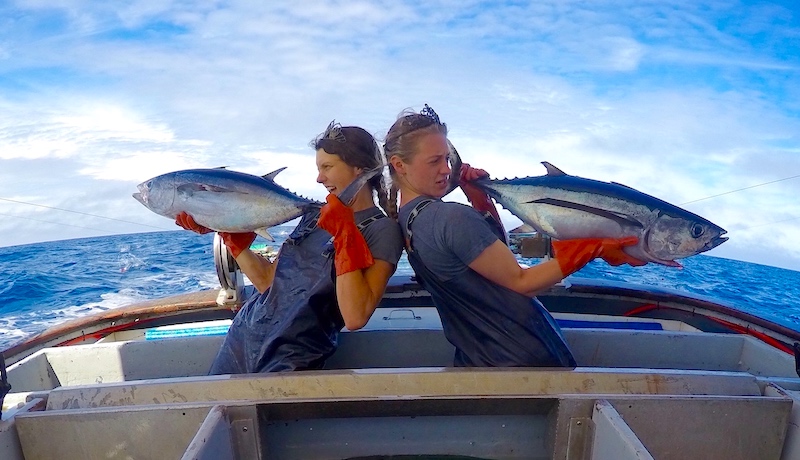
Did you know that around 90 percent of the seafood caught off the Oregon coast is being shipped out of the state—some even going as far away as Japan or Europe? And that 90 percent of the seafood served at our restaurants is being shipped in?
To say that there is a deep disconnect in our local food systems is an understatement. Those famous yellow tins of Ortiz tuna on specialty store shelves more than likely contain Oregon albacore. That's right, a fish caught miles off of our coast is shipped halfway around the world, stuffed into tins and then shipped back to us. Crazy, right? And a good chunk of the rest of our albacore is exported to Japan for sushi.
Most of Oregon's fishing fleet consists of single family-owned boats.
Altogether our Oregon fisheries—including rockfish, ling cod, petrale and Dover sole, wild salmon, black cod, albacore tuna, Dungeness crab, cold water shrimp, and oysters—supply four percent of the catch sold in the entire U.S.; the fishing town of Newport is considered the Dungeness crab capital of the world. But even with a thriving maritime tradition, it’s still difficult to find Oregon-caught seafood on the menus of our own restaurants.
That disconnect is why Oregon Sea Grant—a cooperative program between the National Oceanic and Atmospheric Administration's (NOAA) Sea Grant College Program and Oregon State University's Oregon Sea Grant Fisheries Extension to address the needs of Oregon's coastal communities and ecosystems—has launched the Oregon Seafood Locator with the mission of helping Oregonians discover the many different types of seafood harvested in Oregon.
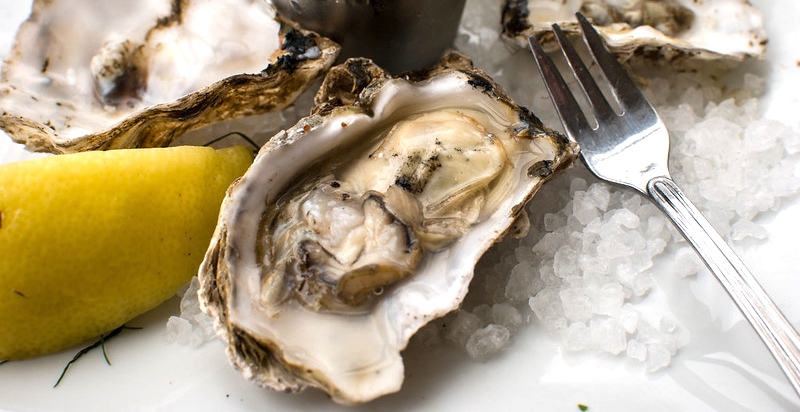
Fresh, briny oysters from Oregon's pristine waters are in big demand.
With a map and a comprehensive statewide listing of locations that sell or serve seafood caught or grown in Oregon, along with information on how to buy the freshest fish online or on the dock, as well as how to preserve and cook it, the Seafood Locator is intended to be a comprehensive guide to these local foods that are so much more delicious than substitutes shipped from farther away.
You can get involved in building this resource by contacting them if you know about a business that sells Oregon seafood products that needs to be added to the page. You can also add to their listing of recipes by using the hashtag #EatOregonSeafood in your social media postings.
There are just two weeks left in this legislative session and three pieces of legislation need your help.
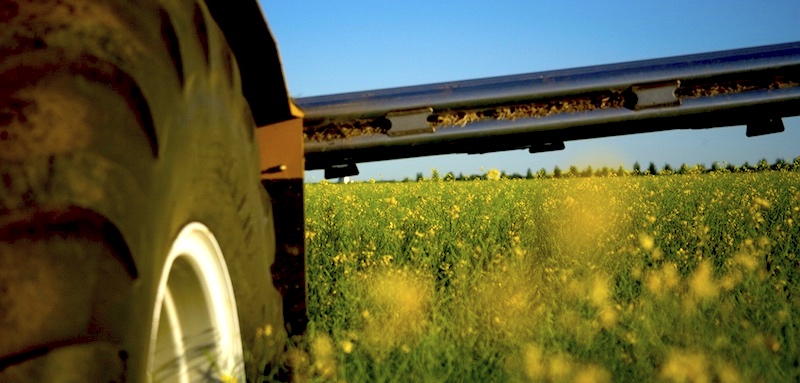
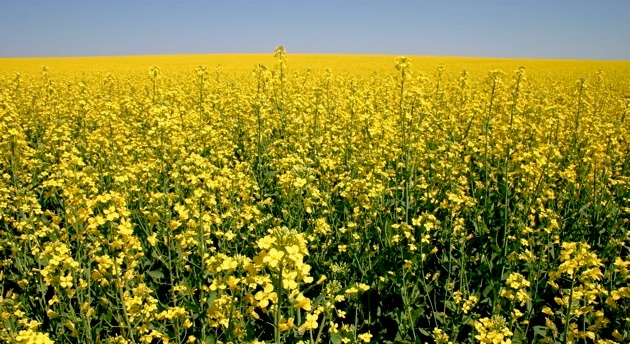
Canola is a low-value crop that can cross-pollinate with valuable food crops, wreaking havoc on local agriculture if it is not tightly controlled.
Protect the Willamette Valley from Canola Contamination
Willamette Valley Specialty Seed Protected District (HB 4059) needs to be passed before the current proposal "sunsets" this year. The Willamette Valley is one of the most important regions in the world for large-scale vegetable seed production. Prior to 2015, growing canola was prohibited in the Valley due to its ability to cross-pollinate with crops in the brassica family like broccoli, kale, cabbage and others, risking the livelihoods of vegetable farmers and seed producers. In 2015 a law was passed allowing a very limited amount of canola to be grown with strict rules requiring distancing from brassica growers.
In order to protect farmers and growers of vegetable seeds in the brassica family from fear of crop contamination or rejection of contaminated seed by national and international markets, strong protections and compliance tools must be developed. Maintaining the Willamette Valley Protected District and limiting canola production is crucial to preserving the state's specialty seed growing industry. More information here.
ACTION NEEDED: Submit your testimony by e-mailing Senator Jeff Golden, Chair of the committee and entering "HB 4059_A" in the Subject line, then copy and paste the text below into the message, filling in the brackets as needed.
To Chair Golden, Vice Chair Girod and members of the committee:
My name is [name] and I am writing in support of HB 4059-A. I am a community member in [town]. The Willamette Valley Specialty Brassica seed industry is vital to the agricultural landscape of Oregon and we are so lucky to have the land, expertise and conditions to support this unique industry. We should protect these farmers’ ability to grow the seeds that produce millions of pounds of food across the world.
Because a reasonable agreement could not be reached after the work group process, extending the current regulations is the only viable option. This topic means so much to me because [insert your reason here, such as "I want to be able to buy locally produced organic seeds for my garden that are adapted to our climate" or "I want to buy organic crops from local farmers to put on my table," etc.].
We know that HB 4059-A is not the end of the road and we will have to find a more permanent solution in the next few years. I urge legislators to listen to the specialty seed growers in this process. Just because they are not the biggest, most industrialized farms does not mean that they have any less value in the system. Please respect their knowledge of the plant biology, industry standards and best practices that have made this a thriving industry here in our state. In particular, we need future policy to address the issues outlined in scientific studies that threaten organic production in the Willamette Valley.
Thank you,
[your name] [your address and town]
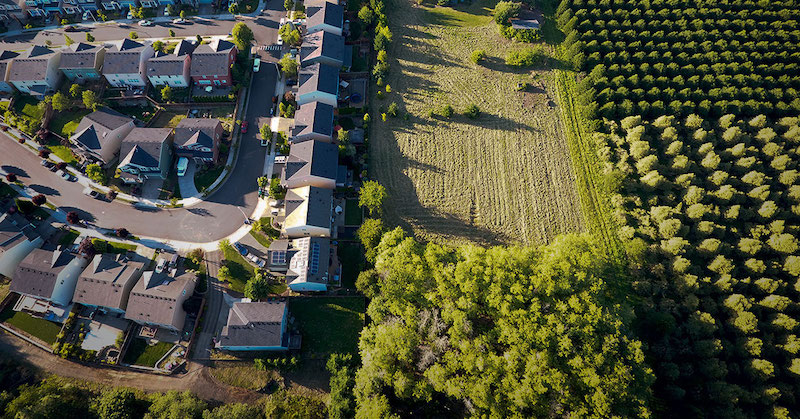
Choosing sprawling subdivisions and strip malls won't solve our housing crisis— it will only destroy valuable farmland and create new problems for Oregonians.
Support Smart Housing Policy
Governor Kotek’s 2024 housing bill, Senate Bill 1537, offers Oregon much-needed infrastructure funding and climate-smart housing incentives but it also allows cities to override long-established land use laws and processes to expand their urban growth boundaries (UGBs) by at least 75 or 150 net residential acres, depending on population size. This could lead to municipalities open to influence from developers eager to enrich themselves at the expense of our rich agricultural lands near population centers.
Though there are many crucial components in this bill that address the existing housing crisis, advocates are stressing the need to prioritize affordable housing within the existing UGBs first and foremost. Oregon’s land use laws and the concept of Urban Growth Boundaries (UGBs) has protected valuable farmland, they argue, saying that once farmland is lost, we can't get it back. Farmland with close proximity to urban markets supports a robust local food system, benefitting urban residents who gain access to locally grown products and farmers who have ready access to a large customer base.
The Double Up Food Bucks program gives hungry families access to local food.
Fresh Local Food for Hungry Families
Double Up Food Bucks help those who currently receive food assistance through the SNAP program to afford additional fruits and vegetables. A healthy diet is a crucial part of building a healthy lifestyle and that is why it's critical this program receives continued funding. There are federal matching dollars available, but only if legislators allocate more state dollars.
It's Community Supported Agriculture (CSA) Week, so I'm reposting this Q & A from 2019 with details on this year's CSA Share Fair at the bottom of the post:
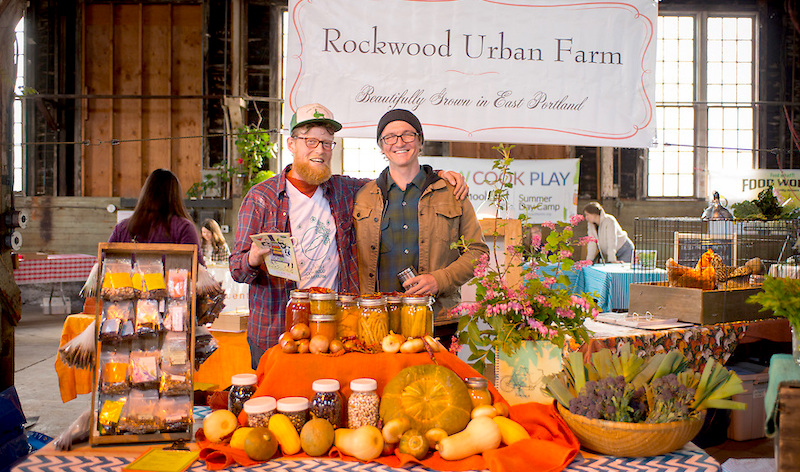
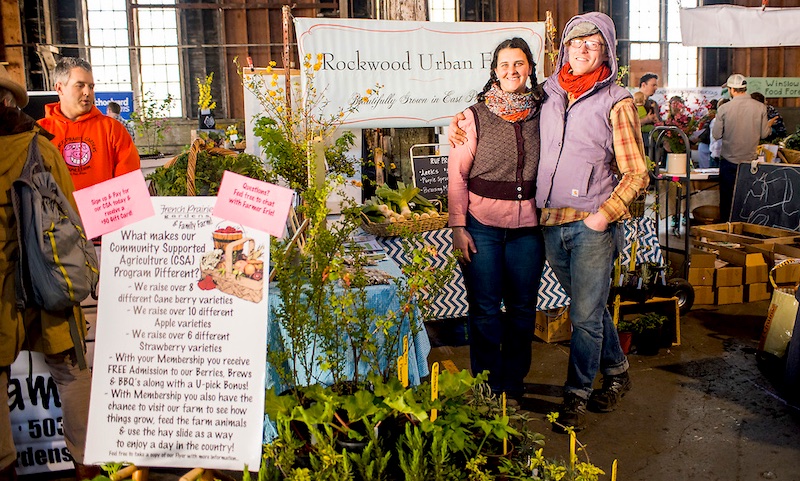
The CSA Share Fair on Sunday, March 3, is a chance to meet more than 45 local farmers, ranchers and fishers who offer Community Supported Agriculture (CSA) shares to the public. They'll be showcasing various options, including vegetables, fruits, pastured meats, wild fish, eggs, flowers, honey and more. To keep it simple for you, there's a matchmaking service where you can check off what you're interested in and a helpful volunteer will point you toward the best farmer for you! Time and location of the 2024 CSA Share Fair are at the bottom of this post.
If you're not sure what a CSA is or if there's one that might be right for you, here's a Q & A with CSA maven Katherine Deumling of Cook With What You Have.
Find the right CSA for your household at the Share Fair!
Why join a CSA?
Joining a classic CSA gives you a window onto a farm and what it takes to grow the delicious variety of things that you'll receive in your share each week. The farmer chooses what's best that week that can relieve you of most of your decision-making, though more CSAs are giving members the option to order from a list of what's available. I actually love not having to make any decisions about what produce I'm getting because then I can concentrate on being creative with what I receive.
CSA farmers in our region tend to grow a staggering variety of produce and typify the saying, "What grows together, goes together!" Belonging to a CSA has expanded my repertoire and introduced me to vegetables I wouldn't have picked up at the farmers' market, though some people are not so keen on the "no-choice" bit. My online Seasonal Recipe Collection comes in handy, since the recipes are sorted by vegetable and there is a thorough introduction for each vegetable.
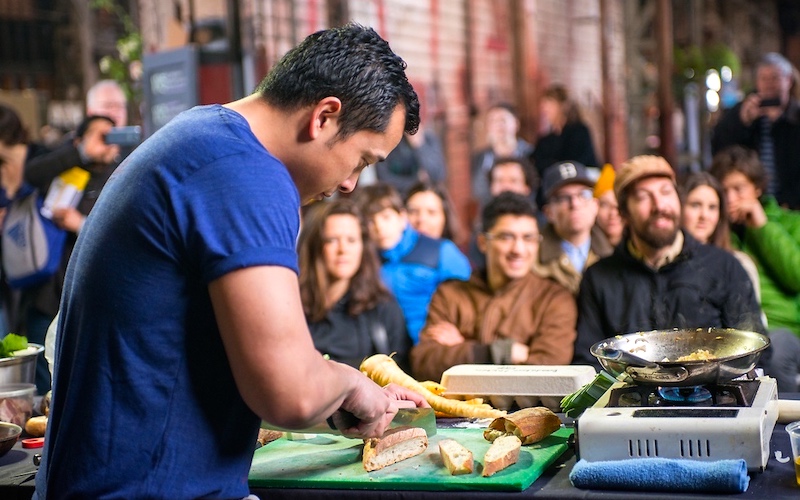
Watch local chef demos and ask them questions at the Fair.
I also subscribe to a CSA because it helps me budget, and when you calculate out the cost of a CSA by the week it is quite reasonable. I pay up front or in a few installments, and then supplement from the farmers' market or the store with fruits or occasional vegetables I'm not getting in my CSA—like asparagus, artichokes and a few other things that aren't typically found in a CSA. If I know I'll be getting my gorgeous box of produce each week, I won't be tempted to buy other things, to make the most what I've already paid for.
What are the different kinds of CSAs?
Some CSAs focus exclusively on produce, some also include fruit like blueberries, strawberries, rhubarb, apples, pears, quince and so forth. Some give you the option to add an extra Salad Share for those who love salad greens; others might give the option to add eggs, honey, flowers or meat. Some CSA farms work together with other area farms to offer such a wide array. And then there are exclusive meat and fish CSAs as well as CSAs that focus on a single crop like apples or flowers.
Many farms, many options to choose from!
There are so many local farms offering CSAs. What should I consider before joining a CSA?
Generally, if you want super-delicious produce and can't always make it to a farmers' market, a CSA is for you. If you like to cook or want to cook more and are typically home most nights of the week, a CSA is definitely for you. If, on the other hand, you travel a lot or are out a lot at night, you'll struggle to keep up with the produce.
Think about the size of your household and your family members' eating habits to decide if a CSA is a good idea or not—do you all like vegetables or are open to trying them? How much do you think you'll eat? You might start with a half share (most farms offer two different-size shares) and see how that works, setting yourself up for success rather than the guilt of wasting some. Also consider if the pick-up site is convenient (some CSAs deliver to your door as well). But make sure you think about the logistics of picking up your share—make a plan with a friend or neighbor, either to share the CSA or both do it so you can alternate doing the pick up. This is great community-building in and of itself, and you can also share ideas of what to do with less familiar produce.
Does a CSA subscription make sense for a single person?
It very much depends on the person—if you are a vegetable lover and like to cook and entertain, by all means. If I were single I would buy a CSA but I do cook and eat more vegetables than almost anyone I know! And again, consider a half-share or splitting it with a neighbor or friend.
Some farms offer a single product like flowers, eggs or beef.
I'm afraid I'd be paying for produce I can't use or my family won't eat, and I know nothing about rutabagas or kohlrabi. What should I do?
This is an important factor to consider carefully. As I noted earlier, I have vastly expanded my appreciation of certain vegetables (rutabagas being at the top of that list) by becoming a CSA member and I've enjoyed that.
There are a handful good cooking techniques and methods—think grated vegetable pancakes, like latkes—that are a critical to successful CSA cooking. In fact I added a grated rutabaga to fried rice the other night and it was delicious! And if you occasionally share an extra kohlrabi with a neighbor (I have definitely done that, too) the benefits of the flavor, nutrition and connection to your place and those growing our food may well trump the "kohlrabi hardship"!
I don't drive. How would I pick up my share?
I pick up my share by bike and it works well. Most CSA shares will fit into two typical panniers. Some CSAs have pick-ups at companies or farmers' markets so you might inquire if your place of work is linked up with a CSA farm or ask them if they might consider it. Some CSAs even offer home delivery, so if you find one you're interested in, definitely ask them!
Details: CSA Share Fair, Sun., Mar. 3, 10 am-1 pm; free. Event at The Redd, 831 SE Salmon St. If you can't make it to the Share Fair, there's a listing of Northwest CSAs at PNWCSA.org.
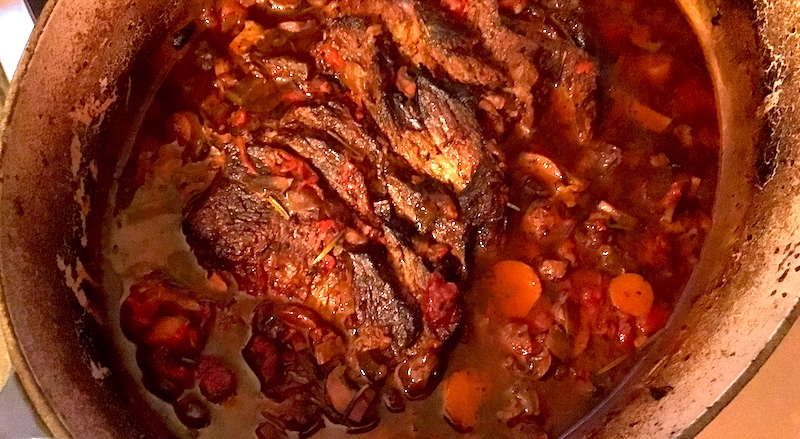
There's a reason the French love braised beef, simmered slowly for hours until it's just short of falling apart. Whether you call it bourguignon or daube as the French do, or pot roast or beef stew, it's a sumptuous, belly-warming meal that fills the house with its luscious aroma and can feed a crowd or keep a couple in dinners and lunches for days.
It's also adaptable to different seasonings depending on what's in your pantry or still hanging on in your winter garden. A classic Provençale beef daube calls for red wine, tomatoes and herbs, while an Italian stracotto—translated as "overcooked" for some reason—calls for…well…red wine, tomatoes and herbs. One may lean more heavily toward bay leaf and thyme while the other includes rosemary, but it's poh-tay-toh, poh-tah-toh as far as I'm concerned.
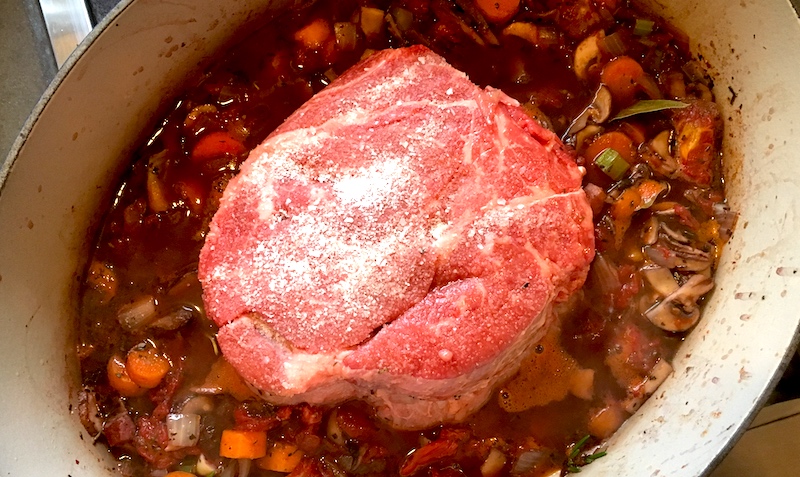
Pasture-raised, grass-fed chuck roast is packed with nutrients and flavor.
Same for a beef stew or pot roast. One may include cutting the beef into chunks and browning first in a dusting of flour mixed with salt and pepper, or throwing in potatoes for the last few minutes, but as long as the meat is simmered until it's about to slip the bonds of structural integrity, it's good to go.
Fortunately it looks like the Pacific Northwest will have at least a few more weeks of what I like to call braising weather before spring temperatures begin in earnest, so don't put away your stew pot just yet. The recipe below is for my version of bourguignon, but don't be afraid to sub in other vegetables or herbs.
Pot Roast Bourguignon
This is extremely easy to make, but you'll need to get it in the oven four hours before dinner or make it the day before. Cutting back on the time in the oven makes for a less-than-stellar experience.
4 slices bacon, cut in 1/4" strips 1 3-5 lb. chuck roast Salt and pepper 1 large onion, chopped in 1/2" dice 4 cloves garlic, minced 2 ribs celery, chopped in 1/4" slices (optional) 4 carrots, sliced in 1/4" rounds 1 lb. mushrooms, halved vertically and cut into slices 1 Tbsp. dried basil 1 tsp. dried thyme 1 Tbsp. minced fresh rosemary (from two 6-inch sprigs) 1 qt. (32 oz.) roasted tomatoes 3-4 c. red wine
Preheat oven to 375°.
Put bacon in a large braising pot that can go in the oven and fry till fat is rendered and it starts to brown. Add onions and garlic and sauté 2-3 min., then add carrots and celery and sauté 2-3 min. Add sliced mushrooms and sauté till soft. Stir in tomatoes and herbs, then add wine. Sprinkle roast generously with salt and pepper add to pot. Bring to a boil, then cover and place pot in oven, baking for 2 hours.
Remove meat from pot and cut in 1/4" slices, then return the sliced meat to the pot, covering with sauce and vegetables. Cover and bake for another 1 1/2 hrs.
Remove to a serving dish. Serve with boiled or roasted potatoes or a rich, creamy polenta.
The Oregon Legislature convened for its 82nd session this week. They'll have 35 days to complete their work—by law they cannot extend the session beyond that in even-numbered years (160 days in odd-numbered years)—with several bills requiring action that will affect our food system. Some of those are:
Oregon Agricultural Heritage Fund (HB 4060). This bill is requesting $10.8M for the Oregon Agricultural Heritage Program (OAHP) for the next biennium. OAHP has four components: technical assistance, succession planning, conservation management plans, and easements. This program is crucial not only for the preservation of Oregon's farmland, but the incorporation of environmental stewardship into working lands management.
Two of those components are particularly critical:
Conservation management plans help farmers and ranchers develop plans for the long term viability of their farm ecosystems along with a plan to pay for improvements with matched federal funds.
Conservation easement is a vital tool to protect farmland for agricultural use in perpetuity and lower the price of farmland for the next generation of producers.
If passed, this bill will broaden the tools available to lower land prices for people wanting to start farming or grow their existing farms; preserve farmland for production; and keep farms close to city centers. Advocates say we must take steps to preserve our high value soils and farmland permanently or we risk losing land accessible to the community food system in the future.
Willamette Valley Specialty Seed Protected District (HB 4059). This bill directs the Oregon Department of Agriculture (ODA) to study issues around the Willamette Valley Specialty Seed Protected District, and whether to allow expanded growing of canola within the district. The ODA is directed to report back with recommendations in September of 2025.
The Willamette Valley is one of the most important regions in the world for large-scale vegetable seed production. Prior to 2015, growing canola was prohibited in the Valley due to its ability to cross-pollinate with crops in the brassica family like broccoli, kale, cabbage and others, risking the livelihoods of vegetable farmers and seed producers. In 2015 a law was passed allowing a very limited amount of canola to be grown with strict rules requiring distancing from brassica growers.
In order to protect farmers and growers of vegetable seeds in the brassica family from fear of contamination or rejection of contaminated seed by national and international markets, strong protections and compliance tools must be developed. Maintaining the Willamette Valley Protected District and limiting canola production is crucial to preserving the state's specialty seed growing industry.
Housing, Land Use and UGB Expansion (SB 1537). This bill is aimed at adding much-needed affordable housing through infrastructure investment, developing climate-smart practices and instituting accountability systems. However, a dangerous loophole was added that allows for the governor to unilaterally decide to expand the current Urban Growth Boundary (UGB), sidestepping current laws and processes that limit urban sprawl, allowing it to expand into valuable agricultural land.
Though there are many crucial components that address the existing housing crisis, advocates are stressing the need to prioritize affordable housing within the existing UGBs first and foremost. Oregon’s land use laws and the concept of Urban Growth Boundaries (UGBs) has protected valuable farmland, they argue, saying that once farmland is lost, we can't get it back. Farmland with close proximity to urban markets supports a robust local food system, benefitting urban residents who gain access to locally grown products and farmers who have ready access to a large customer base.
Summer Electronic Benefit Transfer (Summer EBT). Part of Oregon Department of Human Services (ODHS) budget, this program would help nearly 300,000 Oregon children by providing additional money for families during the summer break. While this is not a bill before the legislature, legislative approval of the portion of the ODHS budget for administering half the cost of this program is required in order to unlock the federal dollars that will fund it.
An article in the Oregon Capital Chronicle quoted Jake Sunderland, spokesman for the Oregon Department of Human Services, who said,“The Oregon Food Bank reports that one in five people in the state face hunger. During the summer months, many children in families with food insecurity do not have easy access to the healthy breakfasts and lunches they get at school during the school year.”
Jacki Ward Kehrwald, spokesperson for Partners for a Hunger-Free Oregon, was quoted in the same article. "We really believe this is a no-brainer since the program expenses are all provided federally, and Oregon just needs to invest in half of the setup and administrative costs," she said.
Thanks to Friends of Family Farmers and Oregon Food Bank for their help with information for this post. Top photo from Friends of Family Farmers; UGB photo from Metro; photo of children from Oregon Food Bank.
While the occurrence of scurvy, a severe deficiency of vitamin C, has been relatively rare in the U.S. population during my lifetime, that never stopped my mother from bringing it up as she poured us our glass of orange juice made from frozen concentrate every morning alongside our cold cereal—Grape Nuts or Wheaties for me, Frosted Flakes or Cap'n Crunch for my brothers.
Here in the Pacific Northwest, most of our fresh citrus comes from California these days, aside from the rare hardy Meyer lemons that some regional growers are beginning to experiment with. And what a plethora, a symphony, a cacophony of citrus it is, from oranges—not just navels but cara cara, blood oranges, valencias and more—tangerines, tangelos and mandarins to lemons, limes, grapefruit, key limes and kumquats. Then there are the more rare but becoming-more-available bumpy-skinned makrut limes, kaffir limes and finger limes (a cheffy favorite with their tiny jewel-like beads inside), plus crazy yellow-fingered buddha's hands, yuzu, limequats and giant pomelos, to name just a few.
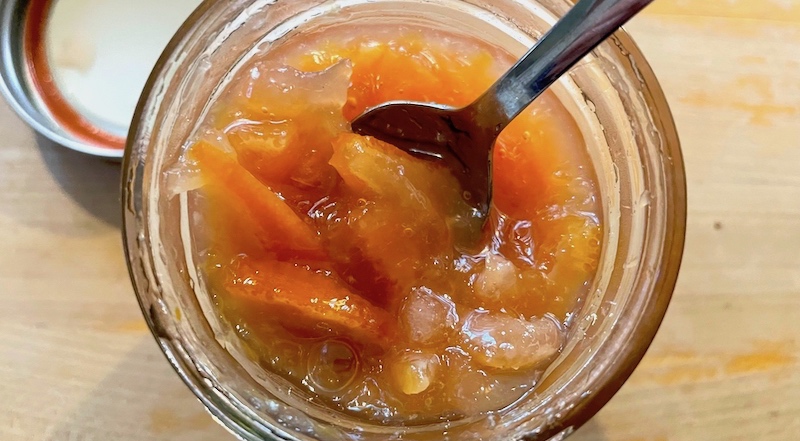
For me, the dark days in the depths of winter are brightened by their brilliant colors and sparkling flavor. I make a point of throwing together a batch of preserved Meyer lemons that will punch up everything from roasted vegetables to stews, salads and grain dishes. The last couple of years Dave has concocted a masterful citrus marmalade, combining a couple of recipes from the New York Times along with his own brushstrokes of genius.
I think we're going to be safe from scurvy's scourge this year—Mom would be relieved.
Citrus Marmalade
2 blood oranges 1 navel orange 3 lemons 4 c. granulated sugar 1⁄4 c. fresh lemon juice
Wash the citrus well under warm running water. Using a sharp knife, slice off the top and bottom of the citrus so it sits sturdily on the cutting board. Halve the fruit top to bottom and remove any visible seeds. Lay the half on the cutting board and cut each half crosswise into 1/8-inch thick slices (white membrane and all), removing any seeds you might have missed.
Measure the volume of sliced fruit and place in a bowl. Cover with the same volume of water, keeping track of the amount of water you add. Cover with a lid or plastic wrap and let this sit for at least 8 hours and up to 24 hours in the refrigerator. (This will help extract the pectin slowly as well as soften the peels.)
Place a small plate in the freezer to chill. (You’ll use this later.)
Place the peels, fruit and water in a large pot. Add enough water to bring the total amount of water added to 6 cups and bring to a strong simmer over medium–high heat. Cook the citrus until the peels have begun to soften and turn translucent, and the liquid has reduced by about three-fourths, 40-50 minutes.
Add sugar and continue to cook, stirring occasionally. As the marmalade cooks and thickens, stir more frequently. Continue cooking until most of the liquid has evaporated, another 40-50 minutes.
As it cooks, the liquid will go from a rapid boil with smaller bubbles to a slower boil with larger bubbles. At this point it's important to stir constantly along the bottom of the pot to prevent scorching. (Be sure to watch out for splattering.) Add lemon juice and continue to cook.
To test the jam's thickness, take out the plate you put in the freezer and spoon some onto the chilled plate and let it sit on the counter for 1-2 minutes. Drag your finger through it—if the jam is done it will hold its shape and not be watery or runny. If not, cook a few more minutes.
Divide among jars, leaving 1/4 inch of space at the top, and seal immediately. You can preserve the jars in a water bath canner (follow directions on the canner), or allow to cool on the counter, thenstore in the refrigerator or freezer.
Top photo: Marmalade on Dave's homemade organic rye sourdough, a match made in heaven!
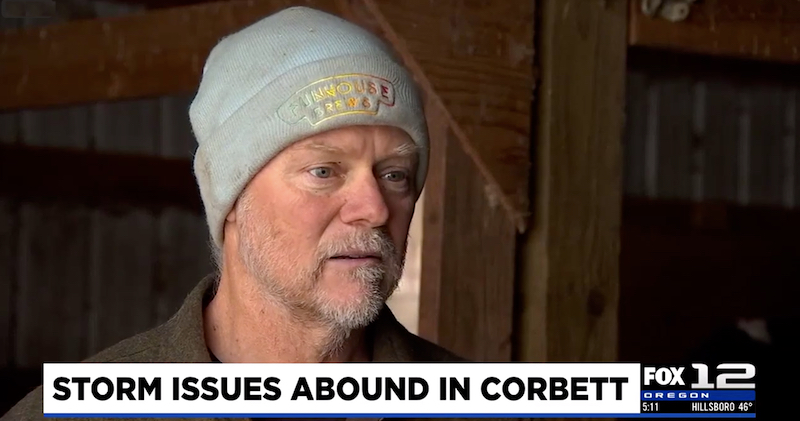
Ten days locked in ice. No water due to a break in a water main, with more than 100 animals, not to mention your livelihood, depending on it to keep them alive. Which means having to carry dozens of gallons of water by hand from the creek at the bottom of the property up a steep hill to the barn.
"Think about your farmers out in these situations and know that they're going through a lot," said Michael Guebert of Terra Farma in Corbett in a report on a local news channel. "It's really, really hard work during good conditions but under conditions like this it's really stressful and really exhausting."
Michael Guebert of Terra Farma in Corbett, Oregon.
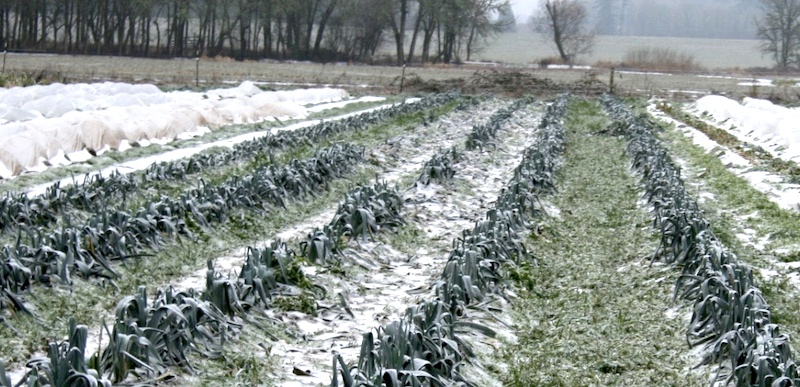
Photos of hoop houses with their plastic coverings collapsed under the weight of ice and snow, fields of frozen vegetables, posts on social media about frozen irrigation lines and burst field pipes illustrated the hazards of farming in winter and the risks that farmers take this time of year.
"I've seen a lot of reports of collapsed greenhouses and barns from the weight of ice and snow, and also damage to structures, fences, and other infrastructure from falling power poles, {power] lines, trees and limbs," said Alice Morrison of Friends of Family Farmers, a statewide organization that advocates for small family farms.
Some field crops will survive the freeze, others, not so much.
In response to the damage caused by the extreme weather, Oregon Governor Tina Kotek declared a statewide emergency on January 18th, instructing agencies to begin working with counties to assess needs, as well as identifying federal resources that are unlocked by declaring a statewide emergency.
In answer to a query sent to the Oregon Department of Agriculture (ODA) about disaster relief from storm-caused damage, Director of Communications Andrea Cantu-Schomus responded, "ODA is not aware of a state resource for farmers who have suffered damage in the ice storms as of today. Individual commodity groups are working on relief efforts" and, without naming the groups that might help, suggested contacting them directly.
Loss of income to farmers from damage to crops, buildings and irrigation could be devastating for some, not to mention the lost income from the many farmers' markets closed because of the freezing temperatures and ice. If they were able to get out at all, many farmers were unable to deliver to retail customers and restaurants because of road closures and dangerous conditions. Others had to hold off on harvesting or reschedule pick-ups with their CSA subscribers.
In some rural areas farmers were coping with ice buildup of six inches or more.
Josh Volk of Cully Neighborhood Farm wrote on its blog that when he puts together the winter CSA schedule he always thinks, “Well, if it freezes we’ll just delay a week since harvests are typically every other week anyway. It's still a bummer, though…I have my fingers crossed that some of the remaining heads [of radicchio] made it through that cold snap."
As they did when the COVID pandemic shut down many in-person farmers' markets, some farmers pivoted to holding local pop-ups with other farmers and producers to make up for lost income. It also gave customers an opportunity to stock up on fresh meat, veggies, locally roasted coffee and baked goods. Other farmers were offering discounts on home delivery of meat, bread, fish and pantry items.
Year-round farmers' markets will be reopening this weekend and farmers are looking forward to getting back to normal. If you can, make plans to get to your neighborhood market and wish your favorite farmers well. They've been through the wringer!
synchronicity Noun; pron: syn·chro·nic·i·ty, siŋ-krə-ˈni-sə-tē; plural: synchronicities 1: the quality or fact of being synchronous. 2: the coincidental occurrence of events.
I love it when I'm walking with a friend—in this instance with my neighbor Ann, a professor of Asian art history, a professional soprano and an expert plantswoman—and we're talking, as we often do, about a favorite recipe. In this case, it was a sheet pan supper she'd made recently and, as we rambled behind our dogs through the neighborhood, I realized I had all the main ingredients in my fridge to make it that night.
Synchronicity, indeed!
When I arrived home I looked up the recipe online and found it was by New York Times writer Yewande Komolafe, who wrote "this recipe calls for a wintry mix of squash and turnips, but equal amounts of root vegetables like carrots, potatoes and beets, or lighter vegetables like cauliflower, brussels sprouts or broccoli will work well, too."
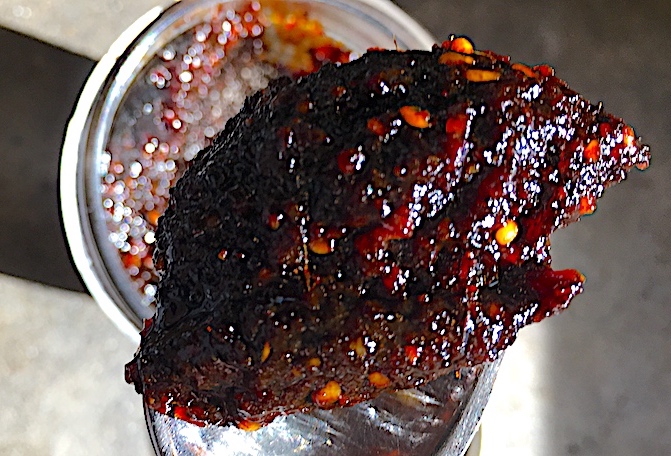
I treasure this homemade gochujang recipe.
I had two very large garnet yams and two medium-sized rutabagas on hand, so I had roots aplenty, plus some carrots I'd just pulled from my neighbor Bill's garden earlier that day. The rutabagas still had their hefty leaves attached, so I chopped those up into bite-sized pieces, too, and threw them in with the rest of the vegetables.
Of course I had the exceptional gochujang I'd made from my friend Denise's family recipe, and I tweaked the NYT recipe by adding several cloves of garlic, a spoonful of locally made Jorinji miso and a couple of glugs of fish sauce to the sauce, plus a splash of fish sauce in the salad dressing.
The real genius of this recipe—thank you, Ms. Komolafe, I'll now be doing this with other dishes—is topping the roasted vegetables with a salad of lightly pickled radishes and scallion greens just before serving. I lucked out there, too, by pullingfrom my veg bin a gorgeous black radish from that selfsame CSA share.
If you have all the ingredients on hand, so much the better, but this is worth shopping for, too, and comes together in about an hour, most of which is roasting time
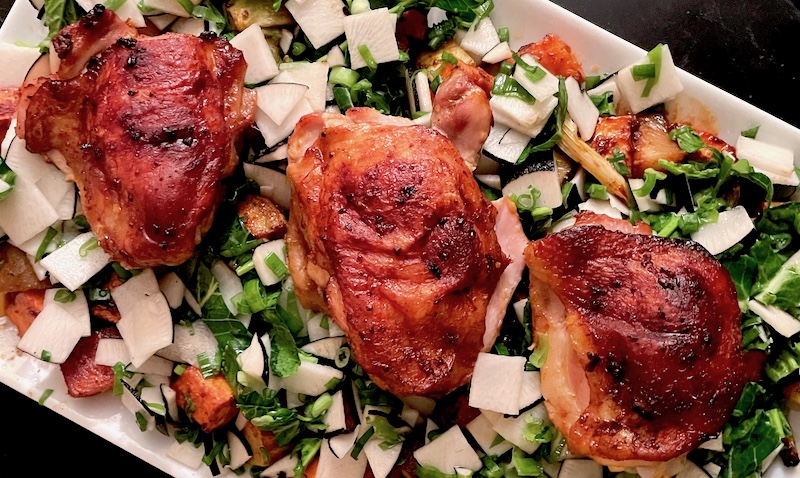
Gochujang Roasted Root Vegetables and Chicken Thighs
For the roasted vegetables and chicken: 3 Tbsp. gochujang* 2 Tbsp. soy sauce 1 Tbsp. fish sauce 1 (1-inch) piece fresh ginger, peeled and finely grated (about 1 tablespoon) 1 Tbsp. white miso 4 large cloves garlic, pressed in a garlic press 3 Tbsp. vegetable oil 2 lbs. garnet yams and rutabaga chopped into 1-inch pieces, about 5 loose cups (see above to substitute other vegetables) 10 scallions, roots trimmed, green and white/light green parts separated, sliced into 3" lengths Kosher salt 3-4 good-sized, bone-in, skin-on chicken thighs
For the salad: 1 bunch radishes, about 10 oz., or 1 med. large black radish, trimmed and thinly sliced 2 Tbsp. rice vinegar 1 Tbsp. sesame oil 1/2 tsp. fish sauce
Heat the oven to 425°.
Combine the gochujang, soy sauce, fish sauce, miso, ginger, pressed garlic and vegetable oil in a zip-lock bag. Add the yams, rutabagas and scallion whites (reserving the darker greens for the salad), and shake to coat with sauce. Transfer to a rimmed baking sheet. Season the chicken with salt and toss to coat in whatever is left of the glaze in the bag. Arrange the chicken pieces skin-side up between the vegetables on the sheet. Roast until vegetables are tender, chicken is cooked through and the skin crispy and browned in spots, about 40 minutes.
While the chicken cooks, thinly chiffonade the scallion greens crosswise. Cut the radishes into thin rounds. If using a black radish, cut into approx. 1" sticks and slice thinly crosswise (do not peel—that black skin is very dramatic). In a small bowl, toss the sliced scallion greens and radishes with the rice vinegar, sesame oil and fish sauce. Season to taste with salt and set aside to lightly pickle, stirring occasionally to distribute dressing evenly.
When chicken and vegetables are done, remove the chicken to a plate and transfer vegetables to a platter. Quickly top vegetables with the drained quick-pickled salad, then place chicken thighs on top.
The recipe suggests serving this with steamed rice, but to me, root vegetables are generally fairly starchy, so I didn't feel it needed the rice.
* If you don't want to make your own gochujang, I've found Mother-in-Law's is a decent brand, but won't have nearly the depth of flavor you'll get from homemade.
Most cookbooks are divided into categories. Some go with the "meat, vegetables, seafood" format where recipes are slotted by main ingredient. Others divvy them up by course: appetizers, entrées, desserts, etc. I even have one that has separated the recipes into occasions, like picnics, parties, casual dinners and, of course, formal dinners. The pages of that last section, by the way, are as pristine as the day it was bought at a garage sale, giving you an idea of how useful its various owners have found it.
But I propose a different way to categorize a cookbook, and that's by how you feel. Happy? Make some small plates of your favorite foods, including simple salads and desserts. Depressed? You could indulge in a big ol' chocolate cake by yourself, or treat your mood with lots of fish and kale for their Omega 3s and anti-oxidants.
Then there's sinful, which I'm sure someone has done already and titled "Food for Lovers" or some such, full of unctuous (good word for that category, right?), creamy, rich or sweet flavors that beg to be licked off the plate or some other surface—but we'll stop there.
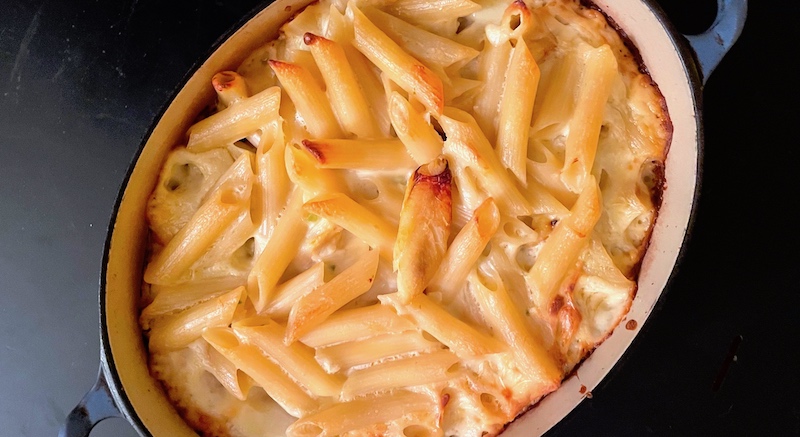
A perfect food for that category, though one I doubt would normally be thought of, is crab. It's certainly rich and has a delicate sweetness on its own…think whole pieces of leg or joint eaten right out of the shell. But it takes on a whole different personality when folded into a creamy sauce or warmed in a bisque, its sweet character enhancing the lushness of the dish and the warm meat melting when it hits your tongue.
Which is why, when I saw that cooked whole crabs had hit a ridiculously low price per pound, and knowing that early season crab is the sweetest, I bought two and fantasized about using it in macaroni and cheese. While I was only planning on using the meat from one of them for the casserole, the price and my lack of inhibitions made me throw the meat from both into the noodles and sauce just before I slid it into the oven, and it was so worth it.
This recipe would be terrific for a special dinner, served in individual ramekins which, depending on your mood and the setting—say, in front of the fire on a lambskin rug?—could make for a memorable evening. Champagne, anyone?
Dungeness Crab Macaroni and Cheese
1 lb. dried pasta (penne or cavatappi are my faves) 4 Tbsp. butter 4 Tbsp. flour 2 c. whole milk (or 1 c. cream or half-and-half plus 1 c. milk) 1/2 lb. extra-sharp cheddar cheese, grated 8 oz. cream cheese or sour cream 1/2 tsp. hot pepper sauce (I use my homemade chile sauce) Salt and pepper to taste Meat from 1-2 crabs
Preheat the oven to 350°.
Bring a large pot of water to boil over high heat. While water is heating, melt butter in a medium saucepan. Remove from burner and add flour, stirring to combine until there are no lumps remaining. Return to burner and cook on low heat for 1-2 minutes, stirring constantly. Increase heat to medium and add milk (or milk and cream) and stir until it thickened. Then add cheese in handfuls, stirring each in until they're melted. Add cream cheese and stir until sauce is thick and creamy, then add hot sauce with salt and pepper to taste. Reduce heat to keep sauce warm until pasta is done, stirring occasionally.
Add pasta to boiling water and cook till al dente or a little less. Drain and put back in pasta pot, pour cheese sauce and crab meat over tthe top and fold in briefly to combine, keeping crab from breaking up too much. Pour into baking dish. Bake for 30 minutes.
In 2008, in an article for the Oregonian's FoodDay, I wrote, "I know the phrase 'winter farmers' markets' sounds like an oxymoron on the scale of 'open secret' or 'original copies,' but all you have to do is bundle up a bit, grab your market bag and you'll discover, like I did, a whole bunch of people who think this is actually fun, not to mention a way to eat fresher and more seasonally. Plus you can find great snacking on wonderful artisan cheeses and prepared foods, and warm drinks to keep the chill at bay."
When that article was written fifteen years ago, there were less than a handful of year-round farmers' markets in Oregon. Back then, mention of going to a winter farmers' market brought visions of sad, soupy bowls of boiled root vegetables. Even the Portland Farmers’ Market, the 800-pound gorilla of the state's farmers’ markets, took more than twenty years to finally get on the winter bandwagon in 2014.
My, how things have changed!
Chicories are the new "it" crop in Oregon.
Demand for year-round access to local produce has grown to the point that in 2024 there are 26 markets statewide that are open during at least part of the winter, with 12 in the greater Portland metro area, including Vancouver and McMinnville (see list, below). This shift has meant local farmers and producers have been able to take advantage of year-round production and a more stable income.
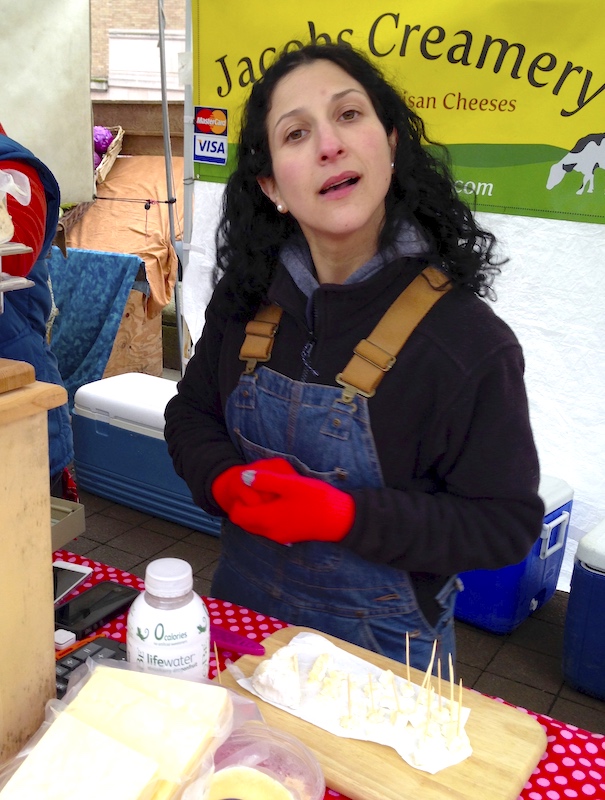
Find local cheeses galore!
"The Winter Market is hugely important for vendors because it provides them with income for more than six months of the year," according to Ginger Rapport, Market Master at the Beaverton Farmers Market, which begins its winter season on February 3rd. "An extended season improves their cash flow over the course of the year and allows them to serve their customers for a greater number of months.
"Loyal customers would often drive great distances to vendors during our off months to pick up products that they just couldn’t go without while we were closed," she said. "The extended season gives customers easier access to the foods they love while helping vendors with much needed cash flow at the same time. It is a win-win for all!"
Plus farmers have the opportunity to retain key staff members, bringing continuity to the farm's operations while providing those staff members and their families with stable year-round employment.
And what will shoppers find at these markets?
In Oregon local farms are growing a bounty of local fruits and vegetables in the winter.
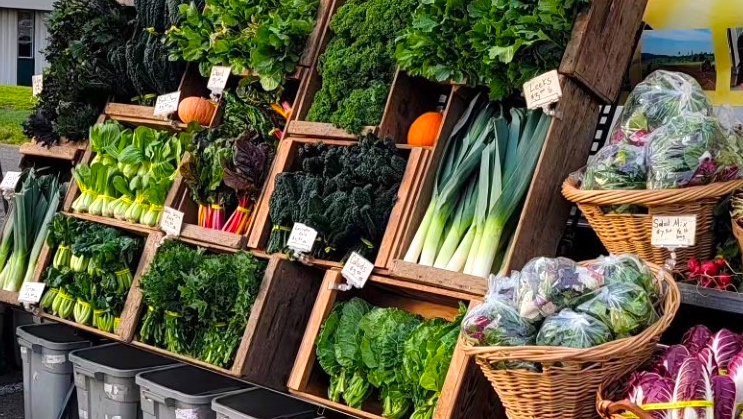
Simply walking down an aisle packed with happy shoppers filling their baskets, bags and wagons brings a profusion of color and aromas, from towers of sweet carrots and radishes—root vegetable and brassicas like kale are at their sweetest in winter when the plants pump out sugars to act as antifreeze— to squashes and heads of lettuce so vibrant you'd swear they have a pulse.
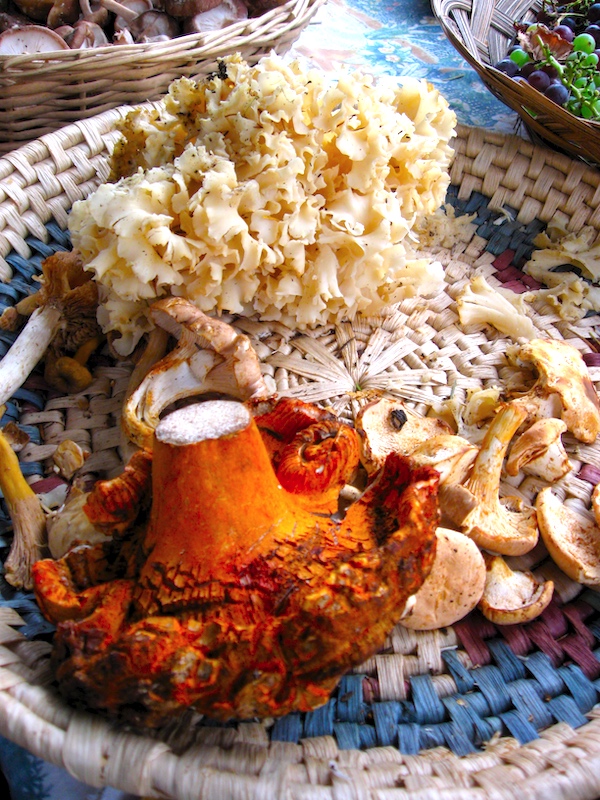
Foraged and culitvated mushrooms are available year-round.
The maritime growing climate of the Willamette Valley is perfect for growing crops that do well in the cold all year long. So, in addition to year-round regulars such as fresh salad and braising greens, apples, cauliflower and broccoli, the winter markets starred things like fractalized chartreuse cones of romanesco and my choice for the ugliest, most delicious vegetable ever, celery root (aka celeriac). Plus root vegetables such as kohlrabi, beets in all colors of the rainbow, turnips, Jerusalem artichokes, parsnips and rutabagas. For omnivores of all stripes, there is sweet, start-of-the-season Dungeness crab and lots of lamb and beef available.
You'll find the latest "it" salad green isn't just green, but chicories—radicchio, the deep red softball-sized variety, being the best known of the species—come in colors from deep red treviso and tardivo to sunny yellow castelfranco with its splashes of rose to the peony-like pink Rosalba, and are being adapted by many Oregon farmers to thrive in our winters.
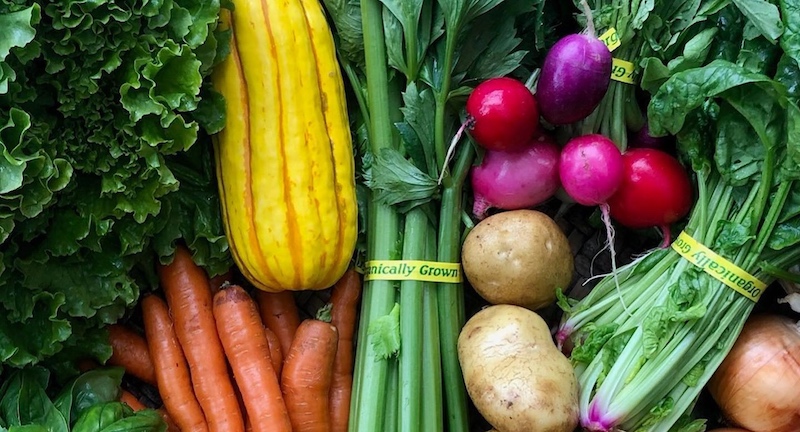
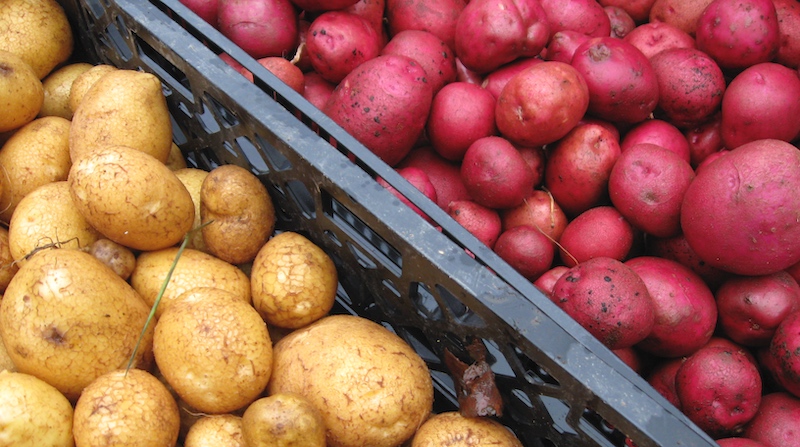
Potatoes are another crop at their best in the cold months.
Regular market-goers also know that they can find their favorite Oregon hazelnuts and berry jams at the market, along with fish caught hours before in our oceans and rivers. Pasture-raised meats and cured sausages, fermented sauerkraut and pickles of all kinds, local cheeses from pastured cows and goats as well as vegan cheeses containing no milk at all line the aisles.
Listed below is the latest list of our winter markets with links to their websites. Let me know if I've missed one!
Rogue Valley Indoor Winter Markets. Tues., 9 am-1 pm at Ashland National Guard Armory.v1420 E. Main St, Ashland; and Sun., 1-5 pm at Village at Medford Center (near Tinseltown and Tap and Vine), Medford.
Salem Holiday Market. Fri., Dec. 13, 5:30-8:30 pm; Sat., Dec. 14, 10 am-6 pm; Sun., Dec. 15, 10 am-4 pm. State Fairgrounds, Jackman Long Building, 2330 17th St NE, Salem.
South Valley Farmers Winter Market. Sat., Nov. 2 & 16 and Dec. 7 & 21, 10 am-4 pm. Cottage Grove Armory, 628 E Washington Ave, Cottage Grove.
Umpqua Valley Farmers' Market. Sat., 9 am-1 pm. First United Methodist Church Parking Lot, 1771 W Harvard Ave, Roseburg.


 For me, the dark days in the depths of winter are brightened by their brilliant colors and sparkling flavor. I make a point of throwing together a batch of preserved Meyer lemons that will punch up everything from roasted vegetables to stews, salads and grain dishes. The last couple of years Dave has concocted a masterful citrus marmalade, combining a couple of recipes from the New York Times along with his own brushstrokes of genius.
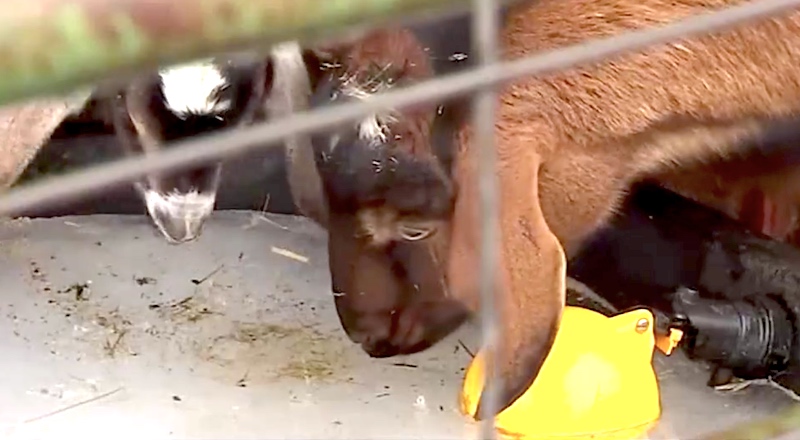

 But I propose a different way to categorize a cookbook, and that's by how you feel. Happy? Make some small plates of your favorite foods, including simple salads and desserts. Depressed? You could indulge in a big ol' chocolate cake by yourself, or treat your mood with lots of fish and kale for their Omega 3s and anti-oxidants.
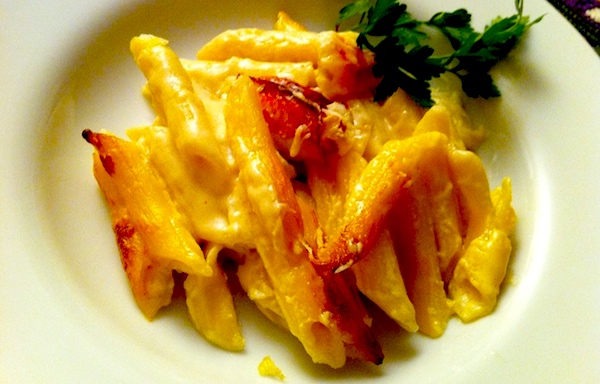 Which is why, when I saw that cooked whole crabs had hit a ridiculously low price per pound, and knowing that early season crab is the sweetest, I bought two and fantasized about using it in macaroni and cheese. While I was only planning on using the meat from one of them for the casserole, the price and my lack of inhibitions made me throw the meat from both into the noodles and sauce just before I slid it into the oven, and it was so worth it.